
Longer Nano Pro 12W Laser Review
Longer Nano Pro
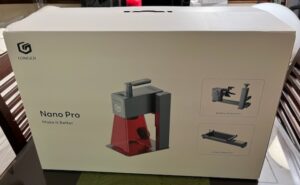
I was recently provided a Longer Nano Pro 12W ($799) by the nice folks at Longer3D. The Pro version is a 12 watt blue diode laser and a rotary extension and slide extension are included.
The Nano Pro looks fairly similar to a Laser Pecker but I assure you this is a different beast. The Nano only has one laser and does not contain the IR (1064 nm) laser as does the LP. Consequently, that makes it quite a bit less expensive than the LP.
Without drudging up the past too much I went on record on my blog saying how much I disliked the Laser Pecker 4. Because of the similar looks I kind of expected the Nano Pro to shake out the same way. File this under “Don’t Judge A Book By Its Cover”.
SPOILER ALERT: I really, really like this machine. It is simple, effective, and the included Lightburn device file is exceptional. I did find a quirk or two which I’d categorize as “Learning Curve”. I’ll discuss that later. This machine is the right size, the right power, and has the right amount of portability. If you are a crafter or a scrapbooker the Nano or Nano Pro is custom made for you.
Leading Particulars
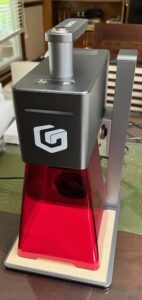
Nano Pro
The Longer Nano Pro’s most notable features are:
- 12 watt blue diode laser (450 nm)
- 5000 mm/sec speed (galvo laser)
- 100 x 300 mm working area (with slide extension)
- Can cut up to 10 mm thick however there is no air assist
- No proprietary software. Uses Lightburn or Laser GRBL
- Included SD card has drivers, and setup files
Assembly And Testing
First of all the included paper manual is really good. Best of all the print is large and the illustrations are helpful. I decided to assemble and test using the manual only. On a lot of manufacturers lasers I find myself seeking out assembly videos. Not so with the Longer Nano Pro. The included tool and hardware kit is well labeled and complete.
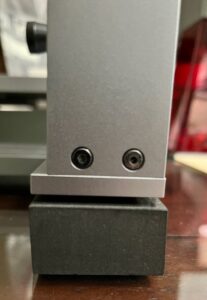
Setting up just the Nano Pro itself is a breeze and I was operational in just minutes. Wiring connections and connectors are color coded for ease of installation.
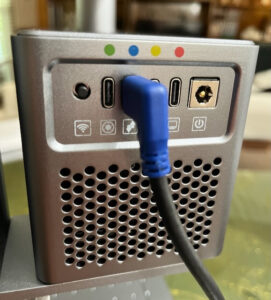
Color Coded Wiring
Then you just need to import the included LaserNano.lbdev file into Lightburn to add the device and settings.
Initially, I tried to use the laser with my MacBook Air however the console was full of gibberish.
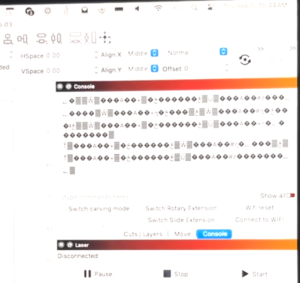
Console on Mac
I don’t know much but I do know about serial port communications. After I installed the included CH430 Mac driver it began working perfectly. It worked right out of the box on a Windows laptop. So Mac users should be aware that they may need to install the driver.
I video every first burn on a new machine. At the end of this video I discuss the gibberish in the console. My first thought was a serial port speed issue however, as I mentioned above it was a driver issue. Also, after I posted the video below Longer reached out to me to tell me it was the driver. I didn’t send them the video, I didn’t hashtag it. Their customer support folks contacted ME. I didn’t contact them. In my book that is excellent customer service.
Video Of 1st Test Burn
[kad_youtube url=”https://youtu.be/oPs8uBps3w8″ ]
It worked like a champ. And you can see that galvo lasers are FAST.
Following the test I took a piece of craft paper from the consumables box that is included and burned a design on it. Perfection!
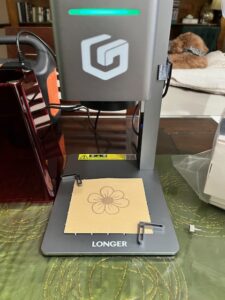
Engraving on Craft Paper
Lightburn Setup
I really have to stress that users need read the manual while setting up for your first engraving. Earlier I mentioned a couple of “quirks” in Lightburn. This is definitely not a deficiency but is a learning curve issue.
I hooked up the Longer Nano Pro to my computer via USB and to my surprise I couldn’t see the framing operation. A quick trip to the manual indicated that I needed to “Switch Carving Mode” in the console tab. After clicking that box my framing light appeared and the laser worked perfectly.

Switch Carving Mode
Subsequently, if you have the Slide extension or Rotary extension you need to switch the associated button in the console. Again, I have to reiterate that you should work through ALL the directions in the manual for software setup. This laser interacts with Lightburn a tad bit differently than most lasers with these console macros. Also with the rotary and slide extensions you must change the height value in the Lightburn Device Settings. And the macro for the rotary button has to be modified with the diameter of the item.
I’ll say it one more time for posterity. Follow the manual before setting up a job. Every mode of operation has unique Lightburn settings. USE THE BOOK!
Firmware Update
Longer has now released a firmware update for the Nano Pro. Version number 1.7.4. They sent it to me a week or two before releasing it and I can verify it works fine. Download here.
UPDATE: Current working firmware is 1.7.6
Slide Extension
The working area for the Nano Pro is 100 x 100 mm. To engrave larger items the slide extension allows for a working area of 100 x 300 mm. Carefully follow the manual to ensure the Device setting height is set to 300 mm and click the “Switch Slide Extension” macro button in the Lightburn console. Right after that ……… burn baby, burn. Here is my 1st test.
[kad_youtube url=”https://youtu.be/rvngBmJy-fA?si=klppFvihHG5itQmN” ]
Rotary Extension
Tailstock Pad
I own at least six other rotary extensions and this one ain’t bad.
One of the first things I noticed is that the tailstock pad doesn’t seem to be the right thickness. As you can see there is a substantial gap between the pad and the rotary.
UPDATE: After some futzing around I determined that the sheet of glass on my table top is not at all flat. But once again I want to add that Longer contacted me unsolicited and provided me with some steps to check. Excellent customer service again! Everything is sitting as it should now.
Maybe my favorite part of this rotary is that it is connected electrically with a USB C cable (as is the slide extension). No more unplugging motor JST connectors. Brilliant!
Like before be sure to follow the manual to ensure correct setup. Some adjustments need to be made in Lightburn. Here is my first rotary test.
[kad_youtube url=”https://youtu.be/_8kiB7dsJwc?si=ys8LeEAyd-MGfrOl” ]
Everything works like a champ!
Carrying Case
I’m a sucker for having a case for my gear. Keeps it clean and dust free and protects it from damage. Additionally, it makes it more portable. Even though there are other lasers with similar footprints, I don’t really know of anyone else who provides a travel case. Another great reason to buy this laser.
Longer Nano Pro Case (click pics to enlarge)


Gotchas
Not many. One of my M5x10 countersunk screws on the rotary build up had a recess that an allen wrench wouldn’t fit into. While the toolbox was complete I always love it when manufacturers throw in an extra hunk of hardware for each operation.
Finally, as I noted when I reviewed the Laser Pecker 4 the very similar fan hood makes it tough to focus. Once the hood is down low the user cannot make fine positioning adjustments to the item positioned on the base. You have to raise the hood and then refocus. For my money I’ll probably never use the hood. Safety glasses are a must in this case.
The base plate for the laser has screw holes in it. If you were performing cutting operations you could conceivably laser the top of your table through those screw holes. I wish they would have included a 100 x 100 mm spoil board type piece similar to the slide extension body.
I wouldn’t consider any of these to be problematic. But, hey, I’m shaking this thing down and reviewing it. These are the things that caught my attention. As far as machine operation is concerned I have to say that everything works as engineered and designed.
Longer Nano Pro Wrap Up
Laser fans, I am telling you that I hate the Laser Pecker 4. Even though this looks VERY similar it is in fact a fine laser engraver. LP4 uses proprietary software that is awful and the Lightburn integration is also terrible.
The Longer Nano Pro has just one laser. That reduces the cost a lot and many people only need a blue diode laser (450 nm). For example, these days I do a lot of CNC work and I apply my makers mark to the bottom of each piece. The Nano Pro is PERFECT for this.
Lightburn integration is PHENOMENAL. The addition of macros in the device file make using this laser much easier.
If you just need to use a laser for wooden widgets or if you are a crafter, a maker, or a scrap booker I guarantee you’ll love this machine. It is the right size and is portable. All my testing was done with a 300 watt Jackery portable power supply. This makes it Ultra Portable. In fact I’m considering taking this to a pet shelter to make free tags for new pup parents.
[kad_youtube url=”https://youtu.be/Q2OzqHw3X4A” ]
I review a lot of lasers here. They all work and work fairly well. I always like to say that the difference lies in AFTER SALES SUPPORT. The fact that I posted a video and Longer reached out to me makes me think someone is watching the Facebook group and YouTube channels and are trying real hard to create a positive presence.
There are very few lasers that I love. Very few. This is one of them. The only reason to pass is if you need an IR laser or a larger working area. I personally love the portability and the fact that the machine is streamlined and not packed full of crazy features.
JOHN’S TECH BLOG STRONGLY RECOMMENDS THE LONGER NANO PRO
I bought a Longer Nano Pro and have tried engraving using GRBL and Lightburn without any success. I have never used an engraver before and bought this one because I thought I could learn quickly. However it appears it’s the settings on the software that are difficult to understand – is there a simple guide I can use?
I am considering my first laser engraver. Battling with whether a Nano Pro 12w or Ortur laser master 3 20w would be a wiser choice to start with? Both have beds and rotary.
Any advice would be very much appreciated.
I have owned 3 Ortur LM3’s and they both had quality control issues. I’d stay away from Ortur. Also if you need that form factor, look at the Ray 5.