Ultimate Guide To Using A Raspberry Pi 5 In A Photography Studio

Yep. I said it. You can use the Raspberry Pi 5 in your Photography Studio.
Imagine connecting a high end studio camera to a Raspberry Pi 5 and taking some studio quality pictures by tethering your camera to your Pi 5.
Then you can control it via VNC from a nearby computer or laptop. Or of course you could hook the Pi to a KVM or plain old Keyboard, Mouse, and Monitor.
Benefits Of Camera Tethering
First and foremost – Instant Feedback on a high resolution monitor. Frequently, you might take a photo, then yank the memory card out of your camera and plug it in a computer. After opening the photo you then see an area out of focus or that has a hair or dust ball hanging out. This makes your picture look unprofessional. And then you get to start the process all over again, or you have to do some serious photo post processing.
That pic sure looked good though on the 2 or 3″ camera LCD initially.
Additionally, since you are on a WiFi or Ethernet connected Pi you can set up Samba Shares to share your files across the network.

Here are some super quick instructions for setting up Samba on your Pi.
sudo apt get update && sudo apt get upgrade -y
sudo apt install samba samba-common-bin
sudo nano /etc/samba/smb.conf
I made the following changes to the smb.conf file. Note the bolded red text.
[homes]

   comment = Home Directories

   browseable = yes

# By default, the home directories are exported read-only. Change the

# next parameter to 'no' if you want to be able to write to them.

   read only = no
And at the bottom I added the following to set what folders I want to share (Entire Home File). In the brackets below you can name it anything you want.
[HomePi5]
path = /home/pi
writeable = yes
browseable = yes
Now you need to set your user/password and start Samba
sudo smbpasswd -a piNow type your password in twice Then start Samba.
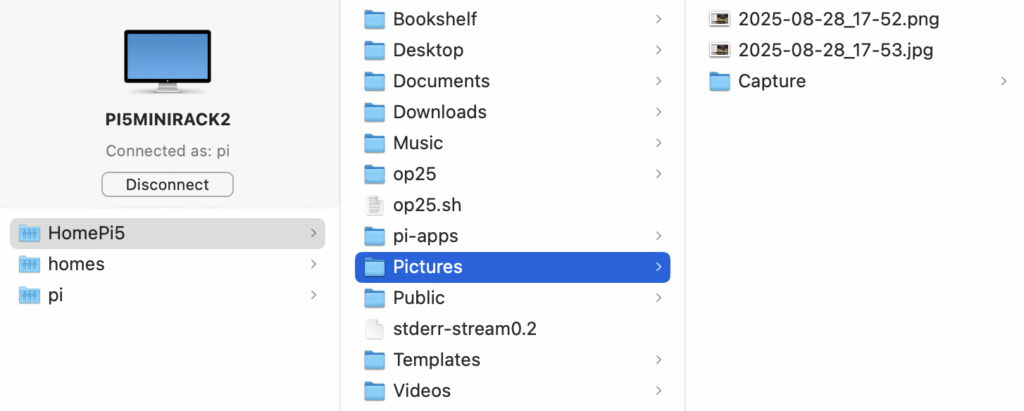
sudo systemctl restart smbdTo start it at boot change the word “restart” above to “enable” (without the quotation marks). Now you can get to the Pictures folder from anywhere on your network.
I guarantee you there is a Samba purist out there in shock at my minimal setup. What I just did WORKS. And yep, it is minimal. If you know a better, faster, stronger way feel free to drop details or links in the comments for the readers here.
Software
There are a few choices here.
Gphoto2 is a command line utility. I like Entangle so that’s what I’m going to demonstrate. I have read a whole bunch of things that say you should compile Entangle from code but I installed it easily with this command:
sudo apt install entangleSo far I have experienced no issues whatsoever with an aptitude installation. Your mileage may vary.
Camera
Next, all you need to do is connect your camera via its USB interface to the Raspberry Pi USB-A port. Since Entangle uses the Gphoto2 library, cameras on this list should be supported.
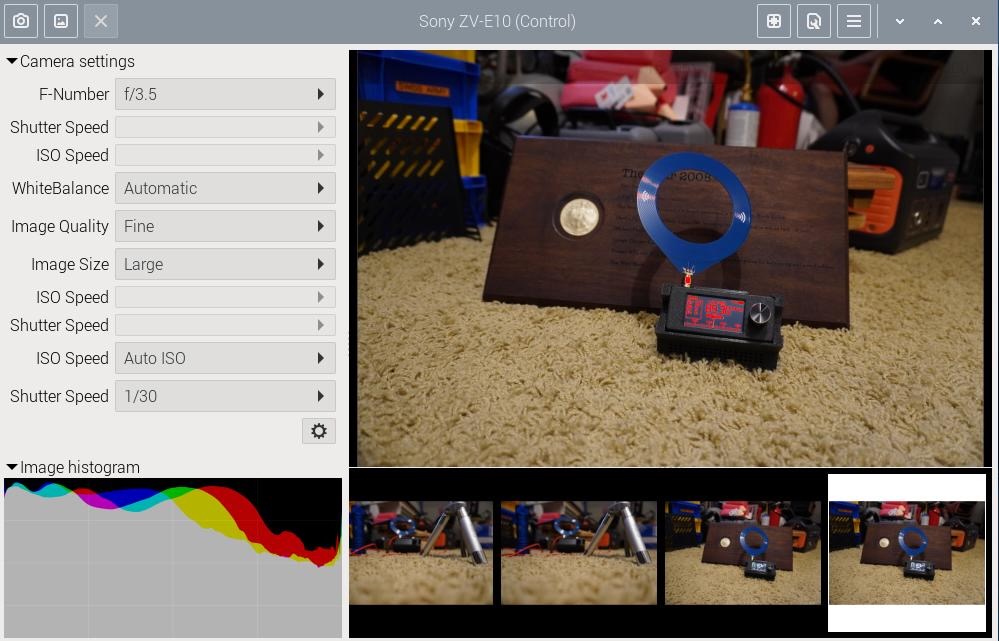
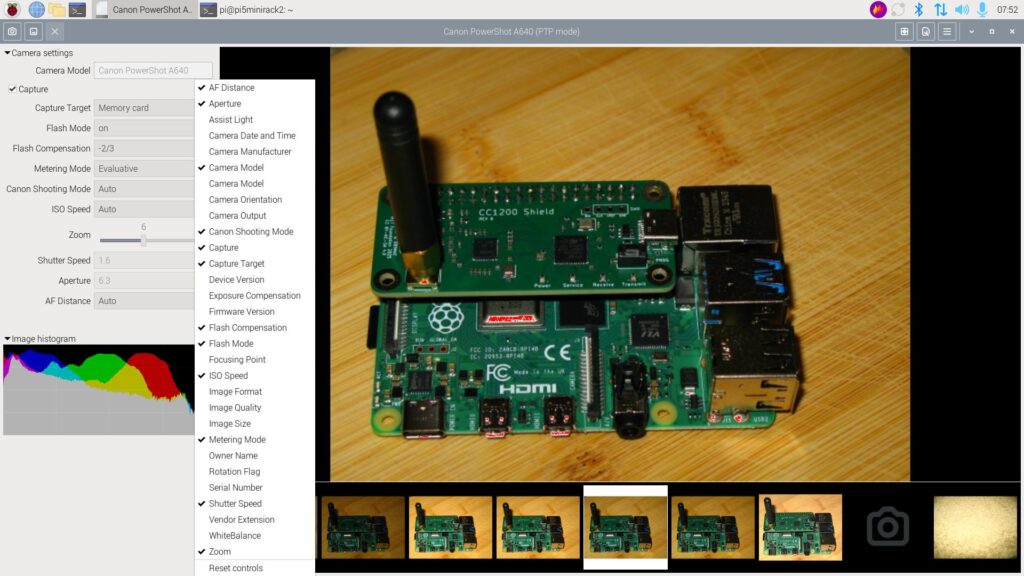
For this blog I’ll be using my Sony ZV-E10 and my Nikon D7000 which worked perfectly. First I tried my old Canon Powershot A640. It is on the supported list, and it does work……..once. Then it causes the camera to hang up. But it works fine on a program called Darktable (linked above).
So, don’t be surprised if there is a glitch or two. Especially with older hardware.
My Pi 5 Tethered Setup
My Pi 5 has an NVME and PoE+ Hat on top of it. Also I have a 4TB drive mounted on it. PiOS is installed on the NVME drive and quite honestly it is as quick as a hiccup. So I also use this Pi for some redundant file storage, In addition to that it has an RTL-SDR dongle and I run a program called OP25. OP25 is essentially a P25 Phase 1 and 2 digital decoder. That’s a fancy name for a police scanner.
So I am doing all kinds of stuff with this same Pi 5. My software, as mentioned above, is Entangle. I also added a Photoshop like Open Source Program called GIMP. I will actually be doing my post processing on my Mac. But GIMP Is there if I need it.
When shooting, I can get a nearly full screen image of the photos I take. Once I get something I’m prepared to use I just use the Samba share to access the Pictures folder on the Pi. I can do all this wirelessly from my MacBookAir or my Windows 10 or 11 laptop computer. How about I just show you?
RETRACTION:
I’ve stated Entangle only worked once on my Canon A640. So I have NO IDEA what happened but it began taking multiple shots successfully. Then I went to configure it and I have NO IDEA where all these settings came from. If I shut things down and reopen it I get a very basic settings selection. I’m trying to figure out what recreates me getting multiple shots and that loaded menu. No rhyme or reason. I’ll still call this “buggy” for the Canon A640.
I can hook up turn it on, fiddle with it and get it to work for a solid session. Once I quit or turn off the camera it starts all over with a minimal menu. Scratching my head.

To Summarize
- Get Pi 5
- Install Entangle or Darktable
- Connect Camera that is compatible with Entangle (gphoto2 library)
- Set camera to the mode of your choice. I like Manual (M) or Program Auto (P)
- Open Entangle
- Click on the Camera icon in Entangle
- Profit
- Add Bob to your list of Uncles. (I’d love to know the source of why Bob is my Uncle when something cool happens).

The phrase “Bob’s your uncle” likely originated in 1887, when British Prime Minister Robert Gascoyne-Cecil, known as “Bob,” appointed his nephew Arthur Balfour as Chief Secretary for Ireland. This act of nepotism, where a job was given based on family ties rather than merit, led to the phrase being used to indicate that something was easily achieved or sorted out.
“New Wrycuda” from DPReview
Cool! Thank you!