
LaserPecker LX2 Laser Cutter Review
The team at LaserPecker provided me their brand new LaserPecker LX2 to review. At no time have they compensated me beyond providing a sample, nor have they tried to influence my review.
What you read here is what I really think of the LX2.
Spoiler Alert: The LX2 stacks up in a huge way, but I did have a temporary issue with the Auto Focusing Probe or Distance Sensor. I was able to resolve it easily and brought it to the attention of LaserPecker Support. They are looking into it.
Unboxing
Somewhere on this blog I state that I don’t do unboxing videos. When they contacted me to review the LX2 they asked me, “Hey, can you do an unboxing video?” And I thought about it for a moment and then realized no one had ever asked me before. Much less asked so nicely. So here we are breaking new ground!
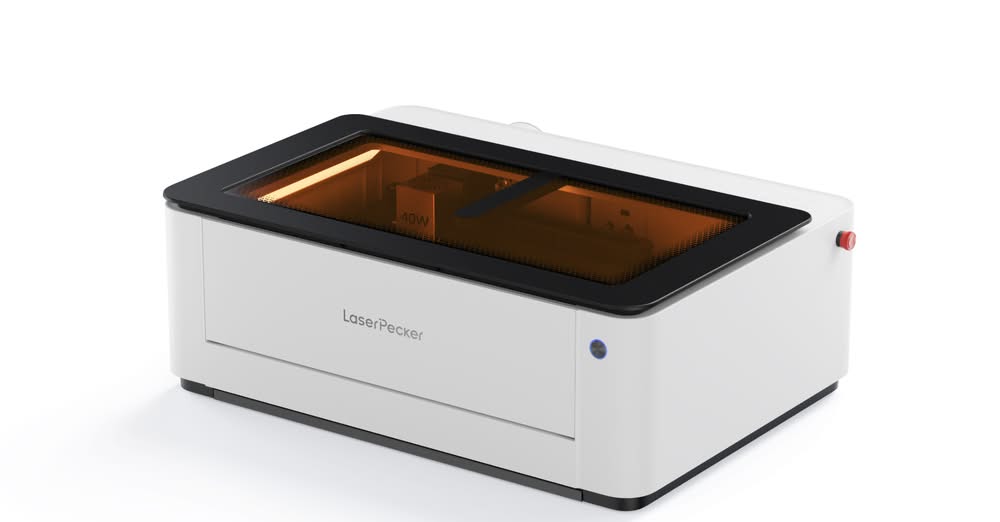
I should point out that I believe they sent me the 40 Watt All-In–One Bundle ($2899 .99 currently). All this in the video below might not be pertinent to you if you purchase just the LX2 or another bundle.
The Bundle consists of:
- LX2 Laser
- 2 Watt IR and 40 watt blue diode laser modules
- Riser Base
- Air Assist
- Rotary Extension
- Smoke Purifier
- Slats
- Fire Extinguisher
LaserPecker LX2 Features
That is a lot of cool stuff and it should be pointed out that this is also a Class 1 laser. Laser classifications are established by the FDA and run from 1 to 4 with #1 being the SAFEST. Here is a quick overview video on some of the outstanding features found on the LaserPecker LX2 40 Watt All-In-One Bundle.
One quick note. Every laser manufacturer shows their laser blasting through thick material. That material is usually a soft wood like pine or basswood. In the video below I have this particularly nasty piece of wood that resists cutting and it is what I use during MY TESTING. While it did take a couple of passes that 40 watt laser at full power blasted through it easily. I have lasers that won’t cut that slab of scrap wood no matter how many passes you make. This was impressive to me.
I’ve been reviewing lasers since around 2019 when they first became commercially available. I’m feel confident in saying that this laser is stacked and packed with all the best features. One of the best safety features it has is a fire suppression system that they call the “Fire Extinguisher Set”. It initially did not come with the laser and just showed up one day a couple of weeks later.
Technical Features
Here is a quick list of the technical aspects that I think are important.
- 1000 mm/s engraving speed
- 4 laser modules available (2w IR, 20, 40, 60 watt blue diode)
- Dual Positioning System for remarkable accuracy
- Interior Camera
- Focusing Probe which can accommodate engraving on curved surfaces
- 19.7″ x 12″ Working area
- Pre-Assembled (Except for the Riser Base and LX2 mounting)
- Supported Software: LaserPecker Design Space APP & PC Software & LightBurn
- Supported OS’s: MacOS and Windows (Lightburn also has a Linux version)
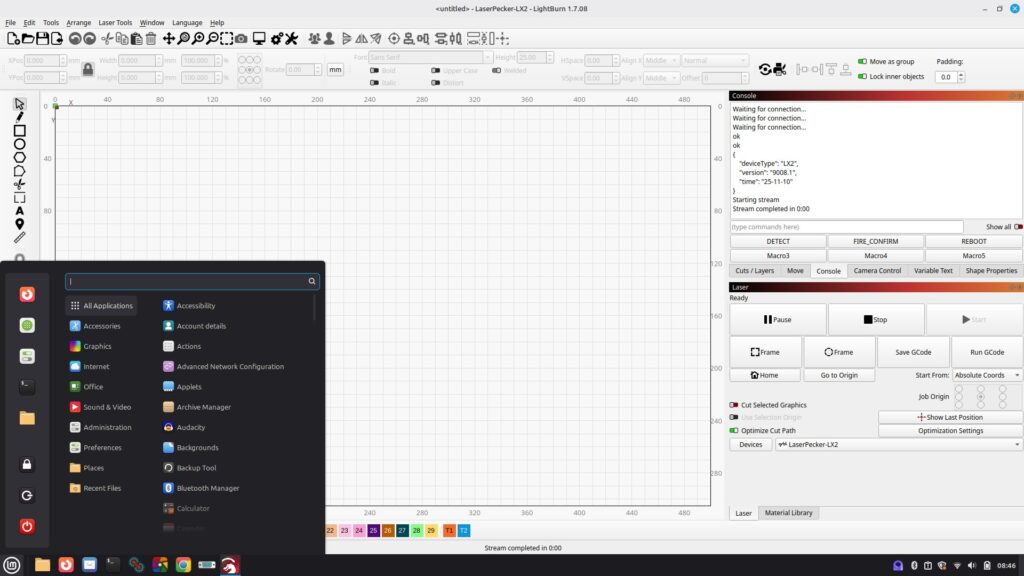
Just for fun I installed Lightburn on Linux (version 1.7.08) sadly this is the very last Linux version that Lightburn will support. Anyway with the LX2 Lightburn Device files (version 1) the LX2 works like a champ!
Software Support And Connection
LDS has a Beta version for the LX2. Make sure to click the box and that it turns amber otherwise you’ll just get the regular LDS version.
Currently the Beta software download was updated and is on their Software Download page.

Also, the LX2 is now supported by Lightburn. HURRAY! There are two versions. One for Lightburn 1.x and one for Lightburn 2.x. Details and device files from Laserpecker can be found here.
My LX2 shipped with firmware version LX2_9001. The current version is LX2_9008.1 and you will need to update to be able to use the Lightburn device files.
I, like many laser operators use Lightburn almost exclusively. When LDS software first dropped I struggled a lot with it. As with all products there is some maturation that occurs with upgrades and bug fixes. I’m able to navigate around LDS now pretty well.
Here is living proof that it works:
Encountered Issues
Just one really. I had a problem with the Automatic Focusing Probe
Issue: Focusing Probe
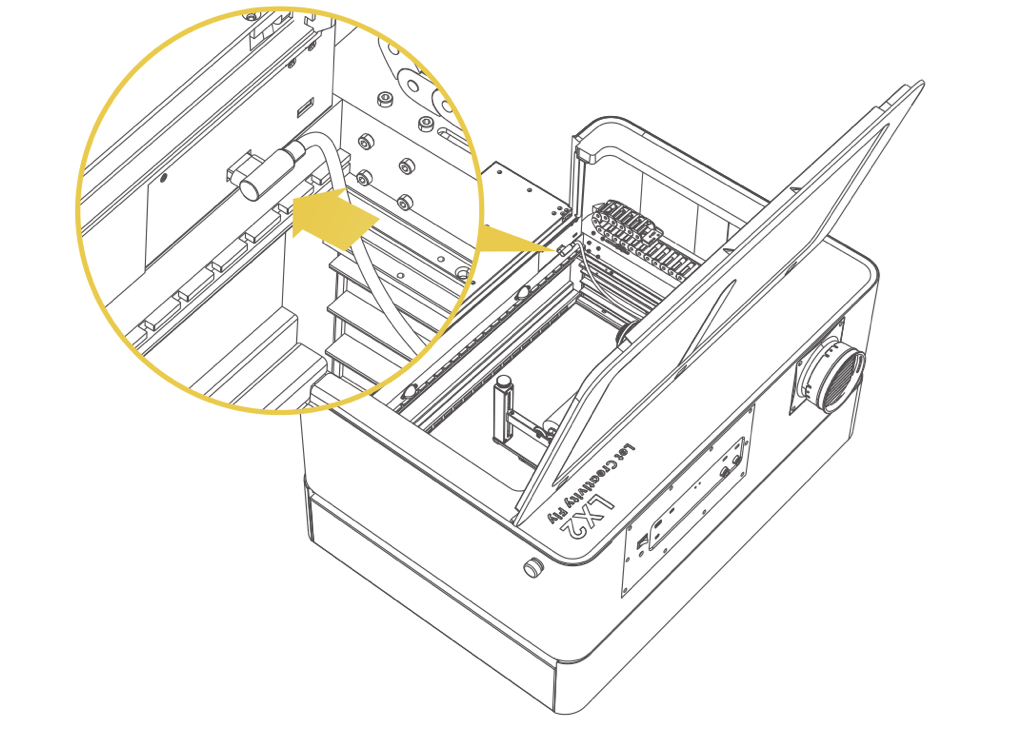
The LaserPecker LX2 comes with two focusing probes. One for each laser module (IR, 40watt). The probe is retracted initially. When you begin focusing operations it extends, and upon measuring and setting the focal distance the module rises which causes the probe to retract again. The retraction is necessary so it doesn’t drag around or move your material laying on the bed or slats.
Mine stopped retracting.
Here’s a quick video showing you what I encountered and how I dealt with it. Before we use our sentence enhancing words to describe this situation it is SUPER EASY to manually measure your focal distance and input the distance into LaserPecker Design Space Software (LDS). I have found this is something you NEED to do with very small items anyway. The point where this becomes an issue is when probing uneven surfaces for curved engraving scenarios. When I first noticed this I did a little caveman tweaking to the rocker arm and now it works perfectly. Sorry I didn’t film the actual failure at the time. But look out for this, LX2 users.
If that probe does not retract after taking the measurement it WILL hit your workpiece and move it.
Regarding Power
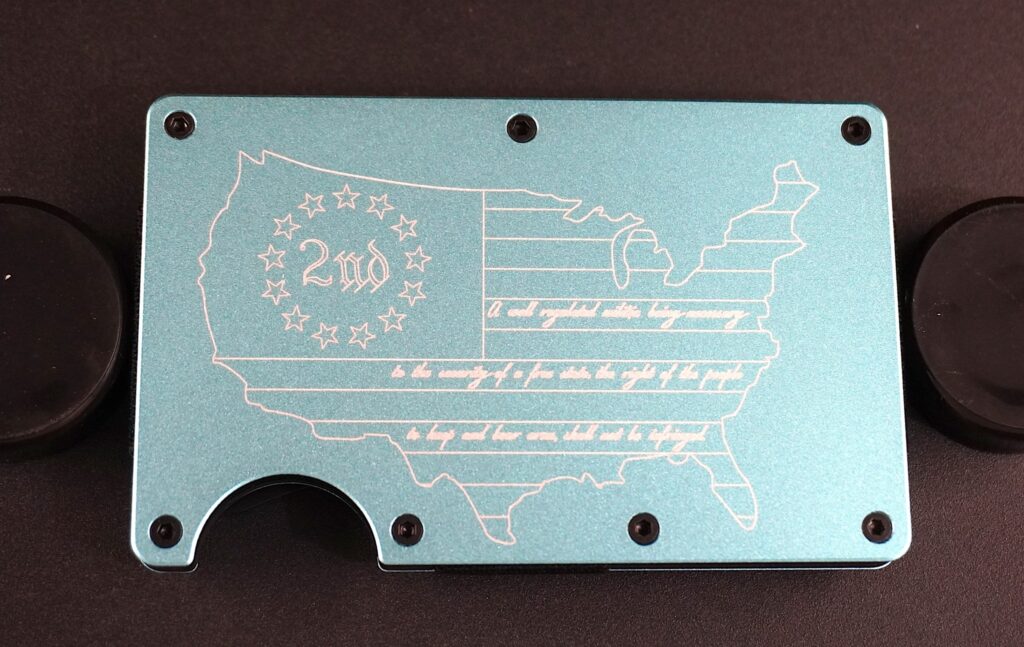
I engrave quite a few of these anodized aluminum wallets. Typically I need to do them on a fiber or IR laser. Just for fun I wondered how the 40 watt blue diode would perform ON A BLUE BACKGROUND. Not bad, not bad at all. I did this at about 100% power and 15 mm’s speed.
Also just for fun I ran the file 4 times to test repositional accuracy. No fat lines, no double lines. Perfect accuracy!
LaserPecker LX2 Connections and Ports
There are plenty! And they are very well laid out. Cut and pasted from the manual. The only thing that stands out to me here is that there are Fire Extinguisher power ports and inlet ports while the actual Fire Extinguishing Set in a video above connects on the interior of the cabinet. Looks like you can use an external extinguishing unit too.

One huge bonus is that there are ports on the inside as well. I kind of fumbled and bumbled around looking for the rotary port and found that there are a whole bunch of support documents for the LX2. And wouldn’t you know it, there is a doc on the Rotary Extension. The port I couldn’t find is clearly marked in that doc in the front of the LX2 cabinet. Sweet!
My Honest Summation And Advice For New Users
I’ve yet to see a laser configured as well as this one. Every major feature in the industry is in this machine. I’ve yet to mention the rails and drag chains. The quality of this is indicative of a well engineered machine.
The price is not bad for what you get. As with any laser from any manufacturer, the key is after sales support and the ability to purchase spares. If you crack a protective lens and you don’t have a spare, you’re out of business. LaserPecker gives you a spare. Still, it is incumbent upon the user to get more, just in case.
So many customers buy a laser and just keep using it until a point of failure and then they scream foul. “The manufacturer is awful and I have orders to fulfill.” As with any laser, the LX2 requires cleaning and maintenance maybe even more so than other equipment. I’d love to see the interior ports capped so fumes and buildup from cutting won’t affect them negatively. I’ll probably slap some tape over the unused interior ports.
Distance Sensor
The problem with the distance sensor (focusing probe) is somewhat troubling though. It needs to work 100% of the time especially if you are doing curved surfaces. If that probe doesn’t retract it will drag around on your work or move the piece that you are working on leading to an engraving failure. That happened to me. It was only after I ruined something that I realized what was going on. I strongly recommend you watch my video above if you haven’t already.
Rotary
I’ll cover the Rotary later in a different blog and you can see my recommendation regarding it below. Essentially, you place a positioning block against the rails. It is magnetic and lays on the clean out tray.
Rotary Extension Alignment (click pics to enlarge)


Oh, one more thing about the rotary extension. I send all my love to the engineer who designed the latch mechanism to move the tower on the end. I Love You, man. If you’ve been reviewing lasers as long as I have you recognize this as an amazing design feature. Did I say, “I Love You, man” (Or hopefully a woman designed this. Sounds better for me.)

Recommendations
- Cover interior ports with plastic caps so they don’t get gummed up after extensive use.
Provide a Lightburn lbdev fileThis has happened!- Keep improving LDS. It has come a long way but still has some non-intuitive features
- Add LDS to the USB drive that comes with the machine. (They may be doing this on the current batch of shipping LX2 lasers now.)
- Mark that rotary extension positioning block to say “Rotary Extension Positioning Block”. I had no clue what it was until I began to play with the rotary.
- And mark that positioning block to say “This Side Up”
- Bluetooth compatibility would be pretty great too. Guys like me who play with networking and home labs and IT security prefer things to communicate with each other without an internet facing app or program. I only use my lasers with USB cables. I did set up WiFI and it was a breeze. I have had some lasers in the past give me heartburn and gray hair trying to set up WiFI.
Should You Buy One?
If you fancy yourself an old pro like I am then a resounding YES. If you are brand spanking new to lasers you are jumping in to the highest desktop laser tier there is. It could be daunting. But if you are up to the challenge then another resounding YES.
If you are lost in the sauce I’d start with the most basic laser and THEN buy an LX2. This is a super capable machine and curved surface engraving is the coolest feature ever.
JOHN’S TECH BLOG BELIEVES THAT THE LASERPECKER LX2 IS CURRENTLY THE MOST ADVANCED LASER ON THE MARKET
Fantastic review! Just received my LX2 4 days ago Although it is relatively easy to set up, I am very disappointed in the lack of a comprehensive user manual. Same for the LDS beta software. Looking forward to trying to figure this system out.
Thanks Becky. Just yesterday they released the updated Beta. There is also an lbdev file for Lightburn however I’m pretty certain they wouldn’t want me to share it and one person there said it would be out in a week or so. Think I just got a sneak peek because I asked them about it.