The goal in geekdom is to always advance the skills but we should NEVER forget where we came from and re-visiting it from time to time is nostalgic and cool to the up and coming geeks.
One particular rite of passage for being a geek is taking an Altoids tin and doing something geeky with it. Here’s my favorite project and then right after showing this I’ll go further back into my geek roots with my first Altoids tin project.
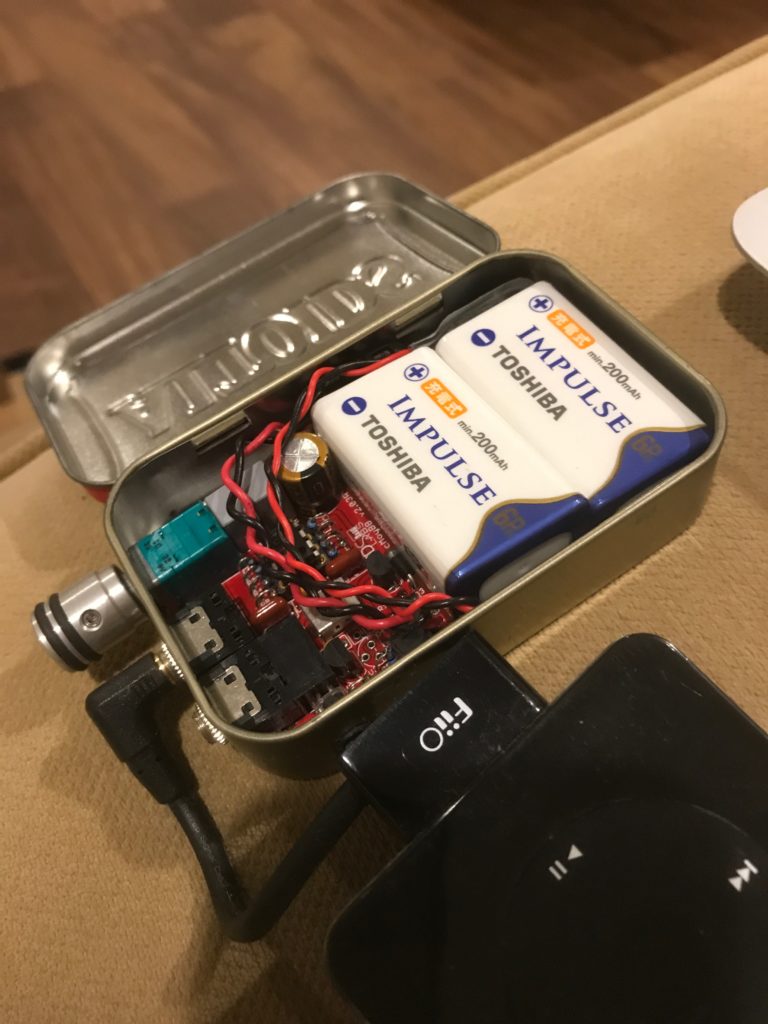
This is a CMOYE BB headphone amplifier stuffed in an Altoids tin. Pretty cool, eh?

Now let’s go back in time shall we to my first Altoids project that I’m remaking just for fun. An LED Flashlight from a mini Altoids tin.
You need the following:
- Altoids Tin
- White LED
- LED Holder
- Battery Holder
- Battery 2025 or 2032 – if 2025 you may have to bend the contacts in the holder I have linked above. 2025 battery is the same as 2032 but thinner.
- Momentary switch
- 100 ohm resistor – this can be optional
- Hook up wire of some kind. Too many different types to list. Almost anything will do.
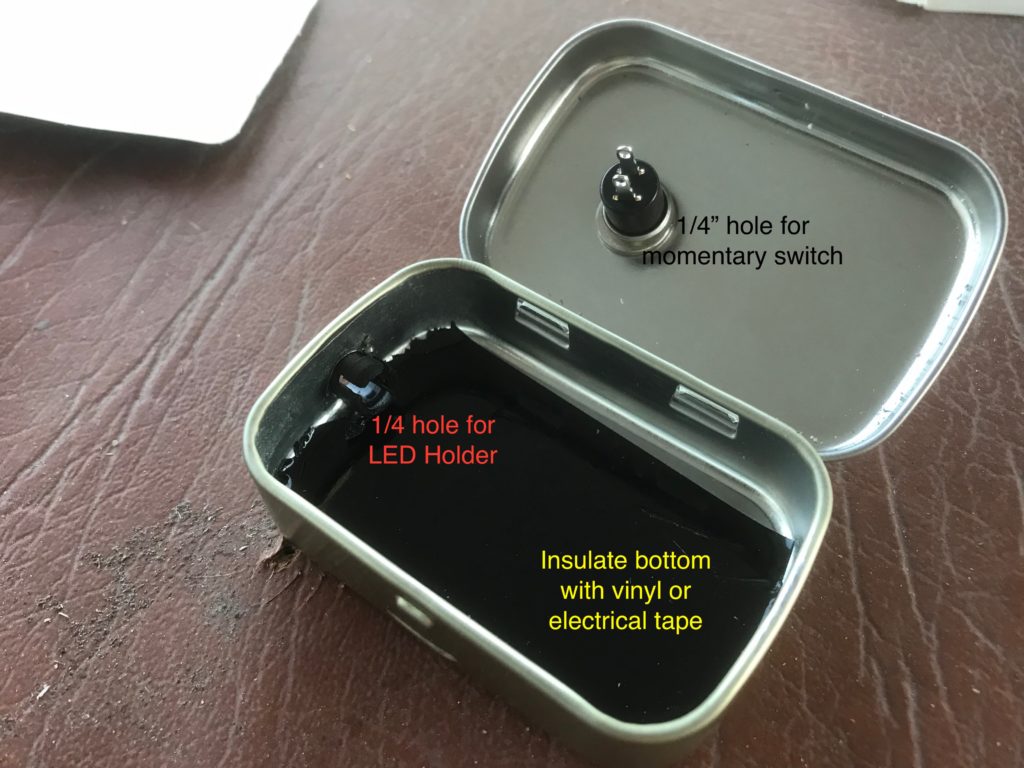
So you got the stuff now the first thing you need to do is drill a 1/4″ hole in the top and a 1/4″ hole near the bottom on one of the sides. Then insulate the bottom of the Altoids tin. The components will be close.

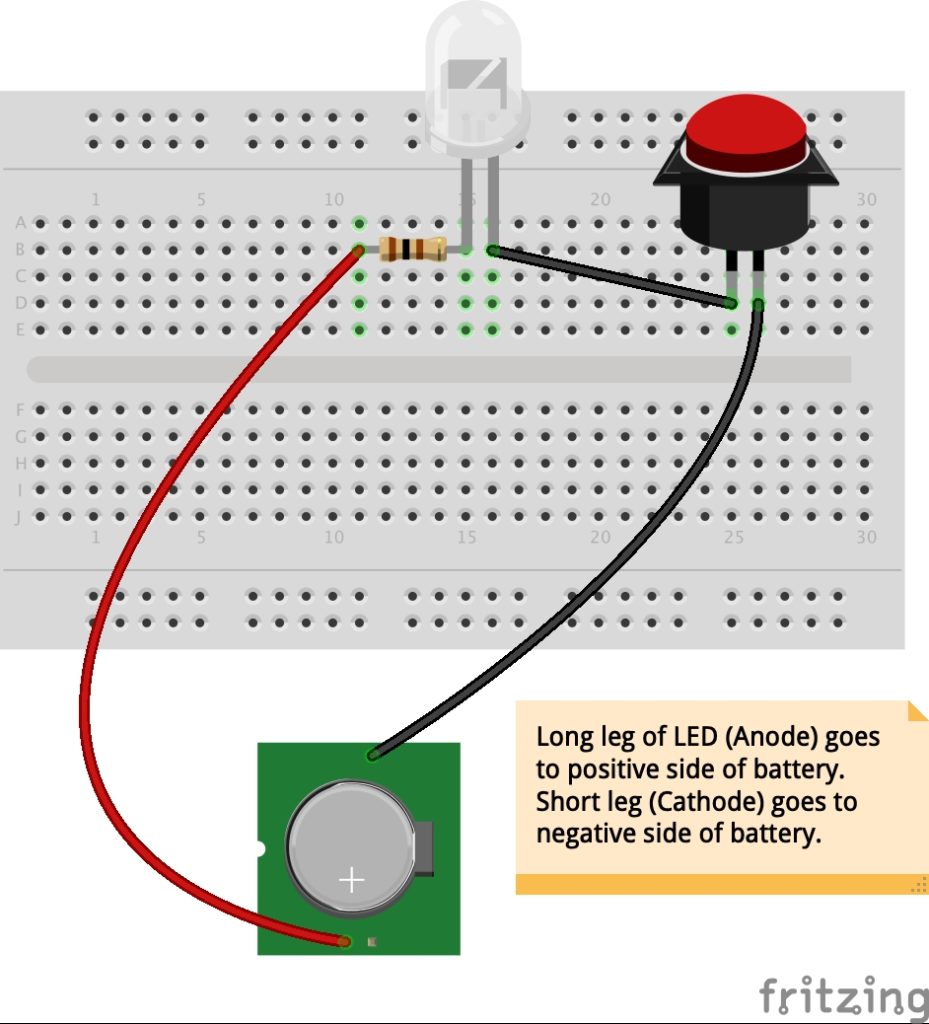
Then wire your components up like below:

Make sure you add the 100 ohm resistor to the long leg of the LED and send it to the positive side of the battery holder. The short leg goes to one side of the switch then the other side of the switch goes to the negative side of the battery holder.
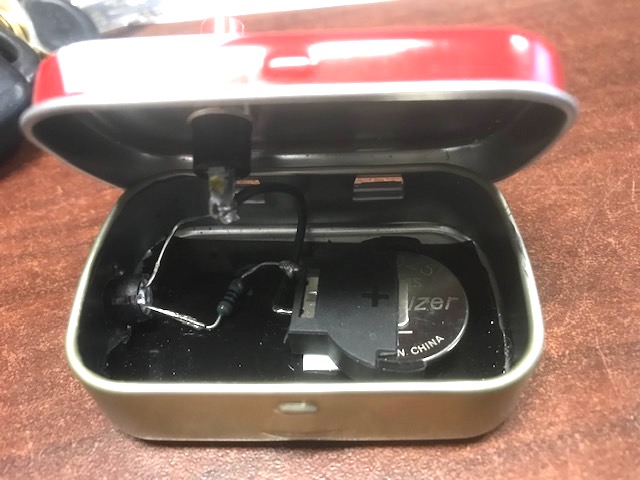
Could not possibly be simpler. Kinda looks like this. I just threw this together for proof of concept. Not intended to be too pretty.

Lastly, here’s your geek light in action. You da man!
