
I had a Ring Pro that was a few years old. It died. I would log in to look at something only to find it was alive a day or two before then died. Then miraculously it would come back to life only to die again.
I bought a new Ring Pro to replace it and documented that process here. It was a living fucking hell. It should have been easy. But it was not easy. Enough of that. I spouted off enough about it in the last blog entry. Let’s talk about fixing the one that was broken. This will just cover the battery replacement and not the entire tear down or rebuild.
Basically you just open the thing up and remove the motherboard. There are several connectors on the board which must be CAREFULLY removed. Take a picture first before you disconnect anything. Regarding the connectors, just get under them and pop them up with a spudger made of plastic. THEY ARE FRAGILE. Then remove two screws , pull the speaker out and then lift the motherboard.
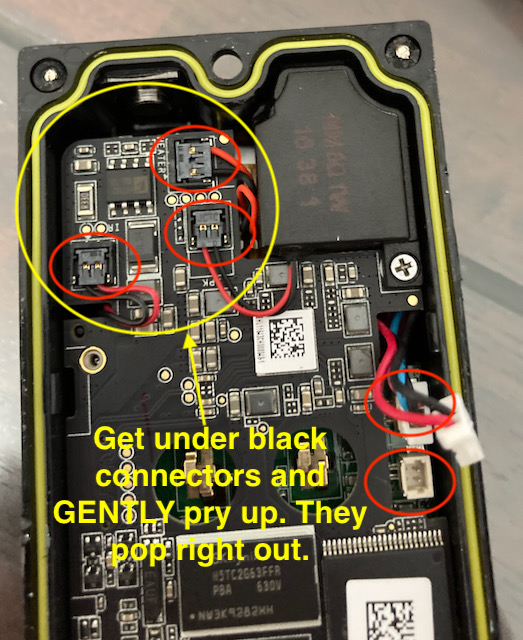
Connector removal locations
The battery is under the speaker. Having a battery onboard makes sense as if you remove power from it or reset it or something you want something to hold your settings. While the battery is nothing special, it has a circuit board soldered across the terminals that is. Also there is a heater pad glued to the battery. It just peels right off but be careful.
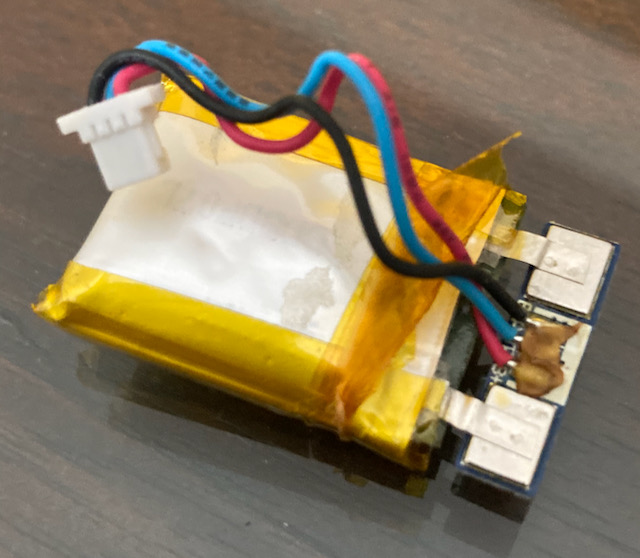
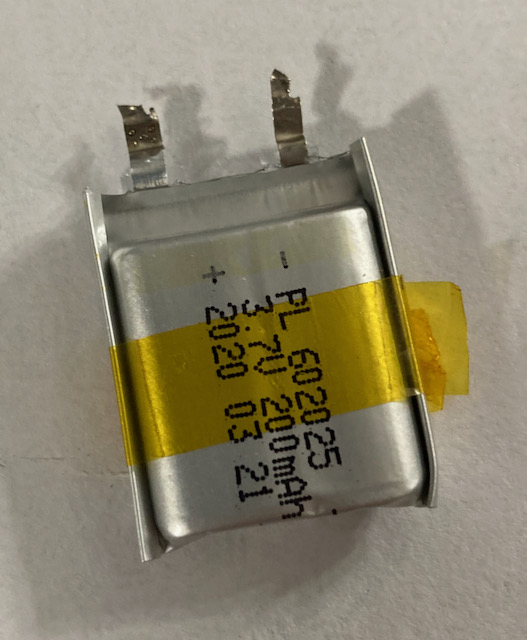
Ring Pro Battery
You can buy a new battery easily enough. All you need is a 3.7 volt Lithium Polymer Ion battery that has a 200-300 mAh capacity. The problem is that the new battery you buy will also have a circuit board soldered across the terminals that is NOT COMPATIBLE with the Ring Pro.
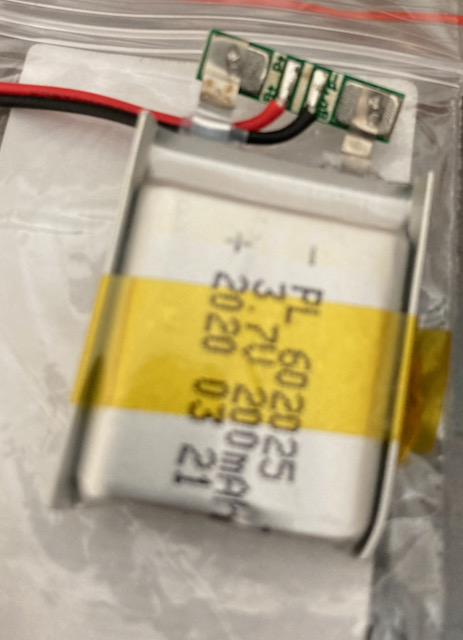
Replacement 3.7v Lithium Polymer Ion Battery
So…..what you have to do is carefully remove the circuit board from both batteries and solder the original circuit board onto the new replacement battery.
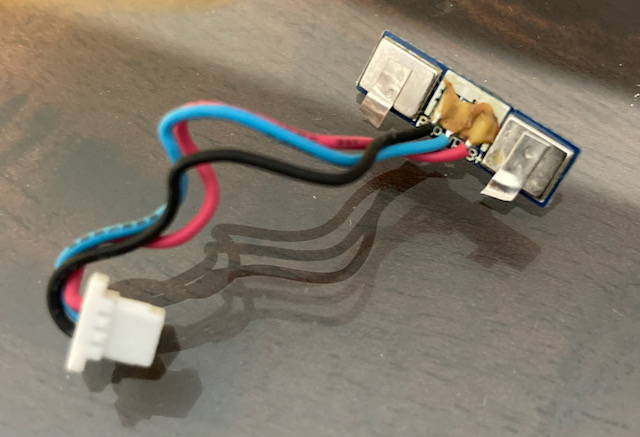
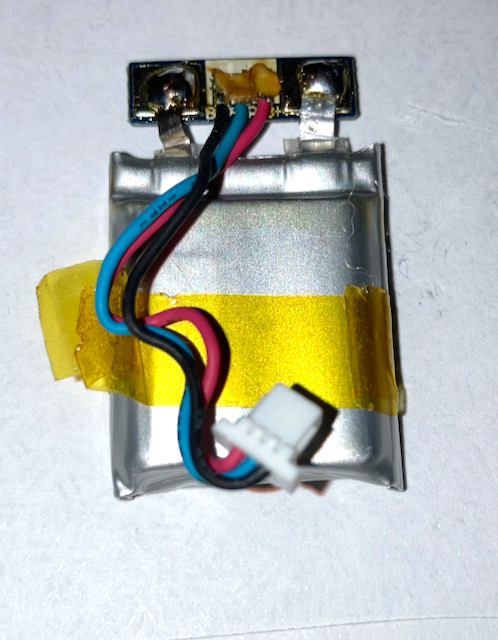
Ring Pro Battery Circuit board
You’ll note that in the pic above I simply snipped the battery leads off of the old battery. For one thing the old battery was FAT and SWOLLEN and I was not about to apply heat to it, so I took the safe way out. You may also note that I’ve been saying the boards were soldered on when in fact they are spot welded on. My bad. So you’ll have to physically tear the terminals off. You may do some minor damage to the new battery terminals but as long as you leave something to solder it to you’ll be fine. I used an exacto knife and just got under the battery tang and sawed away at the spot welds.
Circuit board removed from new battery
I didn’t do too bad of a job here. Plenty left to solder with. And solder I did. Make sure the Red wire faces closest to the + terminal and the black wire faces closest to the – terminal.
Ring board soldered to new battery
Then you just fold the board down by the battery making sure that it is insulated somehow. I carefully removed the old tape and reused it. Electrical tape or heat shrink would work here as well although I don’t really recommend applying a whole lot of heat directly to these batteries.
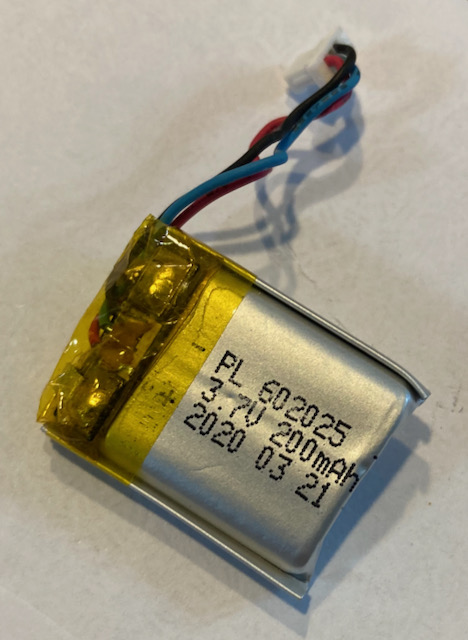
Repaired battery ready for replacment
Now it is a matter of reassembly. Replace the heater pad and use adhesive if necessary. Mine re-stuck pretty good.
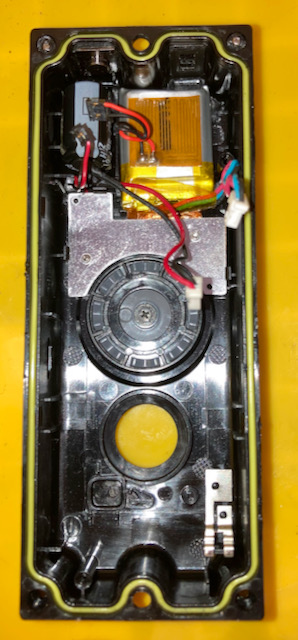
Battery with heater pad installed in Ring
The heater pad of course keeps the battery from freezing which will kill it and probably keeps condensation out of the device as well. Not sure if there is a thermocouple in there or not but probably.
That’s it! Reassemble and then test it out. Mine worked perfect. I hooked it up at my sweethearts house a couple days ago and it is working like a champ again.
[kad_youtube url=”https://youtu.be/Y_H6SYq13dY” ]
This was a $150 doorbell that worked a couple of years and then died. It was destined for the trash, all for a replacement battery that is not easily user replaceable that COSTS SIX DOLLARS. This is a poor excuse for a design.
Great write up, so true. It’s made to be thrown out in 2-3 years intentionally so you have to buy a new one every 2-3 years. Im suspecting this is the same problem with my dads that I’m going to attempt to repair.