So once I needed to add some storage to a Pi and I opted for an SSD. I added the SSD by installing a USB 3.0 to SATA adapter. It was a good solution for the price but configuration was somewhat involved.
But now Raspberry Pi OS supports SATA devices natively. That allows you to connect via a proper SATA add on board from Geekworm instead of a USB SATA device. At $30 (not counting a case, power supply, and Power Management with Safe Shutdown add on board which costs all total around $100).
What you gain here is the ability to boot the Pi from the SSD drive and not the SD card. This speeds things up. A LOT. You could take this device and install Plex and have your very own portable media server that you can travel with.
I’m not doing that here as I want to use 100% of my SSD drive for a SAMBA share. This gives me a terabyte (or more if I get a larger capacity SSD) of network attached storage. And while this isn’t a proper NAS with an array of drives, it is still pretty cool. You can never have enough network attached storage and you can use this device for specific tasks. In fact I was going to put Handbrake on it however there is no docker image for armhf7 for handbrake. Still, you get the idea. You can run any docker image and have it do a task or just be network attached storage. Or as I suggested above use it as a traveling media (music, movies, shows) server.
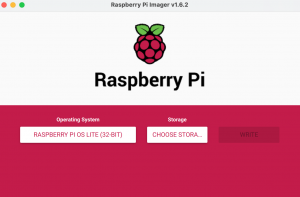
So lets set it up. Download and install Raspberry Pi Imager. We want the Pi OS Lite 32 bit version.

Raspberry Pi Imager
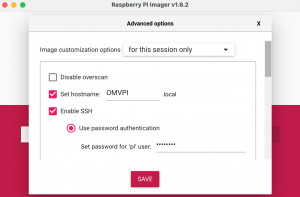
Here’s a cool trick. Hit CTRL + Shift + X and it brings up a screen so you can pre-configure your Pi so you can boot headless.

Configuration screen
Once you configure and save you can select your SD card and then rock and roll.
Once you have booted into your Pi and ssh’d in after finding your IP address (I use a program called LanScan) then you want to do a
sudo apt-get update
and
sudo apt-get full-upgrade
Reboot, ssh back in and issue this command. This will install OpenMediaVault. Then wait a bit.
wget -O - https://github.com/OpenMediaVault-Plugin-Developers/installScript/raw/master/install | sudo bash
This will take a few minutes.
Once again the IP address will change. Find it and go to that address in a browser window.
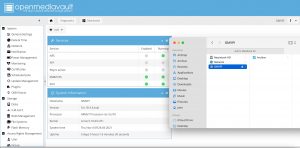
Then you want to create a file system where you will format your SSD drive. Then you can add a File Share and then finally a Samba Share.

OMV running Samba
So……this is cool…….but I could just write the OS to the pi. Mount the SSD drive and install samba and samba-common and configure it all WITHOUT OpenMediaVault. And by using the $10 USB 3.0 to SATA adapter I mentioned earlier and an SSD drive. I have about $200 wrapped up in this Pi with the Geekworm hardware and SSD.
In fact if all you are going to do is run Samba you probably SHOULD do that. But OpenMediaVault is POLISHED, it gives you a web configuration interface and it also allows you to install Docker containers which means this Pi and OMV could be given a specific task. Maybe a LogitechMediaServer docker or Plex ……….or any other of the thousands of Dockers.
OMV gives you the ability to configure additional services, plug-ins and extras. OMV is cool but probably overkill for just making a Samba Server.
