Algolaser Rotary Chuck Review
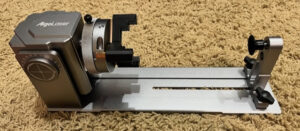
Algolaser Rotary Chuck
The nice folks at Algolaser recently sent me their Algolaser Rotary Chuck (ARC) ($139 currently) to review. Additionally, there is a hot promotion from Nov 5-13, 2024.
I own a lot of rotary tools which range from home made, 3D printed ones to extremely expensive rotary devices for my CNC and fiber lasers.
I can tell the good ones from the bad ones. So far, I am liking what I see here. When desktop lasers hit the scene in 2019 soon after rotary devices made their appearance. The first rotary devices were, and are still good, but configuring the software settings was crazy. Things have gotten so much better in the rotary world since then.
Algolaser branched off from Ortur and I for one am glad they did. My last couple Ortur lasers had serious quality issues. Algolaser has exceeded my expectations since they stood up their company. I’ll be using this rotary chuck on the Algolaser Alpha MK2 laser.
Packaging And Assembly
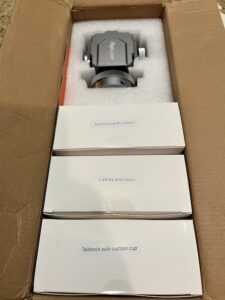
Packaging
The ARC was very well packaged and really the only assembly involved is just selecting which jaws you want to put on the chuck.
There are 3 boxes which are well marked and it contains tools adequate to assemble and operate the rotary.
There are also 4 cables which pretty much allow you to connect this rotary to almost ANY laser. And of course there are cables specific for my Alpha MK2 and other Algolaser lasers.
Once you remove the boxes and styrofoam the unit is ready to roll (once you add the jaws). They also provide extension legs to raise your Algolaser laser up high enough for rotary operations.
Here is what the jaws look like installed. And I recommend pointing the chuck straight up to install the jaws. It is just so much easier.
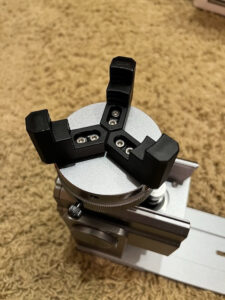
Jaws
Setup
This rotary chuck needs connection to the Y axis. Some lasers these days will give you a separate JST connector port on the frame with a switch to toggle between normal and rotary operation. Not so on the Alpha MK2. The Y motor has to be unplugged and the cable from the main board connects to the ARC.
I’m not a big fan of this as frequently plugging and unplugging JST connectors is a recipe for a cable failure. Be gentle when handling the JST connectors and cables. Here’s how I’m dealing with this. I have two lasers in my work shop. One will be setup for general use. The Alpha MK2 will remain configured for rotary operation.
Software Configuration
The included manual has excellent directions for configuring the ARC in either LaserGRBL or Lightburn. I’m a Lightburn guy so I’ll briefly discuss configuring that software. There are essentially two things to know.
- How to disable homing
- Setup mm per revolution in the Rotary Settings
If you are a GRBL wizard you can just type this command in the Lightburn console:
$22=0
This disables the homing operation. Conversely, $22=1 enables it. Or you can make a Macro in the console to enable or disable homing. Right click on a Macro button and insert the GRBL code.

Disable Homing in Lightburn
Subsequently you add another macro to enable homing. Easy peasy.
Rotary Settings
The key to the rotary settings are to:
- Enable Rotary
- Select Chuck
- Select Y Axis
- Set steps per rotation to 96
- Correctly input the diameter or circumference of the object you are engraving
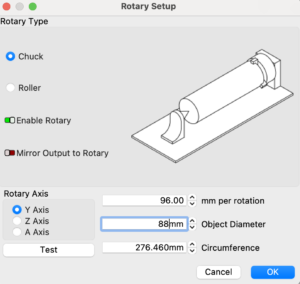
Lightburn Rotary Settings
I used 88 mm for my diameter. This is the size of the tumblers I engrave. If you fill in the diameter the circumference auto populates. You only need to add one. The other one will auto sum.
Disable homing, configure Rotary Settings. That is it. Some years back it was math and trial and error. This is SUPER easy.
Securing Your Parts
There are two styles of jaws to add to the chuck. Also there are two types of tailstocks. One has a suction cup and the other has rollers.
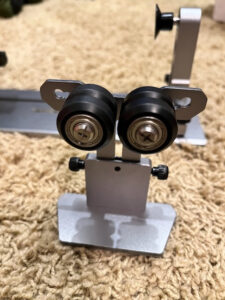
Tailstocks
There are also three small rods called a Ring Rotary for small round items such as jewelry (not depicted).
Also regarding security the bottom of the ARC has very grippy rubber strips that hold it tightly in place.
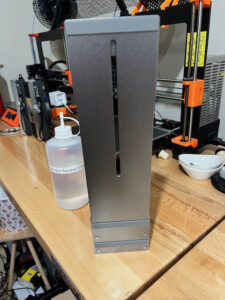
Rubber non-slip strips
Demonstration
Here is a quick and very basic video on engraving on the ARC. Note the orientation of the laser and the direction of the text in Lightburn.
[kad_youtube url=”https://youtu.be/dzg5Me-vbXM” ]
It works perfectly.
Recommendations
Not really any for the rotary itself. I wish more lasers had separate rotary connections on the frame so the Y motor cable isn’t be handled so much.
Final Thoughts
There are good rotary devices and cheap rotary devices. The ARC is a good quality rotary that is well made. And the chuck assembly is STRAIGHT. I recently reviewed a rotary that wasn’t. I would use this rotary as a daily driver. The quality is that good.
Even if you own another brand of laser you might consider buying this rotary. The cables provided should be sufficient to make almost any Y motor connection out there.
I have seen and used them all. I can easily recommend the Algolaser Rotary Chuck (ARC). Setup is super easy and the rotary is reliable. I performed some tests where I laser-ed a circumference line onto tape on an empty soda can. The results were repeatable and perfect every time.
JOHN’S TECH BLOG RECOMMENDS THE ALGOLASER ROTARY CHUCK
