
Building A GPS Tracker – Come On Over Rover
This is actually a Global Navigation Satellite System (GNSS) but the term Global Positioning System or GPS is much more widely known. So “GPS” lands in the Heading of this page. Building a GPS Tracker is fun, albeit this one requires some proximity to WiFi or Bluetooth to surreptitiously track someone.
This isn’t the device you want to track your cheating spouse with, although I guess there are ways to make it work if your vehicle has onboard WiFi.
Shoving a burner phone under the dash and powering it with the 5 volts is probably the easiest way to get location data if you have access to the interior of the car. Anyway, I digress. This post is not about tracking anyone but yourself and learning how to achieve 1 centimeter accuracy.
This is a learning tool and a very cool one at that. You could throw this in the bicycle bag and track your rides, and yet again, a dedicated bicycle computer won’t necessarily track better than this. But that bike computer does lots of other things and makes your information easier to access.
So why build and use one? it really goes back to understanding the technology. We all use GNSS or GPS daily without even knowing it. But how many of us possess even rudimentary knowledge of how it works? Finally, this would be a nifty tool if the world descends into anarchy.
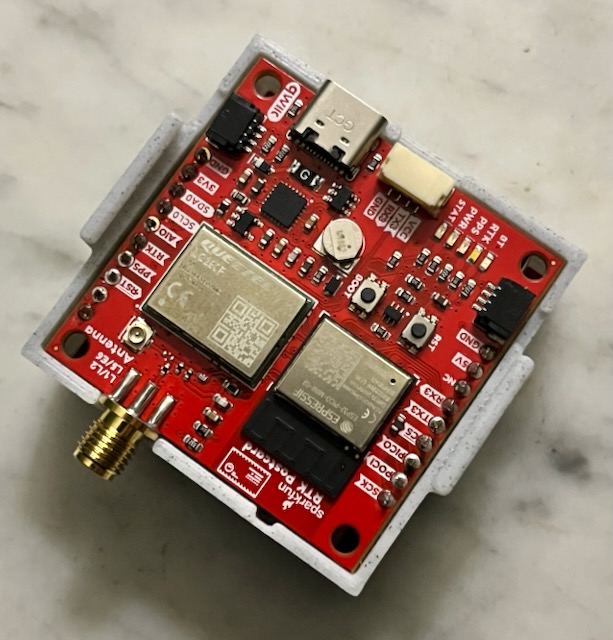
Items Needed To Build Our GPS Tracker
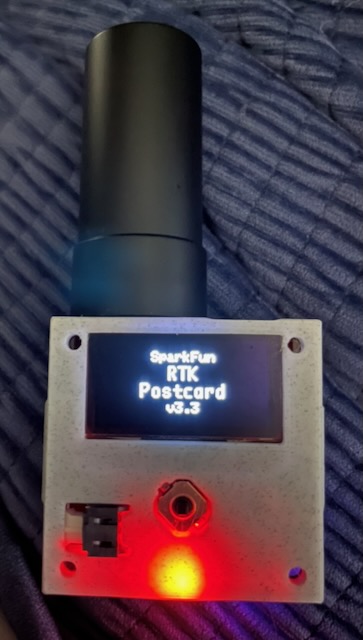
Let’s take a peek at what the current firmware version looks like.
Ensure that the firmware on both the board and the Quectel LG290P chipset are up to date. Instructions can be found here. Make sure you are following the directions for the RTK Postcard.
As of the date of this blog, the current RTK-Everywhere Firmware version is 3.3.
Having said that, it appears that it is frequently updated. So keep your eyes on that.
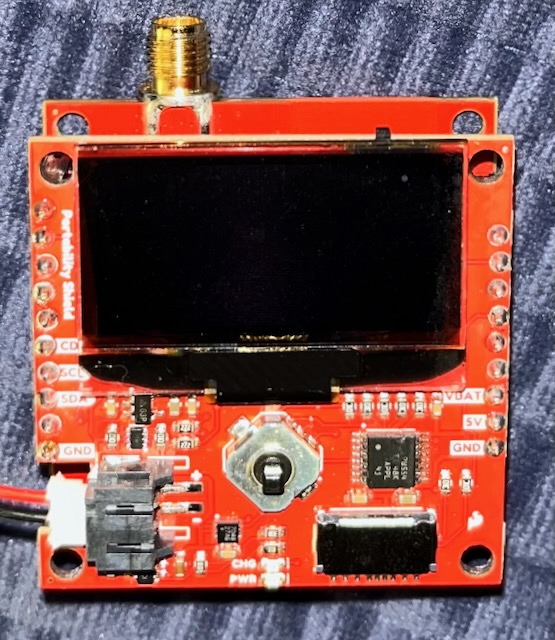
While soldering the male header pins on the Portability Shield it is EASY to melt the little plastic on and off switch in the upper right hand corner by the display. Ask me how I know. Solder your pins quickly with 600℉ or so iron temps and allow time between pins to cool down. Trust me. This baby melts easily.
I removed my switch on my 1st shield and wired up an external “switch”. I used a male and female ended dupont breadboard wires and just plugged them in when I wanted to power up.
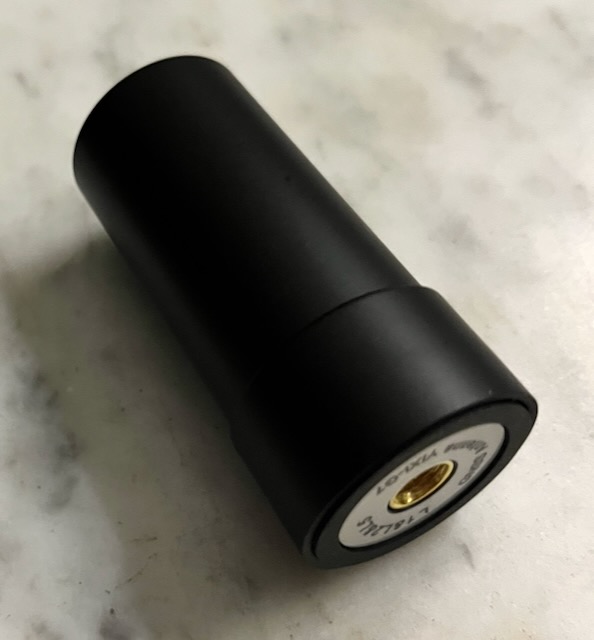
I bought this antenna from Amazon and it is considerably cheaper than the antenna that Sparkfun sells. Soon as I walk outside I get an RTK Fixed status (connected to an NTRIP server). That’s as good as it gets. I suspect this antenna is identical to the more expensive version.
Configuration

By default you should be able to click down on the 5 way switch just below the screen. You will be broadcasting an AP called RTK something or other and then connect to that WiFi network.
Once you connect you can navigate to 192.168.4.1 in a browser where you can change about everything. For convenience you might want to add some wifi networks and passwords and change AP to WiFi.
Then the screen will tell you what network it has connected to and it gives the IP address where the Postcard can be found.
Once you get it set the way you want you should always be able to connect to your station to configure it or upgrade the firmware.
Config Page
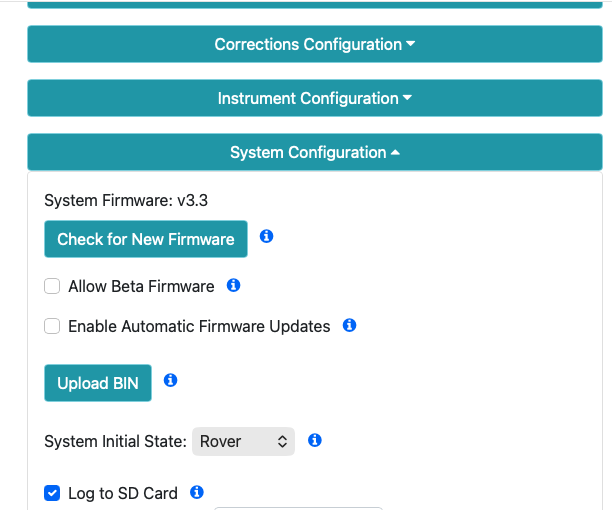
This just shows a few of the config options and here is where you can update your firmware easily. Below what I have depicted you can change your Bluetooth config and I set mine to BLE. So I set Wifi stuff, Bluetooth and a couple other settings pertinent to me.
App Utilization
I think most people use SW Maps to track their movements with this combination of hardware.
The deeper I dig in the configuration menus the more stunned and amazed I am that this software is free.
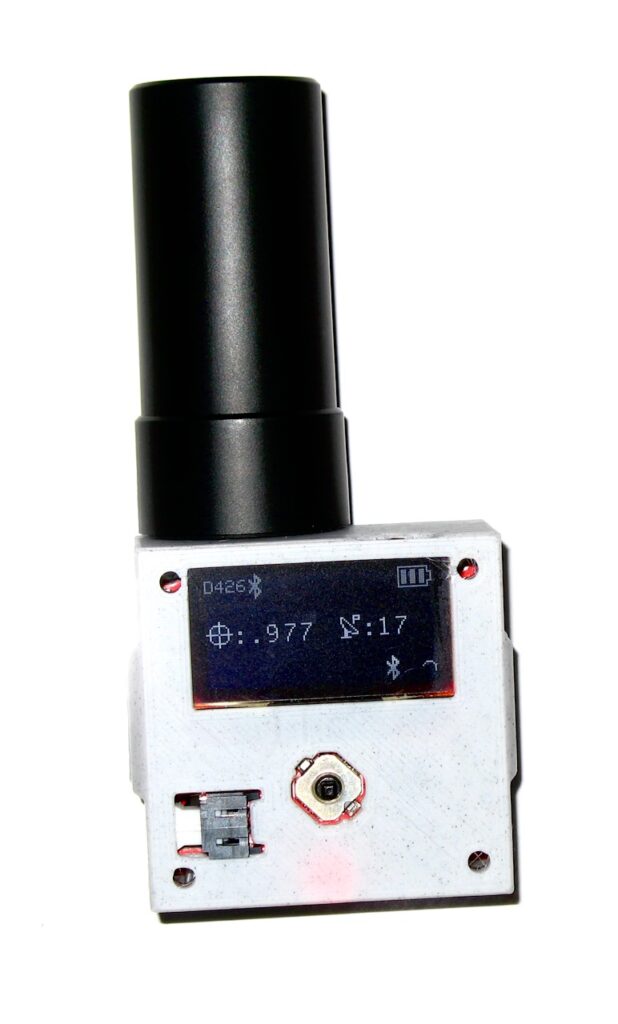
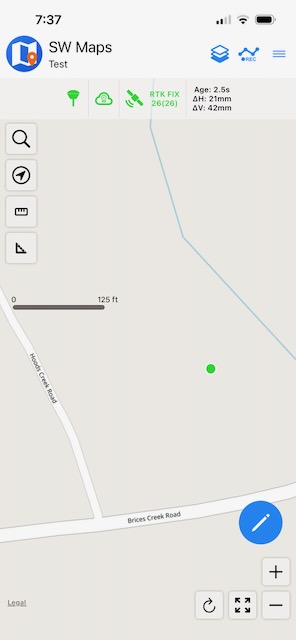
On the top bar the icons in green from left to right are:
- Scanning and connecting to base station
- NTRIP Client credentials and starting
- Fix data
- Type of fix achieved (RTK Fixed)
To the right of that it shows your age of difference which probably should be below 2 seconds. Mine says 2.5 but generally it bobs around and is almost always under 2 seconds.
That was pretty much just an unlucky screenshot.
Once connected you can start a track and then after you stop the track you can export it in a variety of ways. One of the most common would be to export as a .kmz file for Google Earth or Garmin Basecamp.
KMZ File In Google Earth
Here is one of my exported files sent to Google Earth Pro.
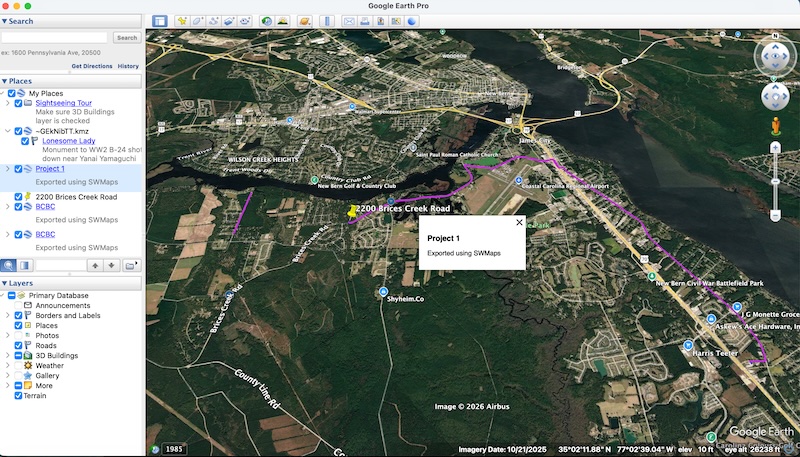
Now zoom way in on this and you can see some of that centimeter level accuracy. You can tell with side of the centerline I was on depending on which leg of the trip it was.
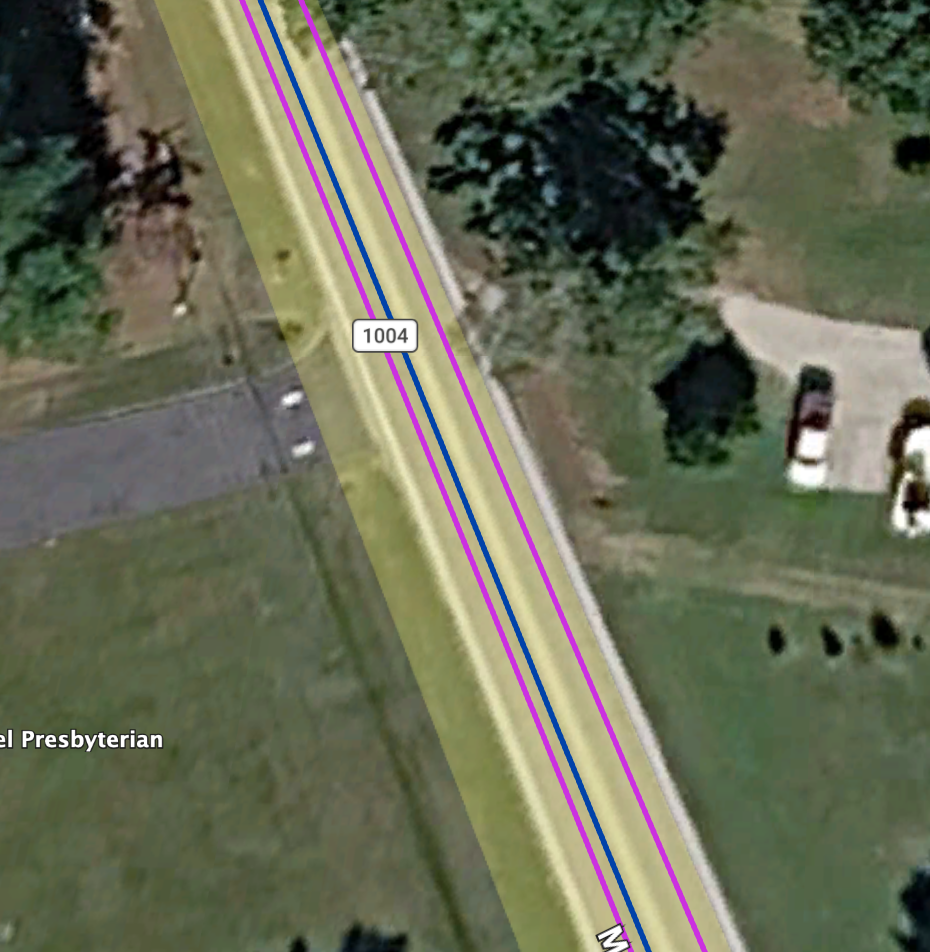
I’m focusing on the two pinkish tracks. The blue track was an earlier experiment of me heading somewhere and not heading back. I should state that the following conditions are true here:
- Blue track done with screw on antenna as depicted above
- Pinkish tracks done with magnetic mount GNSS antenna stuck to the top of my truck. The better the antenna, the more accurate the track, obviously.
You Now Have a GPS Tracker
Congratulations. You did it. I realize I didn’t lay down perfect step by step directions but I did point you to the Sparkfun pages that show you exactly how to configure things.
Good Luck with your build!