

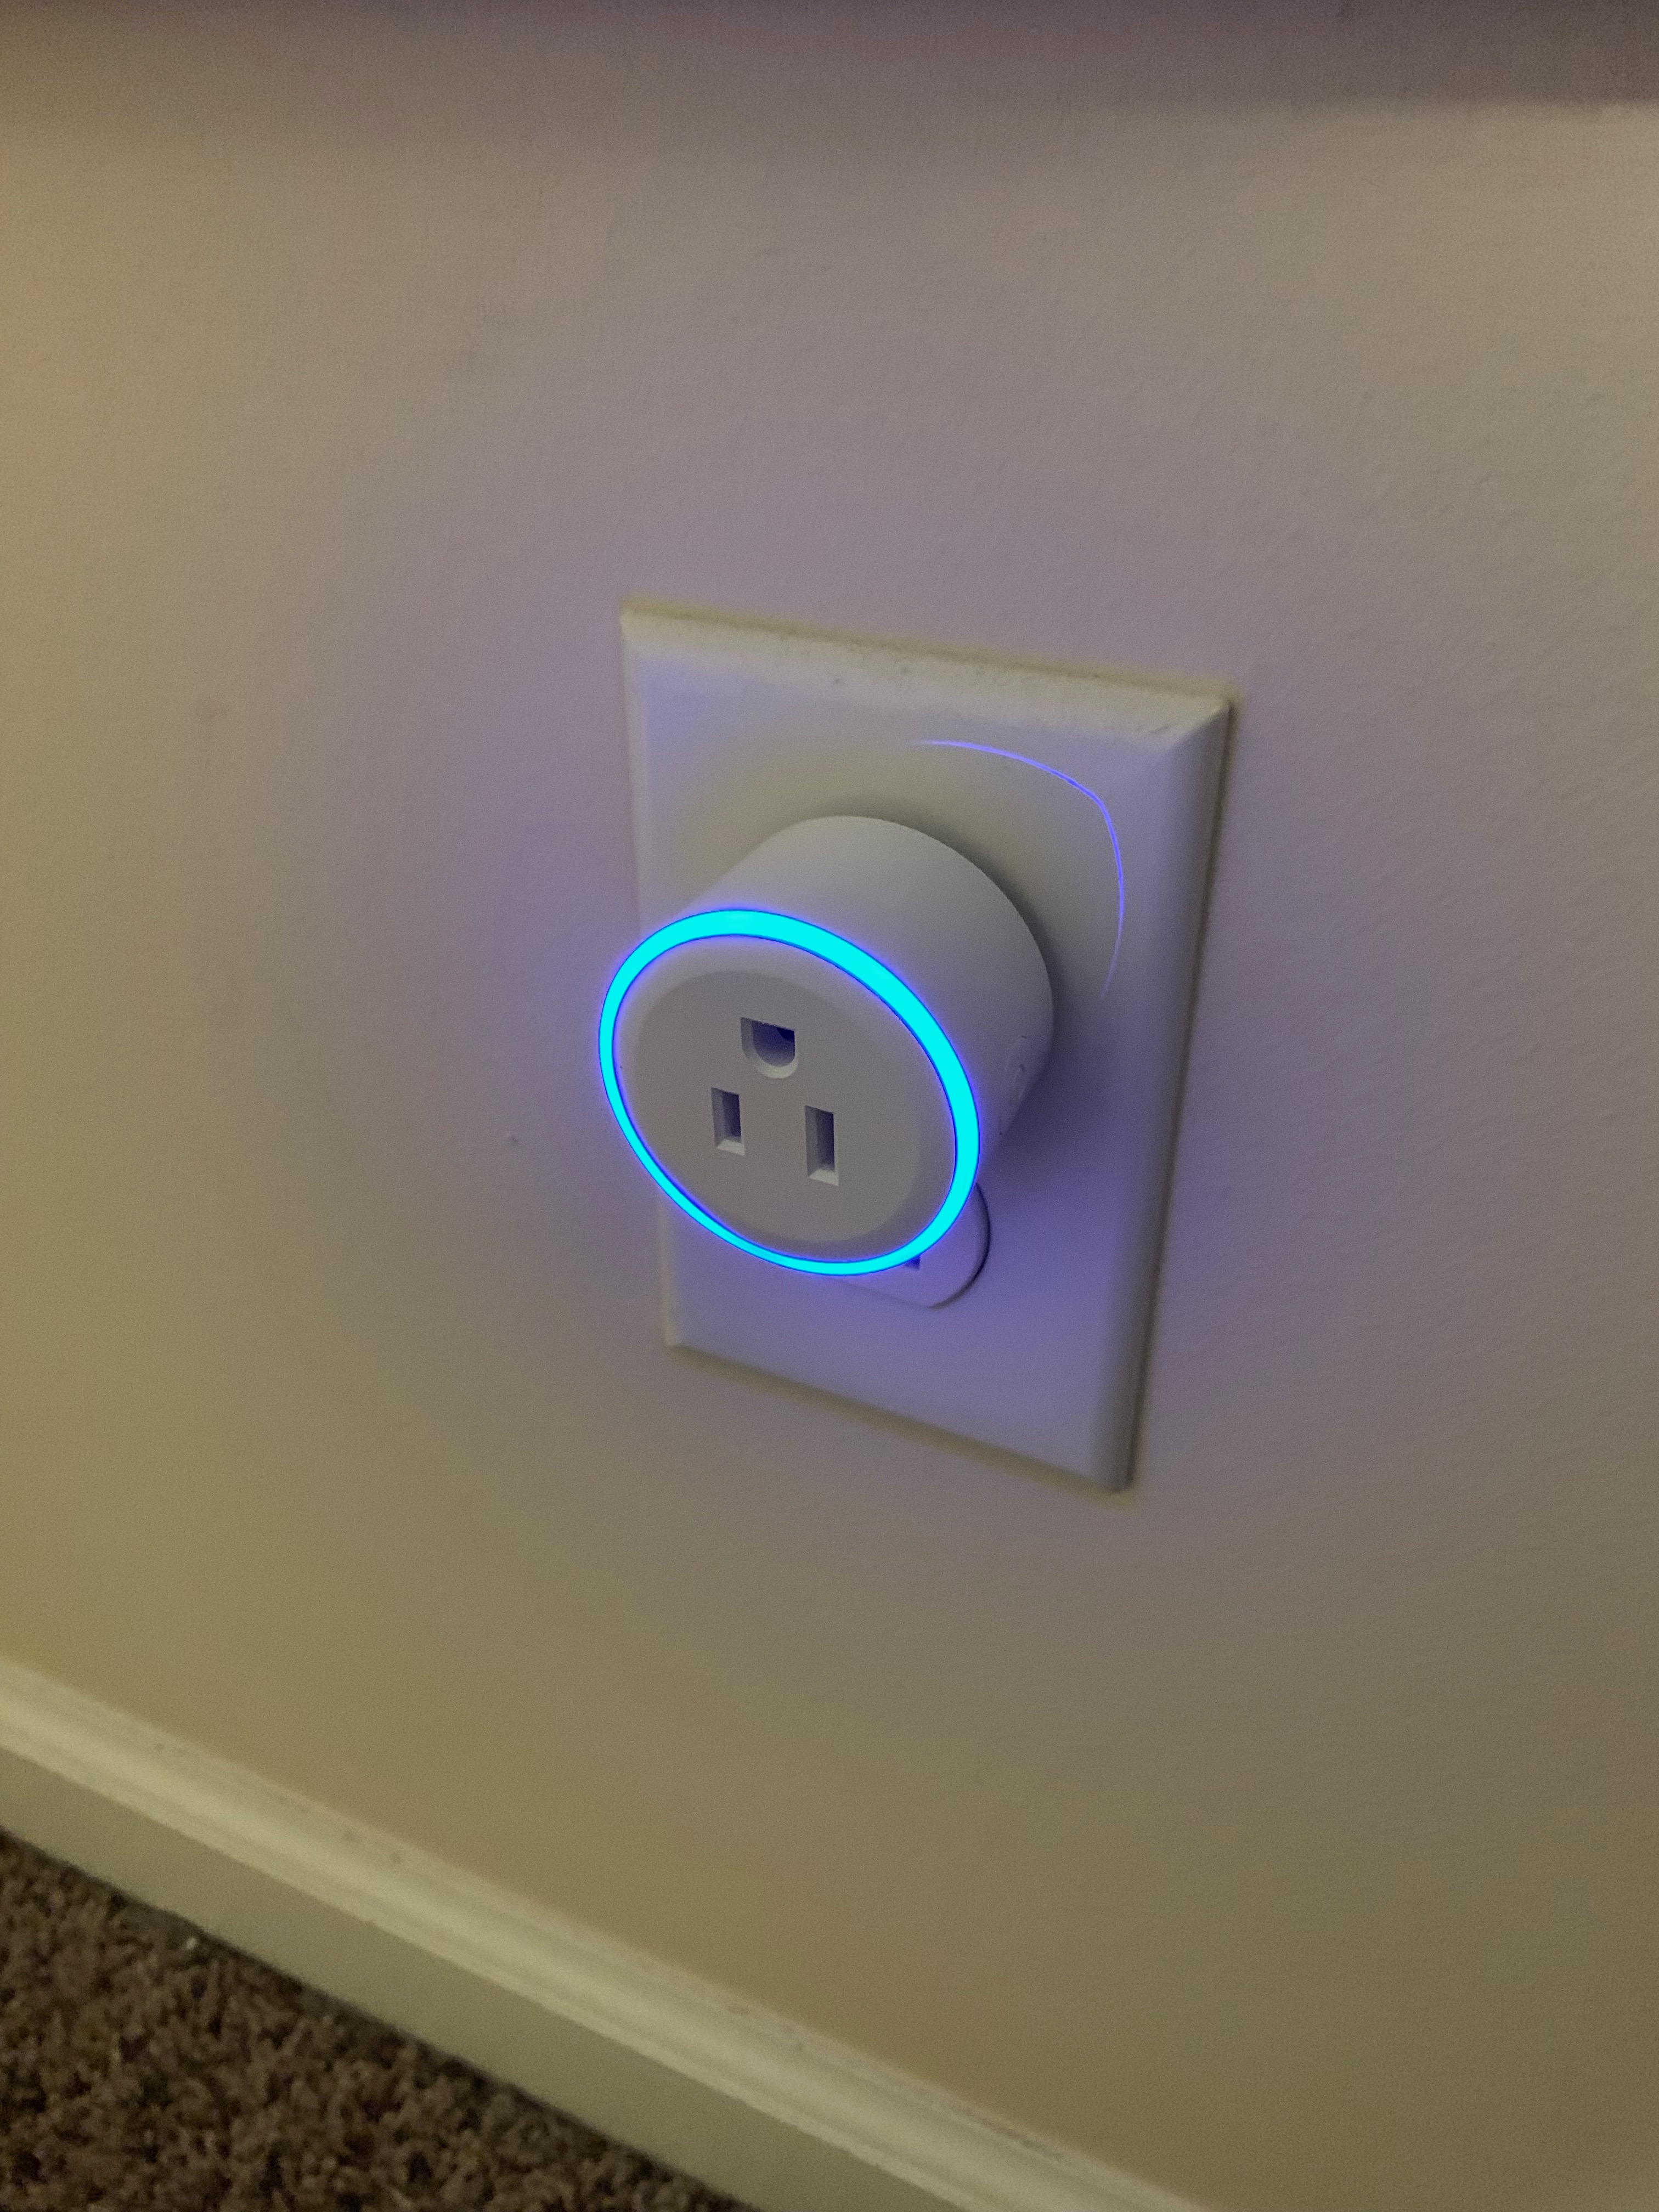
Found these cool little outlets on Amazon and verified they can be flashed with Tasmota Over The Air (OTA). They are technically called “Home Awesome Breathing Light Smart Light.
They are also sold under the name TMRLife Plug
They are another made in China device that is controlled via phone app and I generally don’t trust such things. Flashing the device with Open Source firmware is MUCH better for securities sake.
First and foremost to flash this you need a Linux computer preferably a Raspberry Pi with a fresh installation of Raspbian. Once you install it and SSH in issue these commands:
sudo apt-get update
sudo apt-get upgrade
sudo apt-get install network-manager
Now we need to get the software that will flash the outlet. We’ll use a hunk of software called Tuya-Convert. Download it to the Pi and install it with these commands:
git clone https://github.com/ct-Open-Source/tuya-convert
cd tuya-convert
./install_prereq.sh
The last command takes a while to install. Go grab a coffee. When you get back you can run the program by issuing this command. Have your outlet plugged in at this point.
./start_flash.sh
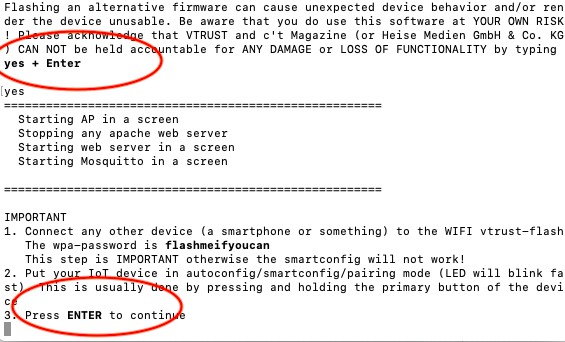
This happens. It will stop and ask you if you are double dog sure you want to go on and make you type the word YES.
Here’s a video of the flashing steps and all the procedures are listed below as well.
[kad_youtube url=”https://www.youtube.com/watch?v=yT2jGty8458″ ]
At this point the Pi will create a hotspot called “vtrust-flash”. Hook a phone up to that AP and the password is (without quotes) “flashmeifyoucan”. Once connected go push the button on the outlet and hold it for 5 seconds. That will put the device in flash mode. NOW YOU CAN PRESS ENTER.
Now it will find the device and flash it. It takes a few moments to write the flash. Then to select Tasmota cut and paste the appropriate curl command to install Tasmota.
curl http://10.42.42.42/flash3
The device will reboot with Tasmota.
After the flash has written go back to your phone or iPad or whatever and look for a WIFI access point called Sonoff-something or other, usually has numbers after it (i.e. Sonoff-8245)
Once you connect to that it will ask for your home access point information. Add your:
- SSID
- Password
And hit save. The outlet will reboot. At this point you can find it on your network by checking your router DHCP addresses or by using an app like FING or LANSCAN.
Now we need to configure the module. At first it will be a Sonoff Basic but we want to set it to Sonoff Generic. Configure it as so.
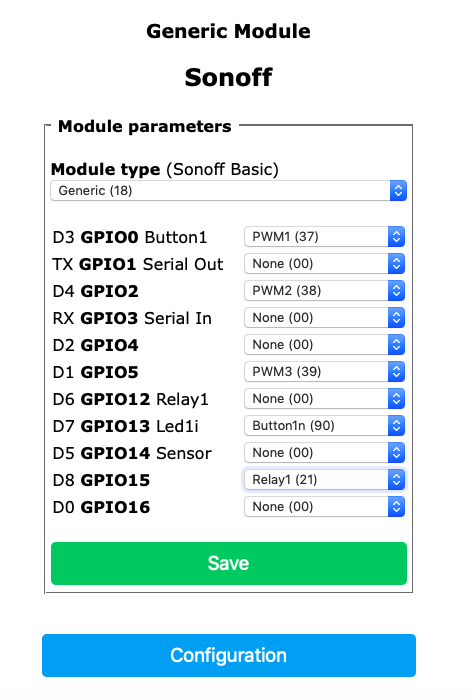
GPIO is as follows:
- GPIo0=pwm1
- GPIo2=pwm2
- GPIo5=pwm3
- GPIo13=button1n
- GPIo15=relay1
Hit save. Now you get a page that looks like this:
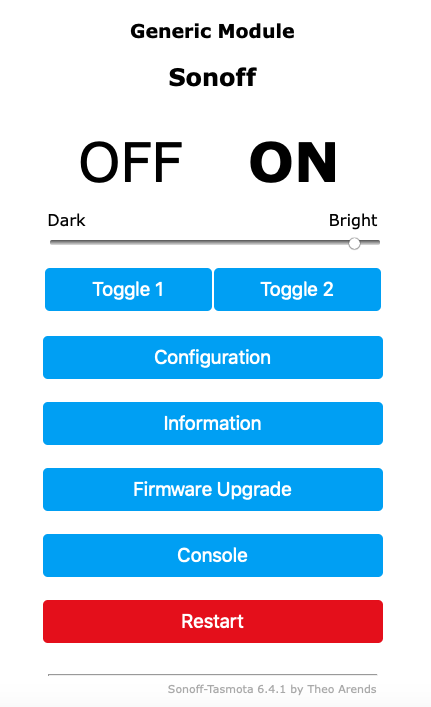
Almost there.
Toggle 1 turns the outlet on and off. Toggle 2 turns the LED ring on and off. Obviously the slider increases the intensity.
If you want to add some color control you’ll have to do that from Home Assistant.
Add the following to your HA configuration.yaml:
BIG TIME NOTE: IF YOU ARE USING THE LATEST VERSIONS OF HOMEASSISTANT THE ENTRIES IN RED BELOW NEED TO BE REMOVED. THEY ARE NO LONGER COMPATIBLE WITH HOMEASSISTANT. EVERYTHING WILL STILL WORK FINE IF YOU REMOVE THOSE LINES FROM YOUR CODE
  - platform: mqtt
    name: "Bathroom Outlet"
    retain: true
    state_topic: "stat/tuyaplug2/POWER1"
    command_topic: "cmnd/tuyaplug2/POWER1"
    availability_topic: "tele/tuyaplug2/LWT"
    qos: 1
    payload_on: "ON"
    payload_off: "OFF"
    payload_available: "Online"
    payload_not_available: "Offline"
    optimistic: false


  - platform: mqtt
    name: "Bathroom Outlet LED"
    retain: true
    state_topic: "stat/tuyaplug2/POWER2"
    command_topic: "cmnd/tuyaplug2/POWER2"
    availability_topic: "tele/tuyaplug2/LWT"
    qos: 1
    payload_on: "ON"
    payload_off: "OFF"
    payload_available: "Online"
    payload_not_available: "Offline"
    optimistic: false
    brightness_state_topic: "stat/tuyaplug2/Dimmer"
    brightness_command_topic: "cmnd/tuyaplug2/Dimmer"
    brightness_value_template: "{{ value_json.Dimmer }}"
    brightness_scale: 100
    rgb_state_topic: "stat/tuyaplug2/Color"
    rgb_command_topic: "cmnd/tuyaplug2/Color2"
    rgb_command_mode: hex
    rgb_command_template: "{{ '%02x%02x%02x' | format(red, green, blue)}}"
Some things to note here. I have named mine “Bathroom Outlet” and changed the MQTT topic to “tuyaplug2”
Now add a light named “light.bathroom_outlet” to HA and it will give you a switch you can control the on and off with and while it is on the LED color via a color palette. light.bathroom_outlet_led will be your other control.
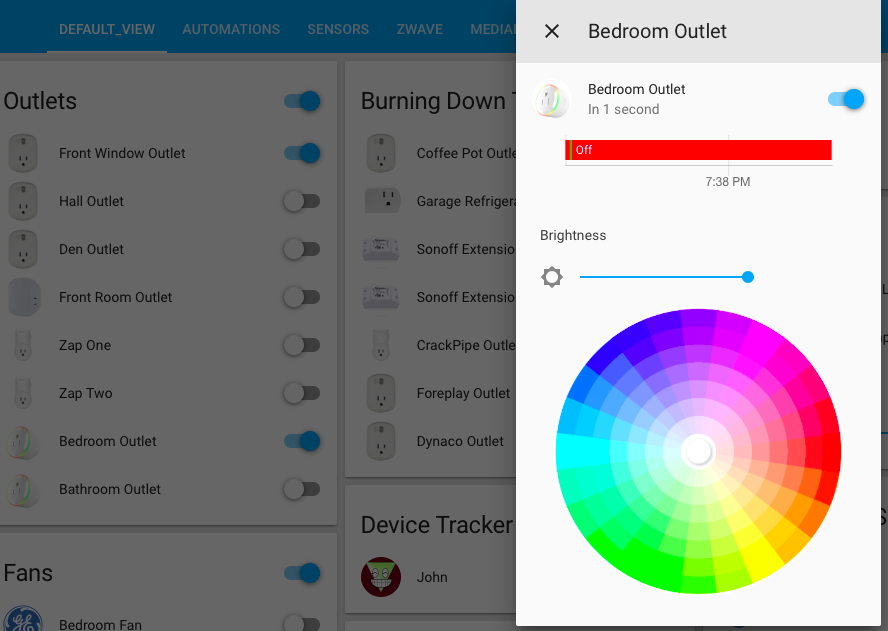
Cool, huh? Here’s what the plug looks like in the dark. Obviously you can pick any color on the palette wheel that you like.
[kad_youtube url=”https://youtu.be/X34w6oYzDlo” ]
Outstanding project. These would make cool bathroom night lights or heck, bedroom night lights.
However, these are PERFECT bathroom nightlights!
Bob is your Uncle once again.
Is the outlet itself dimmable? Meaning if I hook up a lamp to it, can the lamp dim variably from light to dark, or does the dimming feature only work for the LED ring?
LED Ring only