
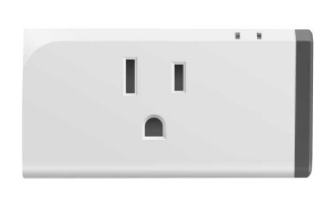
Sonoff S31
I’ve actually blogged about this before but I bought some more of these and just think that the Sonoff S31 is the best power monitoring device going. I got mine on Amazon for about $18 each and I think you can find them a buck or two cheaper in other places. Just make sure that you don’t purchase the Sonoff S31 LITE.. The Lite version DOES NOT power monitor.
The devices work with an app called EWELink but the company that makes all this is called iTead and they are a Chinese company based in China and some people have caught their app sending back interesting information to the home server in China. In short……..I don’t trust the app. You can use them right out of the box with the app but that’s not what I’m all about here at John’s Tech Blog.
So what I do is to modify the devices firmware with something called Tasmota which works on Wifi, creates a web page that displays all your vital information and it ONLY reports to any server if you TELL IT TO. Mine reports to MY machine to machine protocol server (MQTT) so I can tie the switches into my Home Automation software so I can turn them on and off. Also you can do really cool stuff which I won’t go into here in great detail. For example, I can have it send me an email if it sees a refrigerator showing so many watts for so long a period of time. Excessive wattage would be from the light bulb being on so maybe me pulling 60 extra watts for 2 minutes means someone left the door ajar. Cool.
First of all to flash the device with the new firmware you must open it up and there is a little bit of soldering involved and we need to gather the firmware and a flashing program. Since the last time I did this flashing the device is EASY now. Before you had to compile the code on Arduino (or other programs) and it was generally a multi stepped pain in the rear. Now it is a piece of cake.
I used a program called Tasmotizer. You can download a Windows version from the link. To install it in Mac or Linux you just need to run the following command:
sudo pip3 install tasmotizer Once installed you start the program by typing
tasmotizer.py into the terminal.
Now go to this page to get the firmware. Scroll down and download the file named Tasmota.bin.
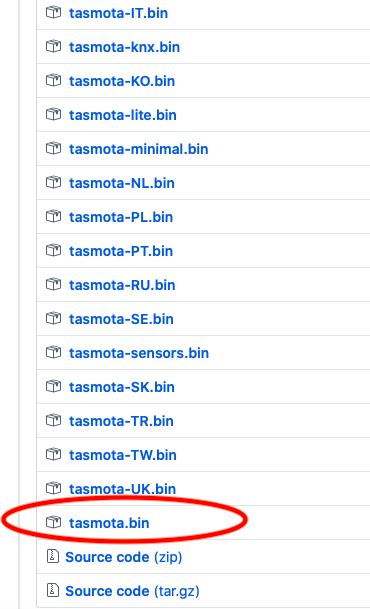
Tasmota.bin is the name of the firmware.
So essentially once we are ready to upload the firmware the steps are essentially:
- Open Tasmotizer
- Tell it where your firmware is
- Push start
Let me tell you that is 1000x’s easier than it used to be.
So now we have to get the hardware ready. This is the scary part for most people but it need not be. Also be advised any warranty you HAD is now null and void.
We don’t need no stinking warranty for an $18 outlet anyway.
You will also need an FTDI programmer. I actually use a different one in the steps below but this one will work. You may need to make sure you install drivers for it in whatever OS you are using. I like this one because it has a jumper for 3.3 volts or 5 volts. You should be programming your Sonoff S3 ONLY WITH 3.3 VOLTS! You’ve been warned.
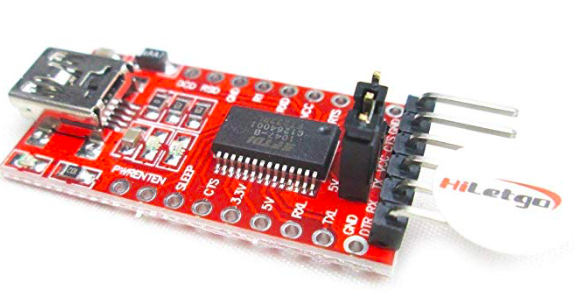
USB to TTL Serial Converter (FTDI)
Take a pocket knife and gently pop the gray cap off the end. 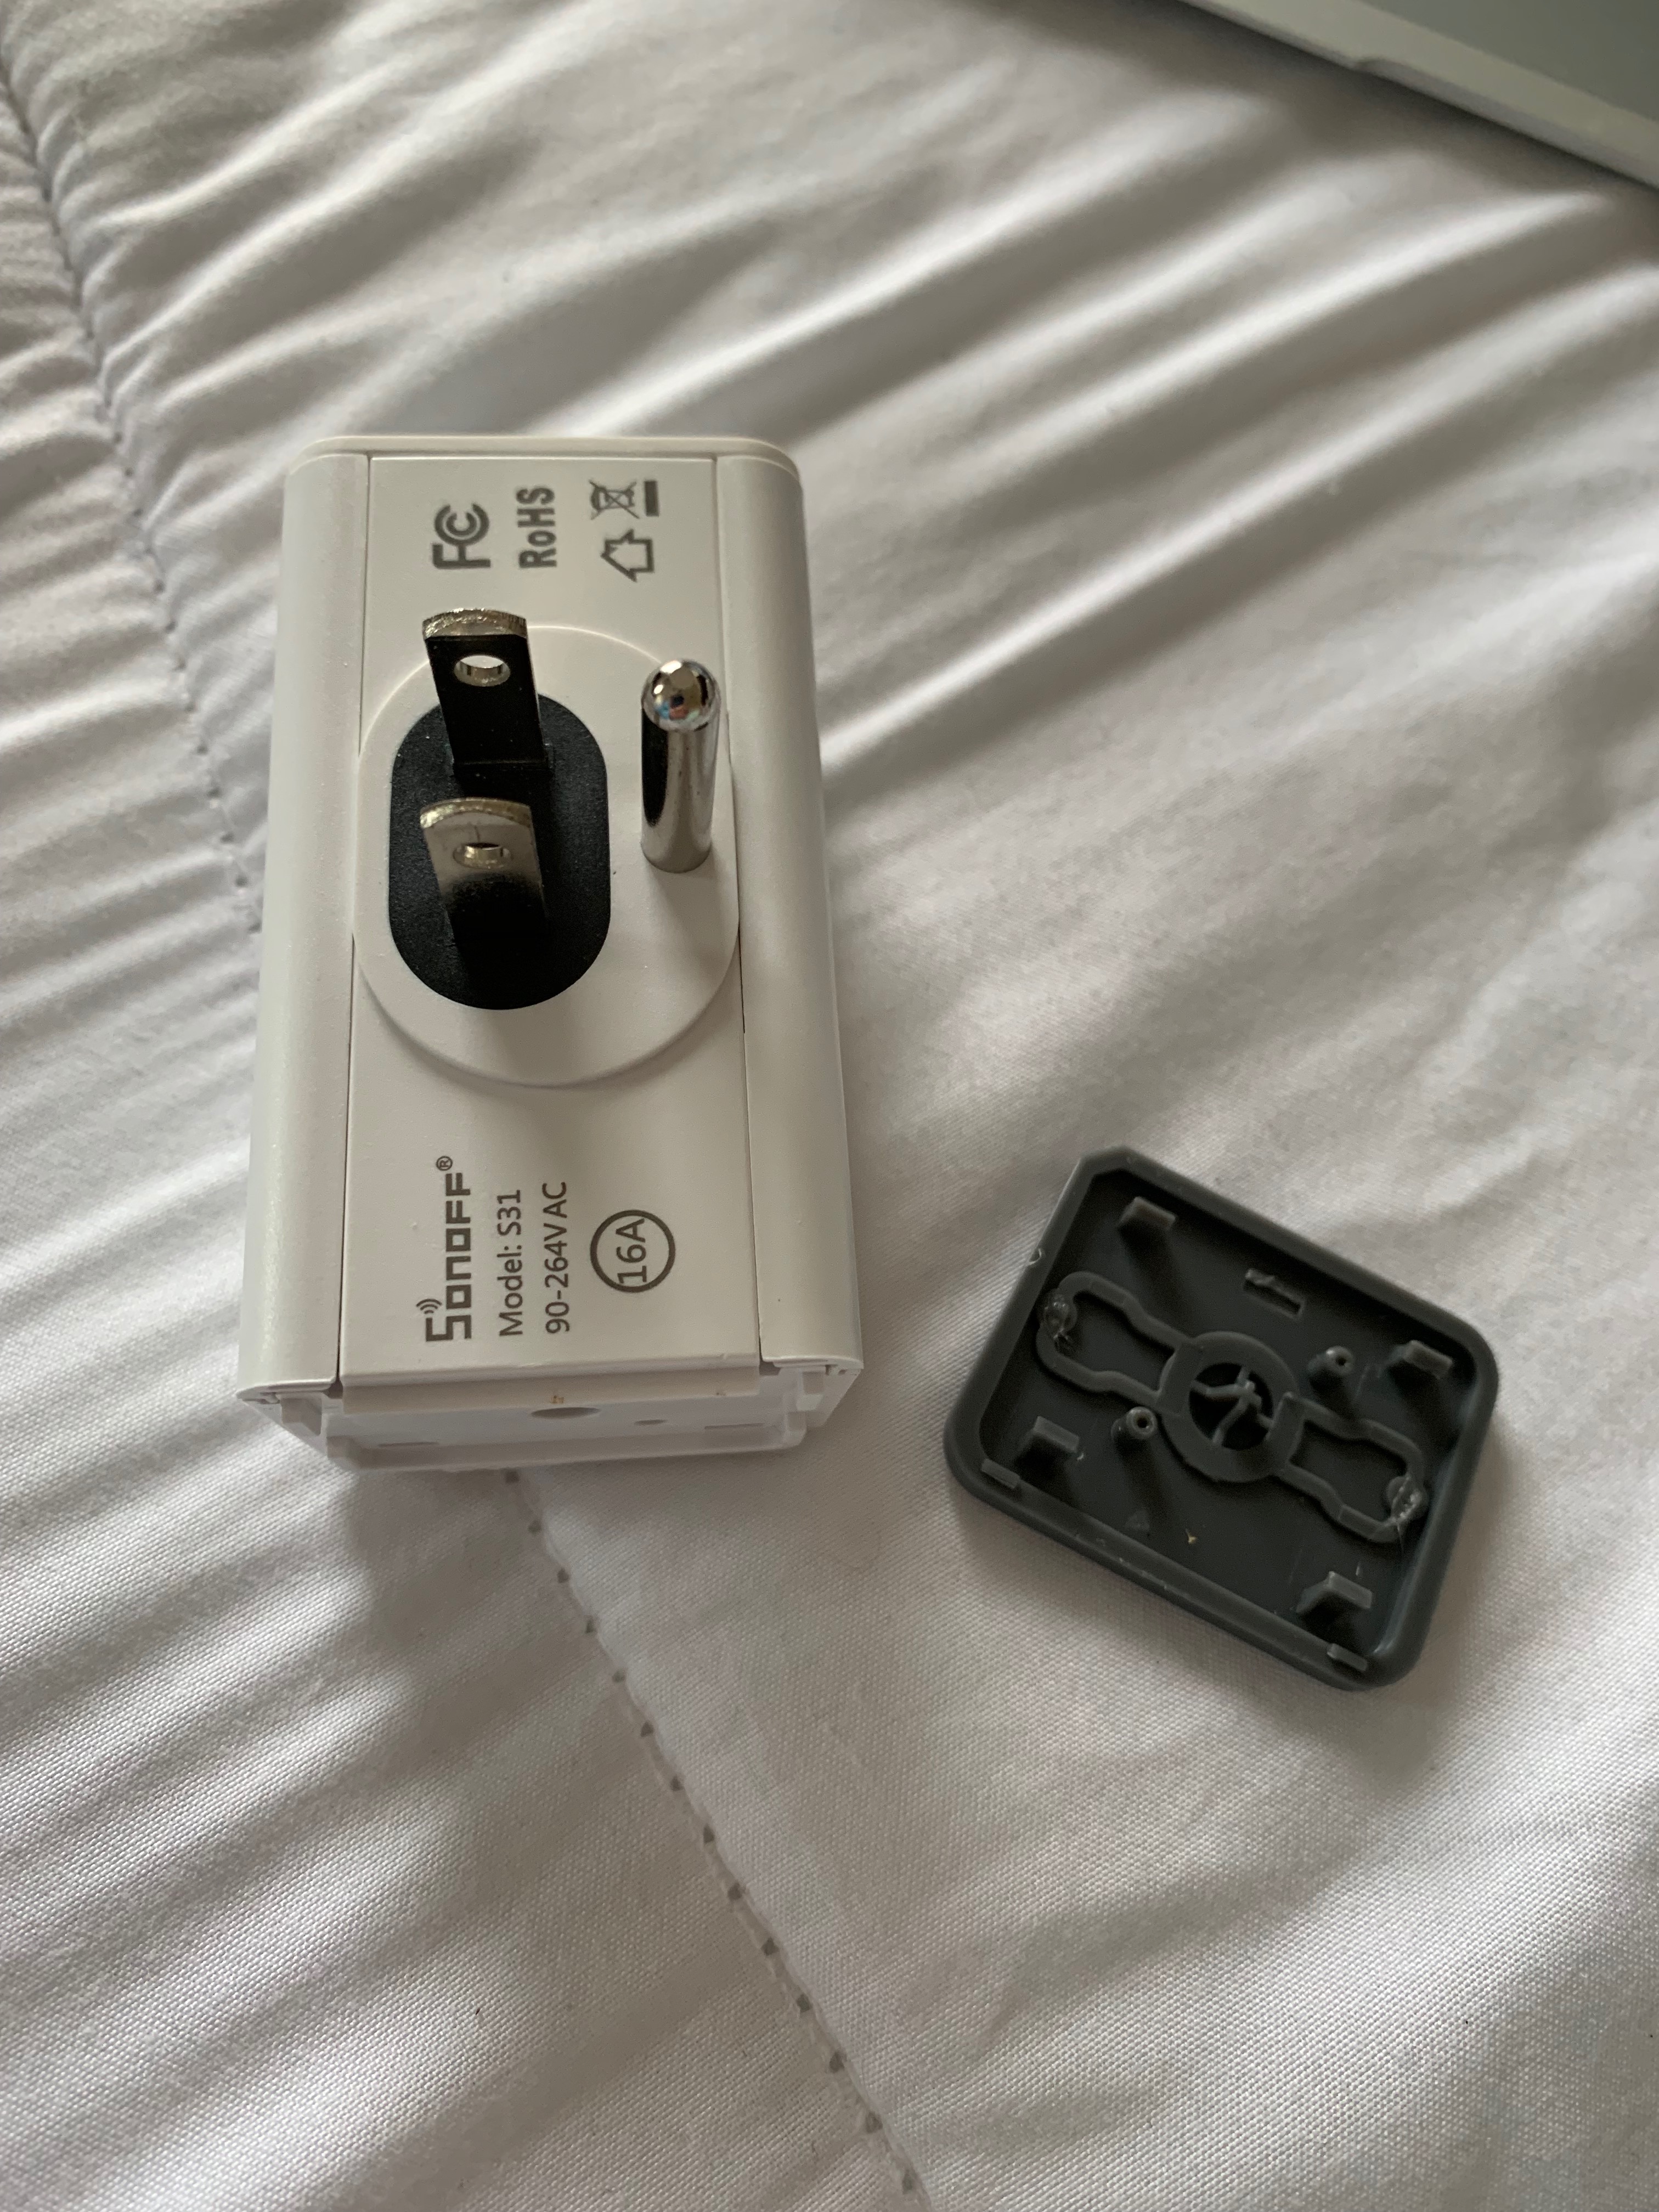
Now slide out the two white corner pieces.
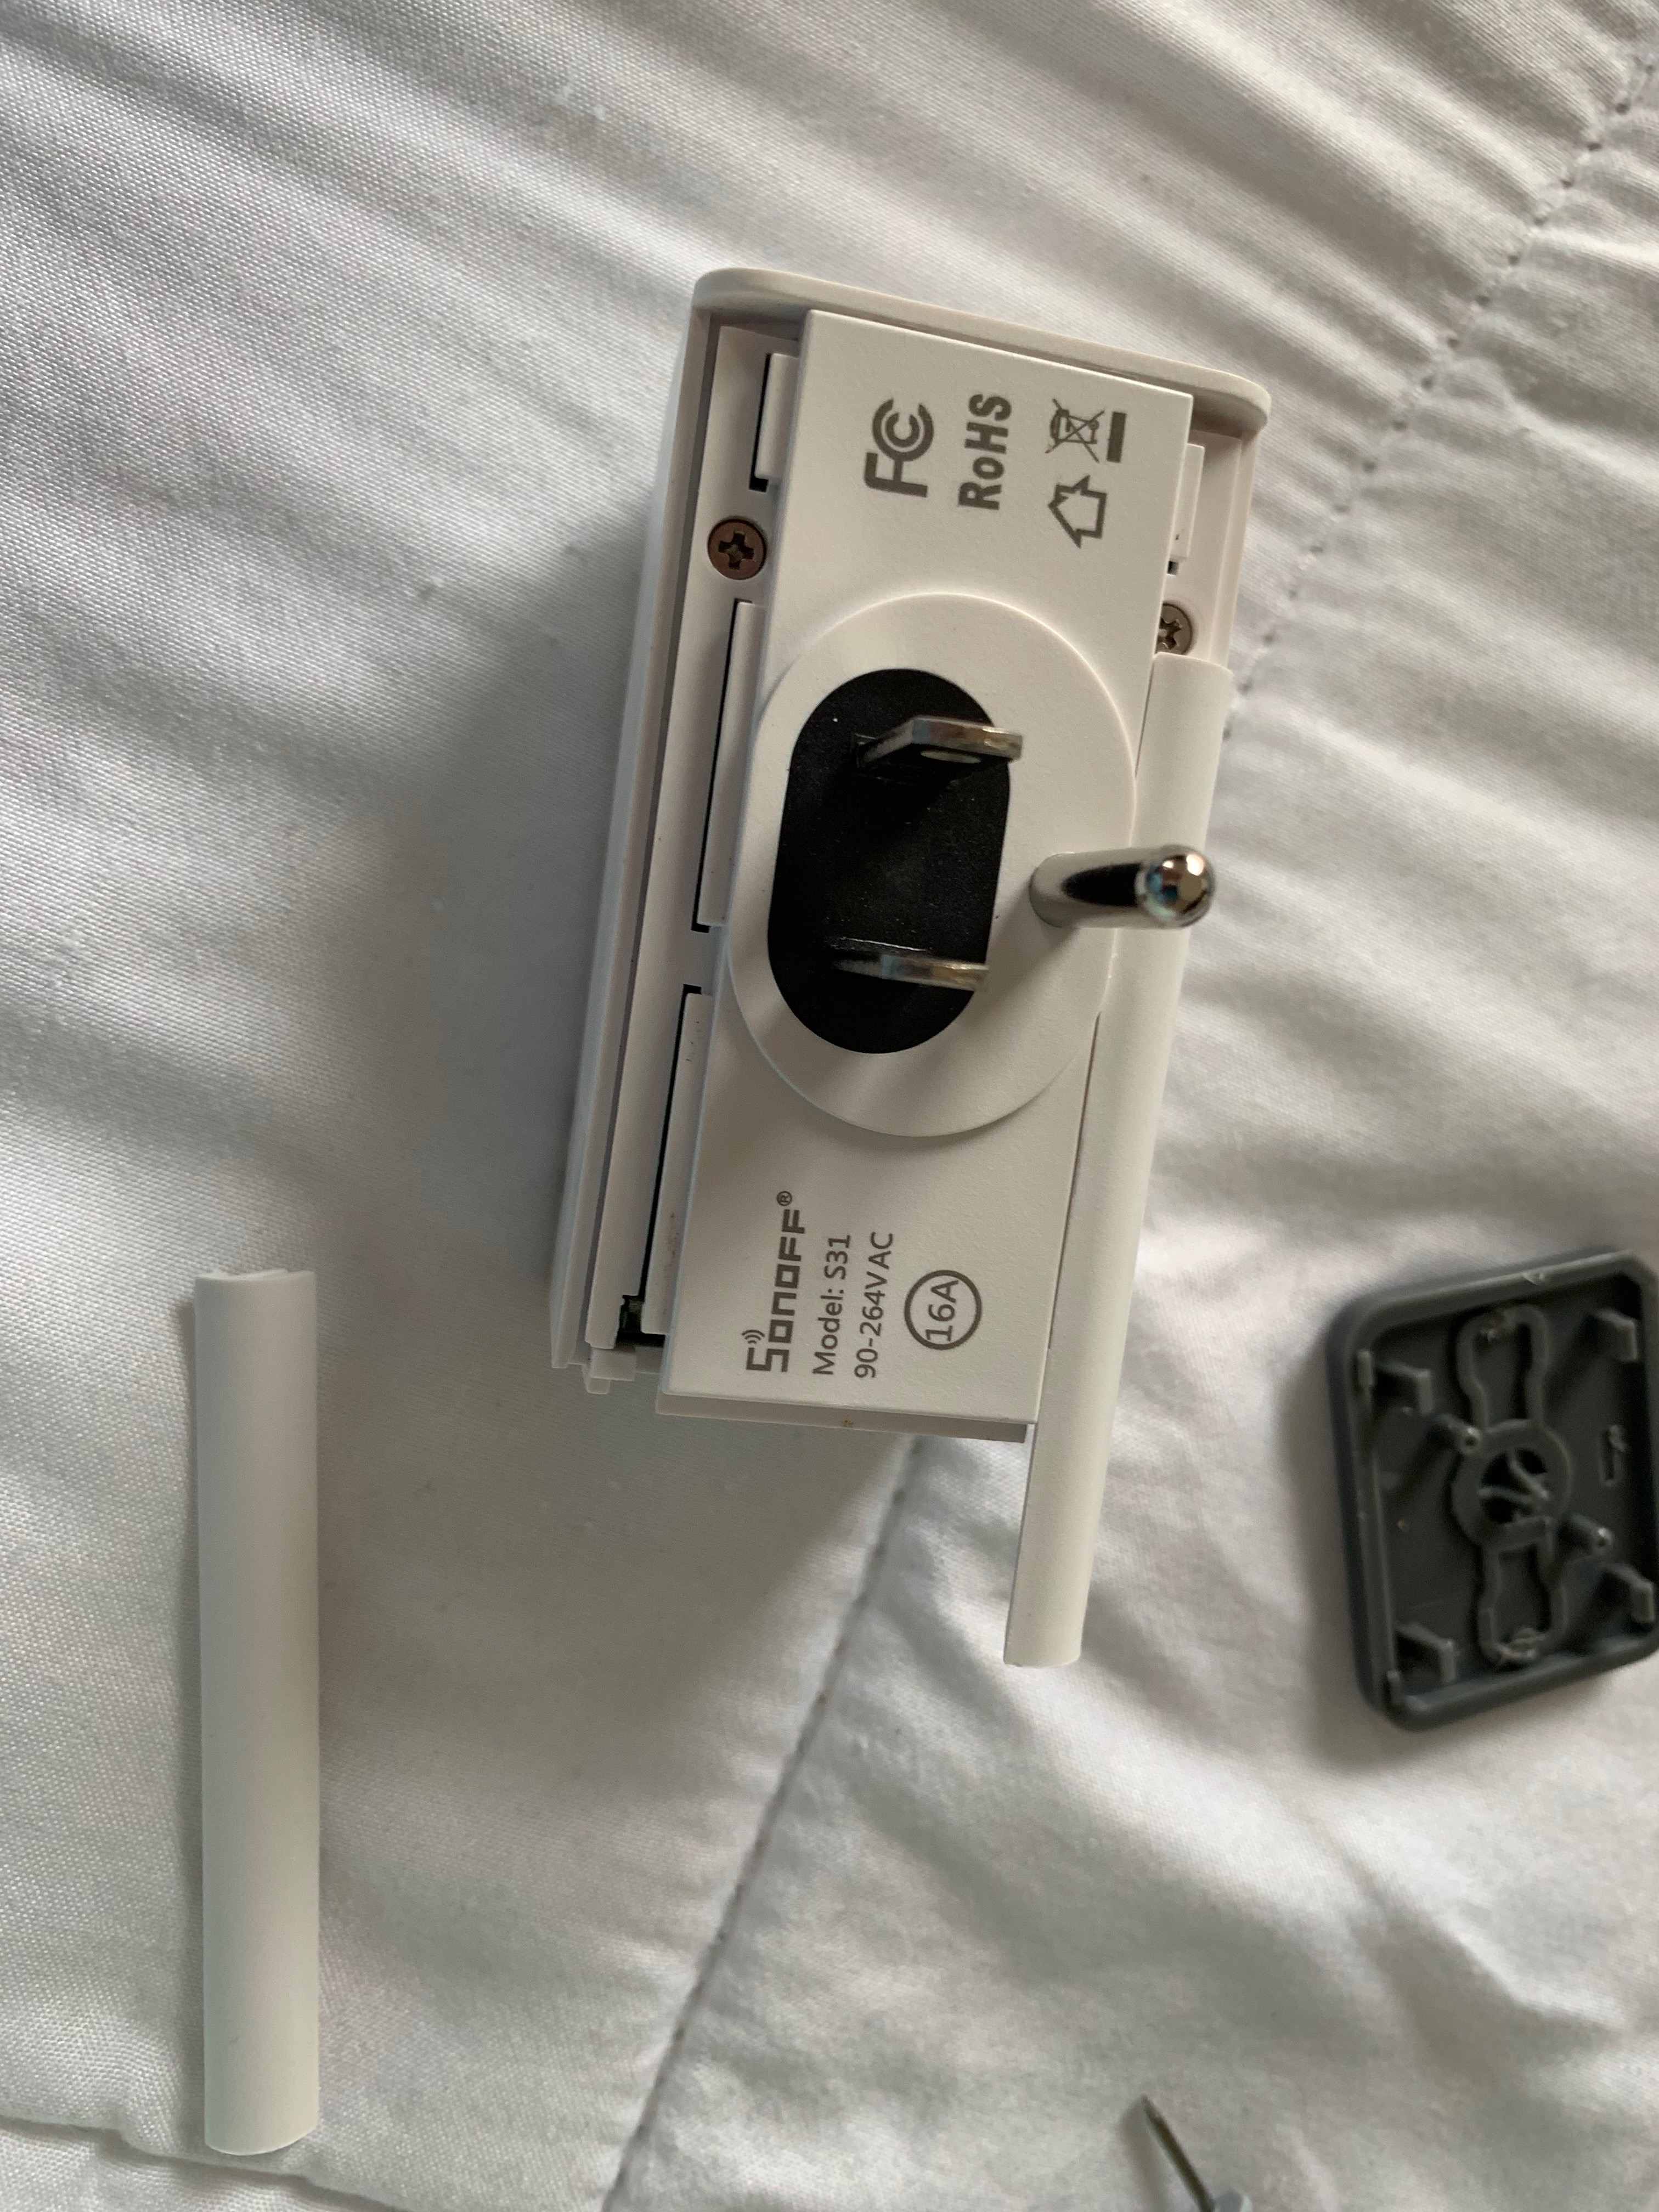
Now remove the three small screws and lift out the board.
The board on the end is what we want and we want to solder breadboard wire leads on to the following terminals:
- Vcc
- TX
- RX
- Ground
Start out by sticking your soldering iron on those four pins, one at a time and feeding in a tiny amount of solder. This will make it super easy to temporarily attach your wires.
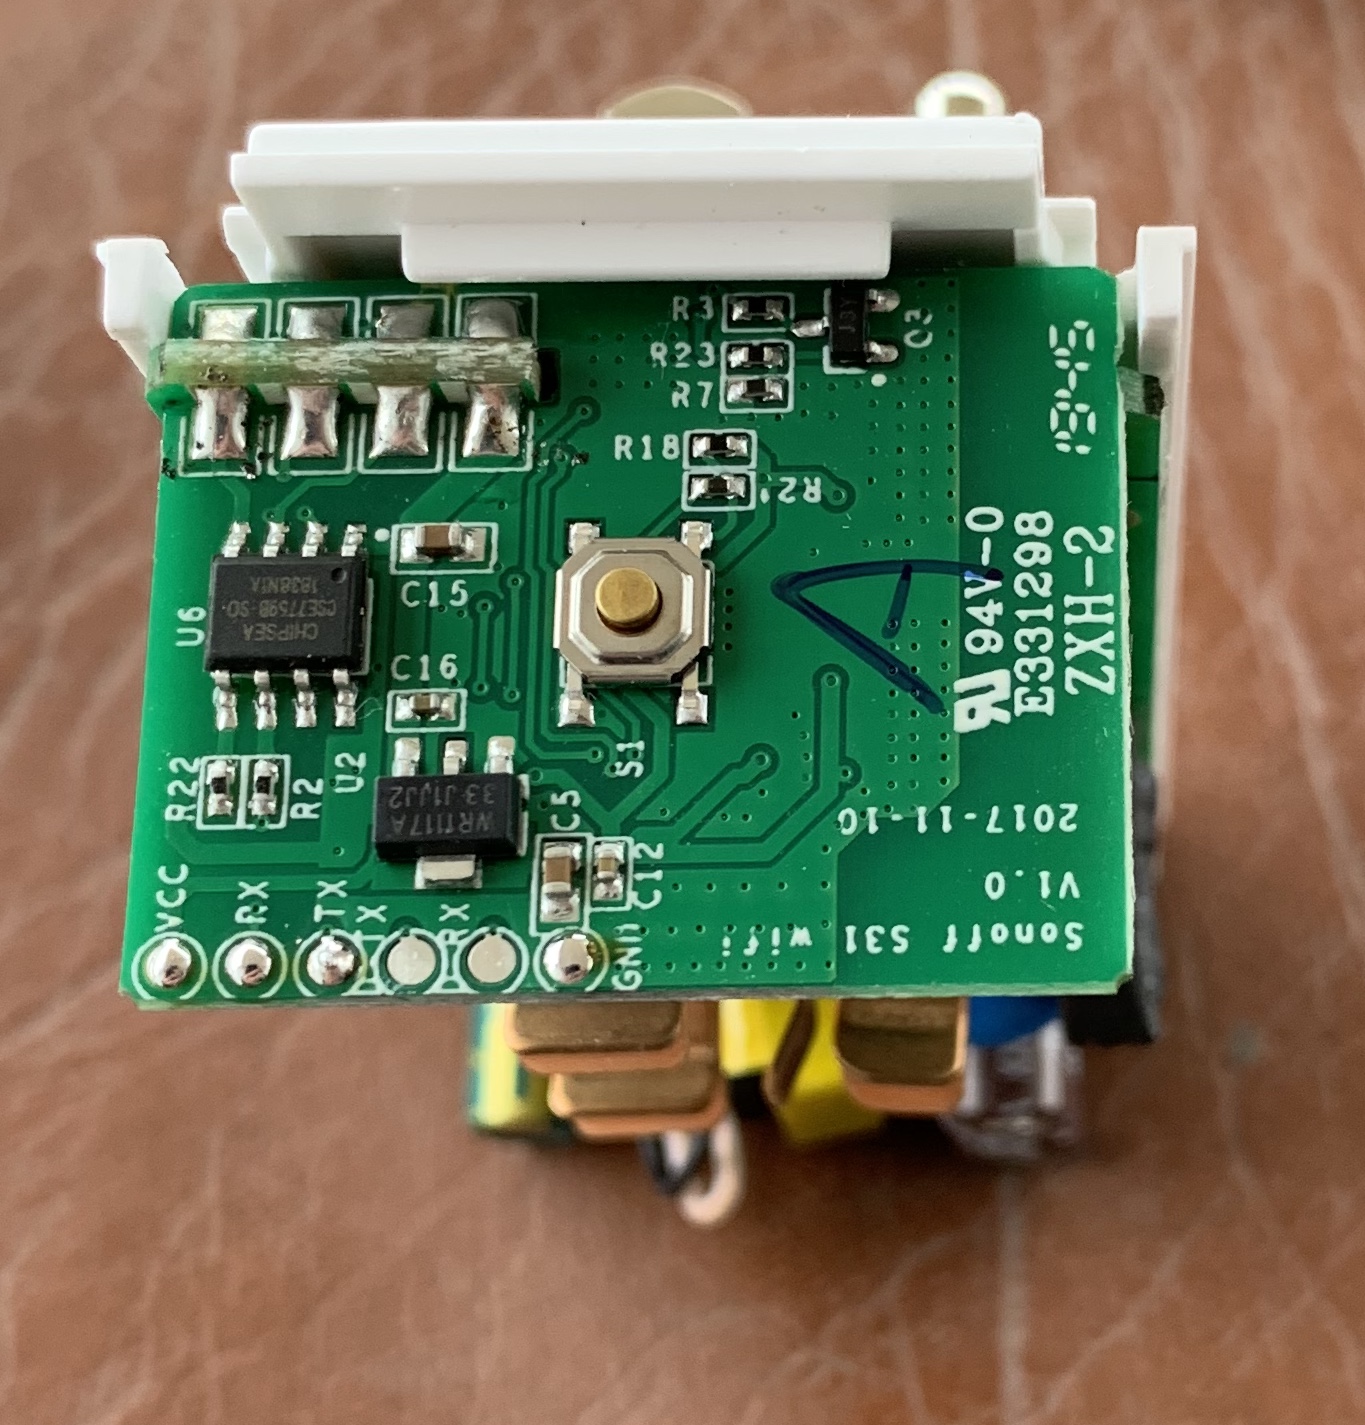
Dab of solar on Vcc, TX, RX, Ground
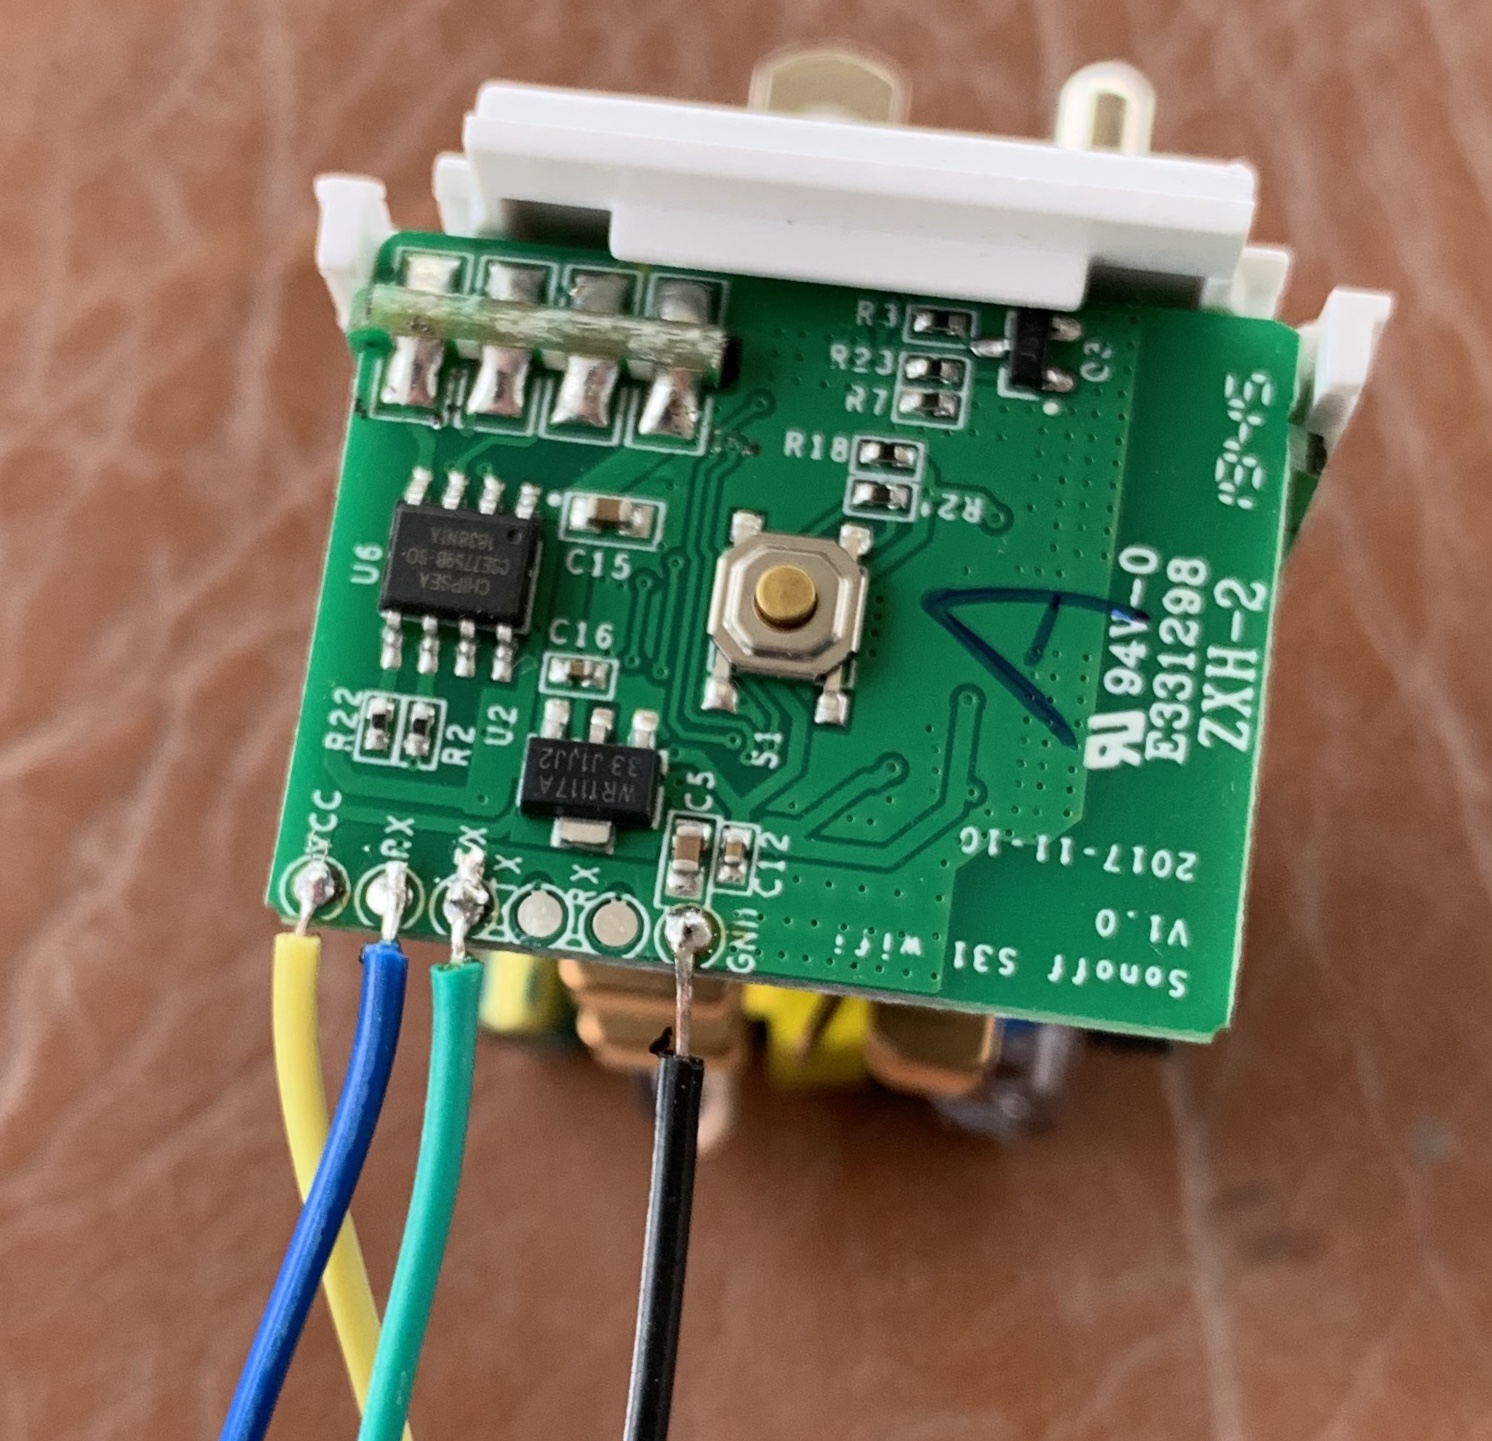
I’ve taken some breadboard wires and cut one end off leaving a female end attached. Then strip the other end and lay them right on top of the middle of the solder blob and just touch it with your hot soldering iron. Not even hardly a second. It will melt right in and hold.
Now hook this to your programmer. There is only one catch. You have to swap the TX and RX. If something is transmitting the other end has to be set to receive. If you hook Tx to Tx and Rx to Rx nothing will happen. Just make sure they are flipped on the controller.
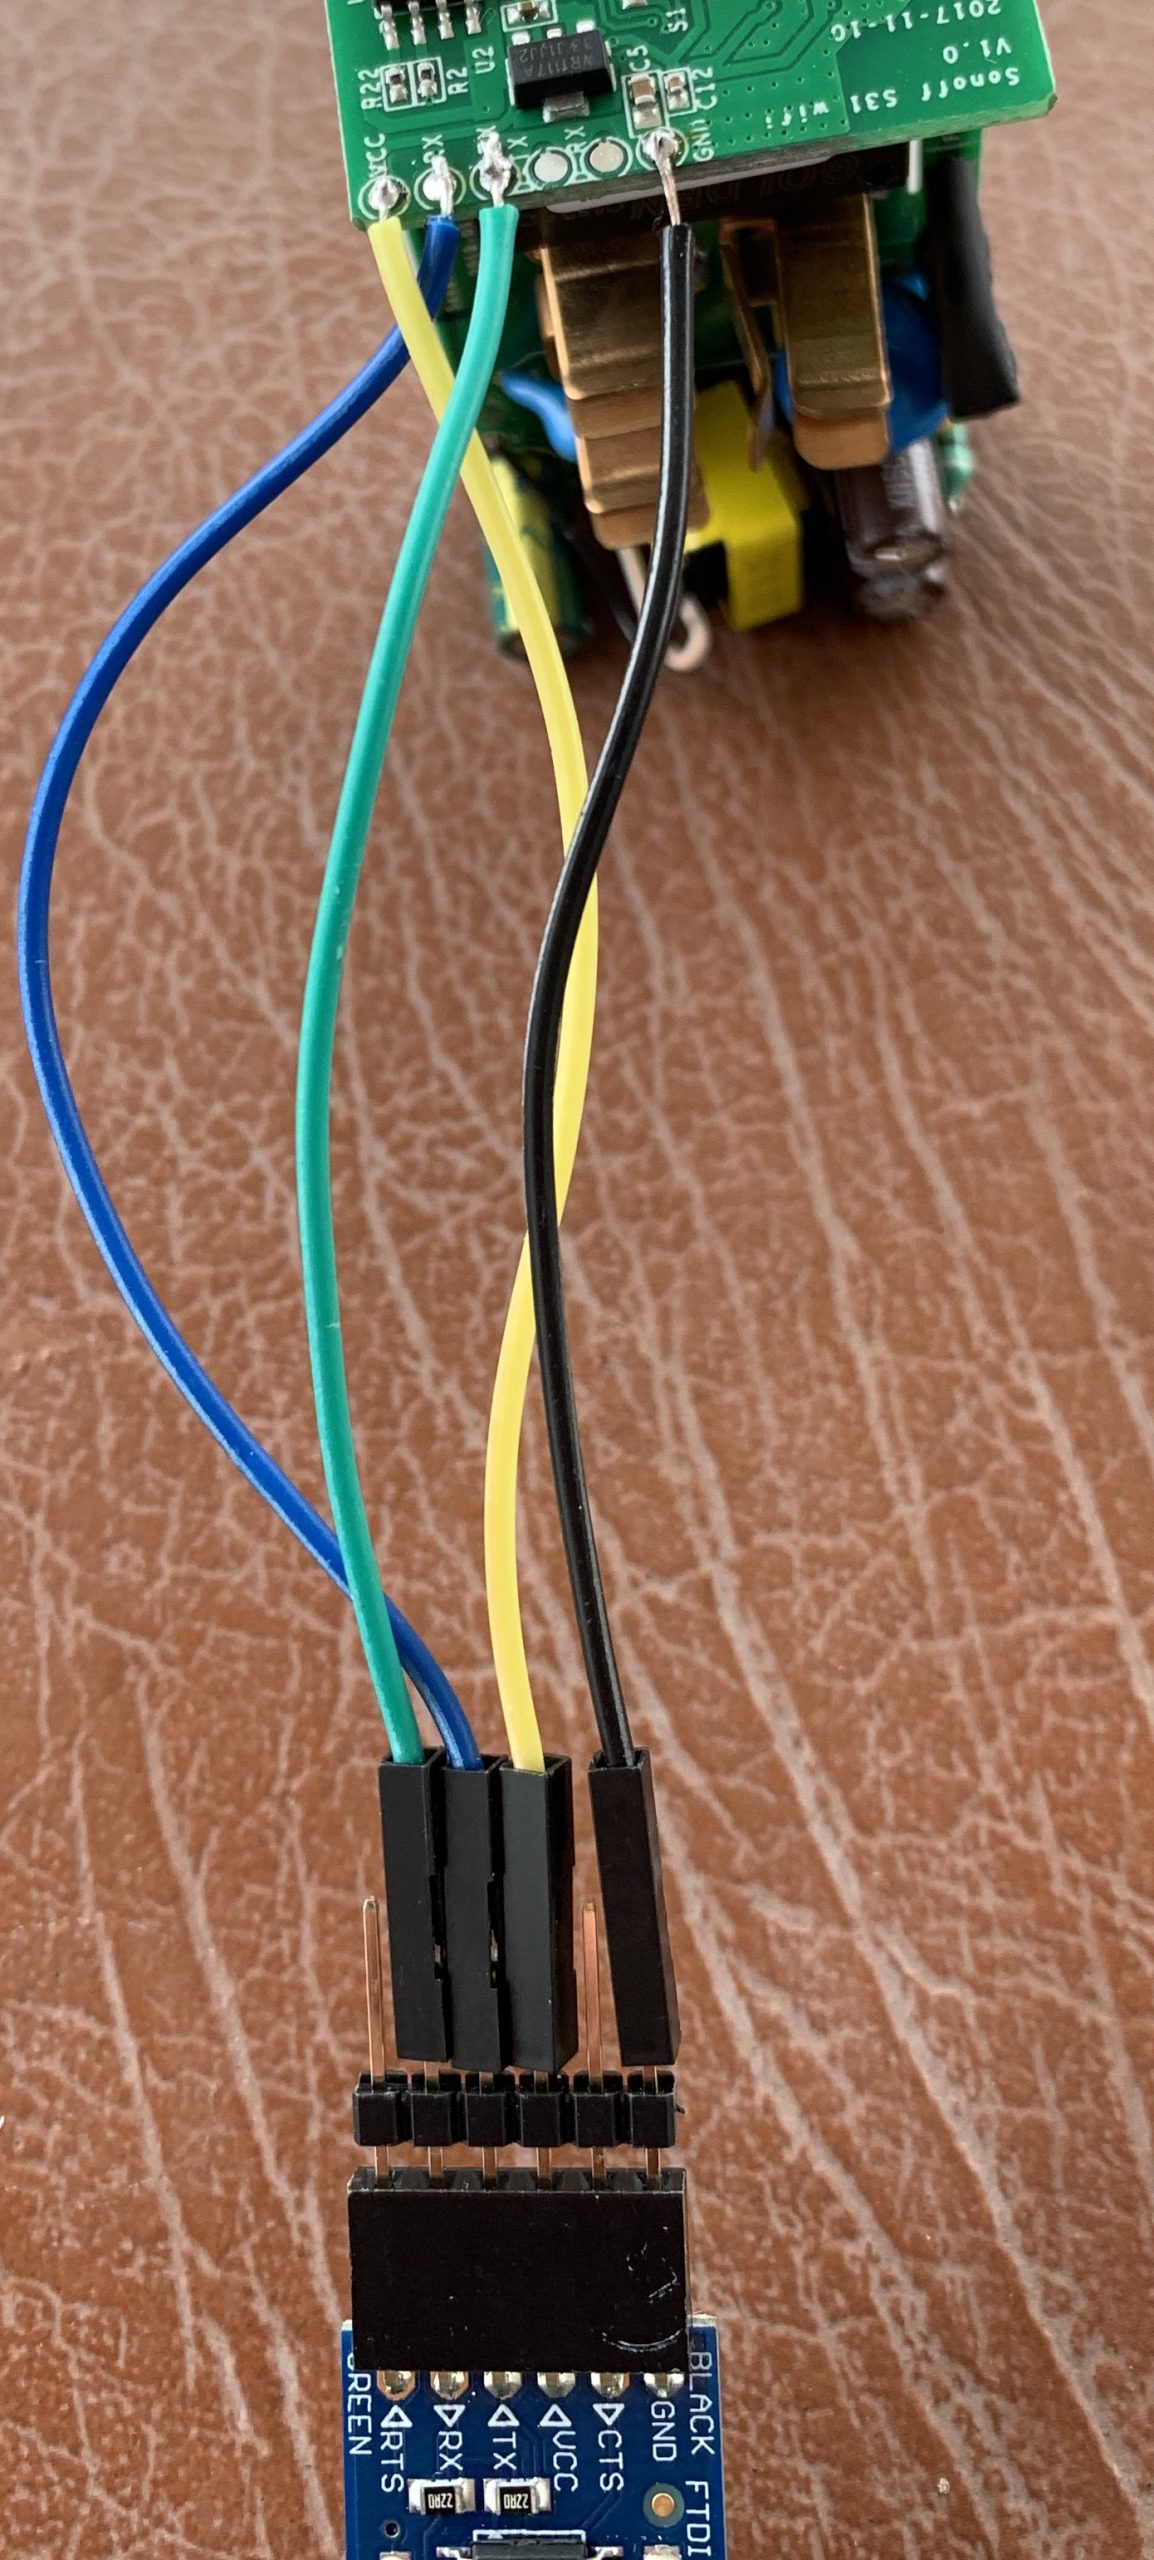
Sonoff S31 wired to FTDI programmer
Now plug your FTDI into your USB port on your computer. While you plug it in hold down the button on the Sonoff S31 board. You can see it prominently in a couple of the pics above. Soon as you plug it in you can release the button. This puts the Sonoff in programming mode.
Now open Tasmotizer.
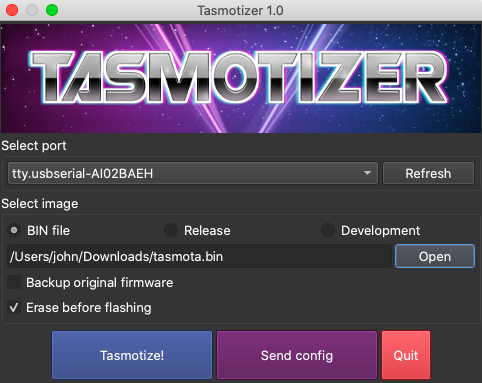
Tasmotizer on MacOS
It should auto detect your USB port.
Also note that the radio button for “BIN File” is selected and that the link to the “Tasmota.bin” file is selected.
Now it is just a matter of pushing the “blue Tasmotize!” button on the bottom of the program. Should just take a moment to erase the flash memory and to write the new Tasmota firmware.
Once flashed it will tell you to restart the device. Simply unplug the USB and plug it back in. It will create a WiFi Hotspot.
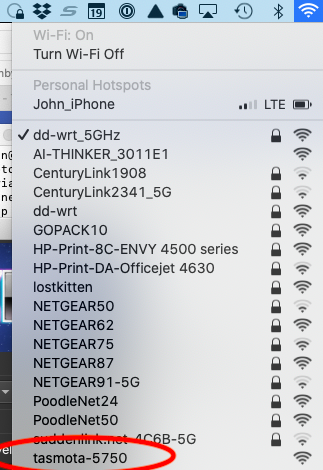
You need to connect to the network called “Tasmota-5750” although every time you flash one of these the numbers will be different.
As soon as you connect it will pop open a box asking you for your wifi credentials.
Sorry I didn’t get a screen shot of that.
So you put in your wifi SSID and password and then click “Save”
The Sonoff S31 will reboot and connect to your wifi network.
Now you need to FIND the device IP address on your wifi network. That sometimes is no fun. You can log into your wifi router and look for a DHCP device called “Tasmota-5750” or use a program called Lan-Scan or any other number of network tools. Once you find the IP address simply type it into a browser.
As soon as you get into the device it will think it is a generic Tasmota device. You have to click on the button that says “Configuration” on the main screen and then on the next screen “Configure Module”. After that select “Sonoff S31 (41) from the dropdown list and save.
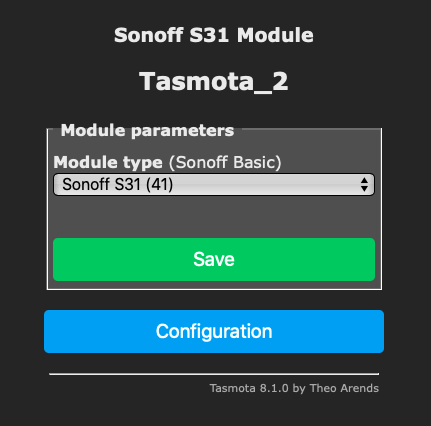
It will look like this although my screenshot didn’t get to the bottom.
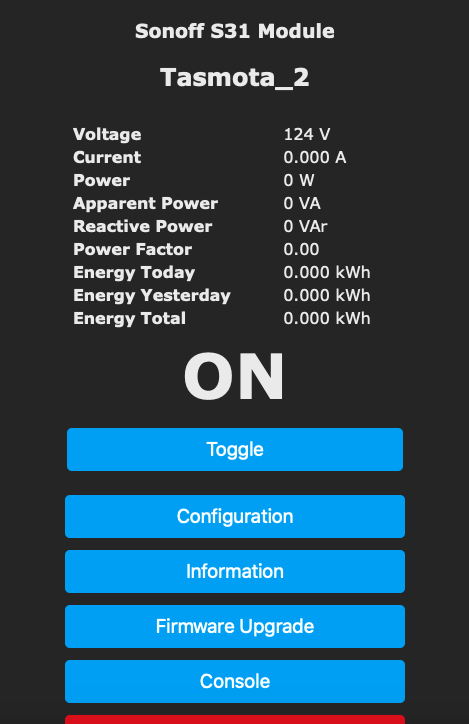
Tasmota on Sonoff S31
You can now begin power monitoring.
There is a calibration procedure for the outlet which you can follow although in my estimation once you tell the device the correct voltage it is seeing that everything else is close enough.
I do however run through the whole calibration produce. I hook a lamp with a 60 watt lamp up and use that as a known load.
Works like the proverbial champ. The calibration procedures are here:
https://github.com/arendst/Tasmota/wiki/Power-Monitoring-Calibration
Okay, it is a little detailed and of course the S31 is designed to be used with the EWELink right out of the box. You don’t HAVE TO DO ALL THIS. You just WANT TO DO ALL THIS. Because we don’t trust Chinese servers and Chinese software on our networks.
Electrical system health and efficiency, Equipment monitoring, these are crucial things to monitor when one wants to monitor power. I use home energy monitor named OHM Assistant. This helps me with these exact two things. Many people ignore checking their appliance health and efficiency, leading to increased power bills. I liked your article. if someone want to save power or wants to monitor power using a DIY product.
Thank you for posting a concise and helpful guide to exploring the Sonoff S31 for using as an energy monitor. I would like to dip my toes into embedded hardware capable of measuring usage and then publishing the data over standard protocols.
You’ve made me a happier hacker!