
We all know what 3 way switches are even if we don’t know what they are called. It is a light that has 2 switches, like at the top and bottom of the stairs. What I did here was to wire up two smart switches that are not 3 way switches in a 3 way configuration.
BIG DISCLAIMER
FIRST OF ALL LET ME SAY THIS ISN’T MY DOING. I HAD TO HAVE MY HAND HELD DURING THE ENTIRE CONFIGURATION OF THE SWITCHES BY THE COMMUNITY AT DIGIBLUR’S DISCORD CHAT ROOM. THEY ARE THE GENIUSES. I’M MERELY DOCUMENTING THIS PROCESS FOR POSTERITY.
If you have any interest in Home Automation be sure and check out the YouTube Channel of Digiblur and his Discord chat room. Great resource. Let’s get to the switches!
My old house had a lot of Zwave stuff in it and Cloud devices like light bulbs. I used Tasmota for a few things but when I moved into this new house I’m trying to keep it as local controlled as possible with maybe the exception of Nest a couple million dollar Lifx light bulbs. Things have changed in the last few years since I automated my house and there is lots to learn again.
Anyway, I put in one switch for the kitchen island lights and when I added it there was a traveller in there. I went to every freaking switch in the room trying to find the other side. I COULD NOT FIND IT. So I disconnected it. The switch worked AWESOME. The switch I used was the Martin Jerry Dimmer
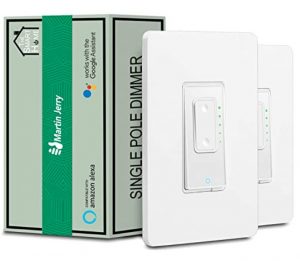
Martin Jerry Dimmer
These can be flashed with Tasmota which is an Open Source firmware with LOCAL CONTROL.
No Cloud.
No talking to servers in China. No goofy Developer API’s to load in Home Assistant.
Tasmota delivers a layer of trust back in Home Automation.
Anyway, sure enough a day later I’m screwing around and find the other switch. When I flip it, the island lights go out, along with every other light in the kitchen when the breaker tripped. (As it should have.)
So now I have some options. I can put a switch lock on the offending 2nd switch.
You no el throwa the switch
Or I can get a proper 3 way switch. When I went to ask the fellas over at Discord they said, “Why don’t you hook your other smart switch up?” Also I don’t think you can flash Tasmota on that 3 way switch. Maybe you can, I dunno but the Googler wasn’t spitting out enough information for me to drop $50 on a chance.
My mind immediately pictures a small kitchen fire by using 2 single pole switches in a 3 way configuration. Remember, I’m an electronics guy and I worked in my career in a very unbending world of configuration control working on Aircraft Carrier and Shorebased Aircraft Landing Aid systems. You replaced a 3 way switch with THE SAME 3 WAY SWITCH. It just wasn’t the way I was trained.
Digiblur sends me a pic that shows the red traveller wire disconnected.
And I wasn’t sure what to do with the Traveller wires. There are two. A red one and a black one. So my mind is in this loop of “should I do this or not” and “we’re ditching an entire traveller wire here and using single pole switches”.
Then I really got to looking at the pic. It’s safe. And it’s kind of brilliant.
- Switch one is hooked only to power (black and white).
- The Load wire is NOT used on Switch 1. Cap it off.
- The black traveller goes to Switch 2.
- Neutral is connected on both switches.
- The load of switch 2 is sent to the light hot.
- Both switches of course get grounded.
Wiring 2 MJ Single Pole Switches in a 3 way configuration (click pic to enlarge)

Here is the cool part. Because the lights are smart you can synchronize them in Tasmota by using Device Groups. While they function individually, they also work together. In a typical home 3 way circuit, you flip one switch and the other one doesn’t move. With device groups the switches both turn on, turn off and display the same LED status. Cool, huh?
In Tasmota configure both switches like this:
PWM Dimmer (Module 73)
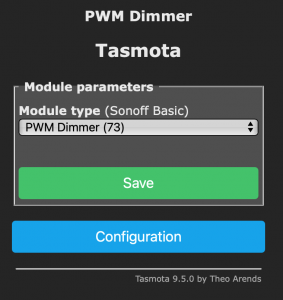
Once it reboots you can add MQTT brokers and stuff but I don’t think it is necessary to do this.
Once your module 73 is set go to the console and turn the Device Group Option on BOTH SWITCHES
so85 1
Confirm that it turned on.
Now you need to give your Device Group a name ON BOTH SWITCHES
devgroupname1 islandlights
I named mine “islandlights”. You can name yours anything but it must be EXACT on both devices.
Both switches worked in sync. Then about an hour later I noticed that one was displaying 4 LED’s and another was displaying 2 LED’s. Then when I would open both Tasmota consoles and refresh the page they would then display the same.
Digiblur suggested I enable the WebLog 4 function which spews out more log info. Nothing was amiss. Packets were sending and receiving……..nothing was dropping. A real head scratcher.
A couple guys helped me out and ultimately I decided that there were 2 switches which were auto-discovered by Home Assistant doing the same job. With the Tasmota Integration in Home Assistant anything added to MQTT is auto discovered. Maybe Home Assistant and the switches were banging heads. I disabled one of the entities in Home Assistant and SON OF A GUN it started working in perfect sync.
Another thing to take note of is the dimming range. I bought some fancy new dimmable 60 watt (equivalent, ha!) lamps and they do not even show a glimmer of light until they hit 47%. at 49% the LED segments seem to actually be lit up. So basically that means that if you ask the Alexa-nator to turn them to 50% they are really at the dimmest part of their range.
Enter the Tasmota command……………dimmerrange
Go to the console and type
dimmerrange 49
Now suddenly your LED’s adjust to use the range between their actual minimum and maximum. Cool trick!
I’ll say this one more time. Digiblur and the fellas walked me through this whole thing. I didn’t have a clue that Device Groups even existed much less what they could do if I did know they existed. The only thing I figured out was that both switch entities seemed to be fouling up the LED display status.
The Tasmota project is AWESOME and the reverse engineer bubbas over at Discord are the shit and they’ll help you!