OP25 Digital Decoder Revisited
About 5 years ago I was DETERMINED to figure out a digital voice decoder software program called OP25. It literally took me a year to figure out how to do it. I’d work on it for a day or two then give up. Then try again a week or three later. Then one day I heard the crackle of a police call over my speaker. It was at that moment I decided to take what I learned and wrote a dummies guide about it. To this day, it is still the blog that gets the most hits, and attention. And that blog is mostly still relevant. It pretty much works in the same way.
Just last night I took my old OP25 installation and noticed that it was on Raspberry Pi OS “Buster”. I tried to upgrade it to the current distribution code named “Bullseye” and things rapidly began going south. Before I fouled it up too bad I downloaded 4 files:
- op25.sh – a script file I made to launch the program
- trunk.tsv – a file that tells OP25 what Frequency and NAC to listen to
- newbern.tsv – my local configuration for the police talk groups here
- viper.tsv – the NC statewide talk groups
I decided to start fresh and within about 20-30 minutes I had a fresh installation of Raspberry Pi OS and OP25 running. I think I can streamline my installation process a bit more.
Dislaimer
I have absolutely nothing to do with the development of OP25. I’m just the guy who wrote the dummies guide on it. And I’m doing it again.
Installing OP25
This blog assumes you have a clean installation of Raspberry Pi OS. I use the full 64 bit desktop installation, and I enabled VNC server in raspi-config which makes things MUCH easier during configuration. Installing OP25 is EASY. Also you MIGHT want to install Libre-Office. I don’t think it is 100% necessary but it might make things easier. It takes just a few commands:
sudo apt-get update && sudo apt-get upgrade -y
sudo apt-get install libreoffice
git clone https://github.com/boatbod/op25.git
cd op25
git checkout gr310  #this may or may not be necessary
./install.sh
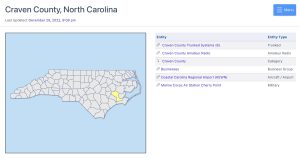
After you run the installer script go take a break. It takes maybe 10-15 minutes to install. Once it is done you need to gather some information. Head over to radioreference.com and go to the Frequency Database map. I’ll be demonstrating with New Bern Public Safety in New Bern, NC, Craven County.

RadioReference.com Freq Database
NOTE: Life is easier if you have an account and even easier if you have a paid subscription to download the files you need in a spreadsheet form. You can still do this without it but it is a lot more tedious.
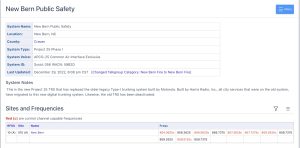
Now I will navigate to the trunked systems and look for “New Bern Public Safety”.

New Bern Public Safety
What we first need to do is find the frequency of our Control Channel.

Frequency
The ones in red are Control Channels and ONE OF THEM is what we need. If you are lucky there is only one. If you are not lucky you have to figure out which one you need. Since you have an RTL-SDR already you can fire up a program such as SDR+ or GQRX to find what the active control channel is. Here’s what it looks and sounds like.
[kad_youtube url=”https://youtu.be/KtWhSuAL1_Q” ]
Once you have found your Control Channel you can start the fun. Be sure to write down or remember the frequency you found.
Running OP25
Simple. Run these two commands:
cd op25/op25/gr-op25_repeater/apps
./rx.py --args 'rtl' -N 'LNA:47' -S 25000 -f 856.7375e6 -o 17e3 -X
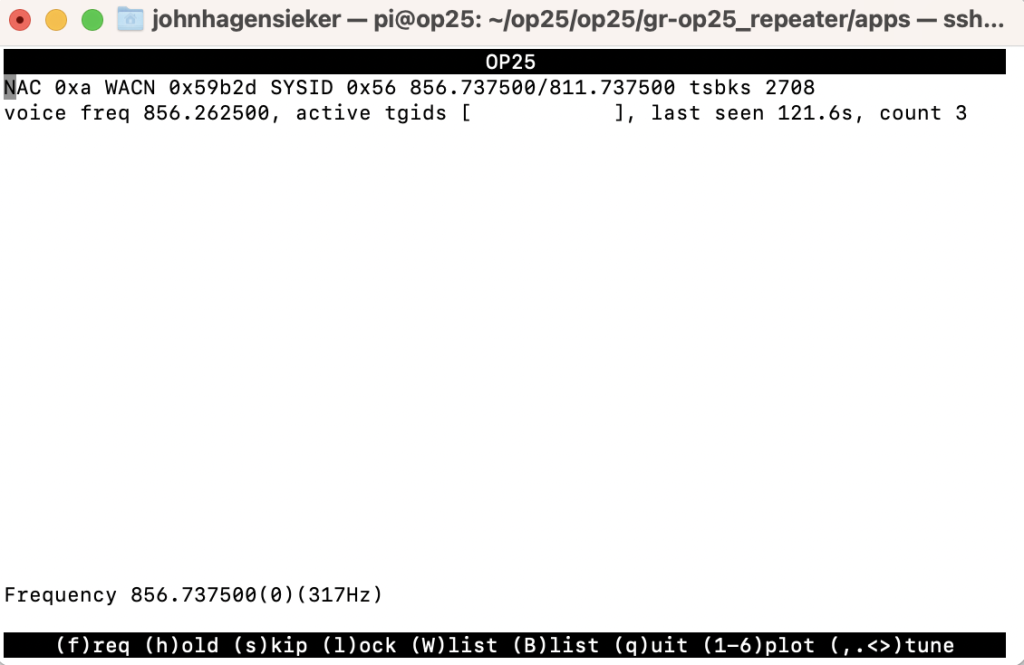
Note that my Control Channel ended up being 856.7375. Yours is probably going to be different. (Unless you live in New Bern). Here is what SHOULD happen:
Obtaining the NAC (click pic to enlarge)
Note the NAC number on the top left. Copy that down. You need it. Mine is 0xa (that’s a zero). Remember earlier when I said to enable the VNC server? VNC into your Pi and navigate in the File Manager app to :
/home/pi/op25/op25/gr-op25_repeater/apps
Then open trunk.tsv. It will open with Geany unless you installed LibreOffice. If you are a newbie to this, just install LibreOffice. Change your frequency and NAC to reflect your system. For the TGID section I called it newbern.tsv We need to make that file.

Trunk.tsv in Geany
Clearly it looks better organized in LibreOffice. Be sure to save the file as a CSV after you make the changes.

Trunk.tsv in LibreOffice
TGID’s
Now you need to make that newbern.tsv file and upload it. I’ll make video showing an easy way I found to do this. There are probably 10 different ways to do this but this is the easiest, in my opinion. I’m on a Mac using CyberDuck, but you can do this with Windows and Putty just as easily.
[kad_youtube url=”https://youtu.be/MVfWDPUvBfI” ]
If you can’t get the spreadsheet files you can manually input them via cut and paste. Just make two columns in your spreadsheet and input the same data manually as I did in the video. Upload it the same way.
Progress So Far
So far we have:
- Installed OP25
- Made our trunk.tsv file
- Made our TGID file
Now let’s get some sound out of this thing.
Running The Command
First cd to the apps directory
cd op25/op25/gr-op25_repeater/apps
Now here is my command:
./rx.py --args 'rtl' -N 'LNA:47' -S 25000 -q 0 -O hw:2,0 -f 856.7375e6 -o 17e3 -X -T trunk.tsv -V -2 -U 2> stderr-stream0.2
Here is a brief explanation of the commands. The python program rx runs our OP25. We are using an RTL-SDR device and our LNA gain is set to 47. Dash S is the Sample rate. Try 25000 or 250000. Dash q is the drift of the rtl dongle. If your rtl is off a little you may have to tweak the dash Q setting. I find that with newer rtl’s this isn’t necessary. Dash O is the output device. If you leave this section out the output will be the audio jack on the Pi. I specifically set mine to use a USB digital to analog converter. This is optional.
Dash F is the frequency. Dash little o is the tuning offset frequency. Not sure about dash X and dash T tells OP25 to use the trunk.tsv file. Everything after that is voice Codec stuff.
Script File
You can make a script file so you don’t have to type out all these long commands.
sudo nano op25.sh
Type in this
 #! /bin/sh

cd /home/pi/op25/op25/gr-op25_repeater/apps

./rx.py --args 'rtl' -N 'LNA:47' -S 25000 -q 0 -O hw:1,0 -f 856.7375e6 -o 17e3 -X -T trunk.tsv -V -2 -U 2> stderr-stream0.2
Finally
chmod +x op25.sh
Now you can launch the program by typing
./op25.sh
Voila
Finished
At this point you should have a functional OP25 installation outputting sound to an external speaker or a set of headphones. Whichever you prefer. If there seem to be any gaps in this tutorial, go back to my original blog post which may have a more detailed explanation.


Pingback: GMKtec NucBox G3 Review - John's Tech Blog
Great guide and thanks for putting effort into explaining this great tool. How would I program OP 25 into hearing P25 Conventional frequencies? The trunked systems I have around are not very active and all I have are P25 conventional frequencies all around.
This is what I got after trying to install:
Identified GNURadio version 3.10
Installing for GNURadio 3.10 is not supported by this version of op25
Please use git branch “gr310” for GNURadio-3.10 or later
How do I proceed?
git clone https://github.com/boatbod/op25
cd op25
git checkout gr310
./install.sh
John, several years ago I used your OP25 for dummies series to do an install on an old single core pc running Ubuntu 18.x and it has been happily running in the corner ever since. The other night I used this update to do another build on a newer laptop running Ubuntu 24.04.1 LTS and now it too is running flawlessly. As you said in your original document OP25 is hard, and I just wanted to say thanks for holding my hand through each of these installs. I truly could not have done it without your help!
Ian
Wow! Thanks. Glad I helped. All I did was dumb the steps down. Believe me I learned the hard way. Decided to document it because I was certain it would fail or the Pi would fail or the SD card would fail…………
Thanks for the great tutorial, nicely done!
I was using GQRX and DSD+ to listen to my city’s non-trunked (i.e. dedicated frequency) P25 signal, but found it a little flaky. Can OP25 be setup to demodulate non-trunked P25, or does it only work for trunked systems?
thanks in advance.
It should do P25 I and 2 I’ve never tried.
I’ll give it a shot and let you know Thanks!
John, Thank you for this blog. Long time reader, first time commenter. I need to upgrade my broadcastify equipment to prepare for the switch from phase 1 to phase 2 VIPER. What is your ideal equipment set up (Raspberry Pi 5, antennas, SDR, etc.) if you are starting from scratch to implement OP25 for NC VIPER to broadcast to broadcastify?
John I have been running OP25 for 2 months and it is working Great!!
Than you for taking time to write up all the steps.
I used the earlier version of helpful guide to do an install several years ago on a Raspberry Pi 3+.
Today I loaded up a fresh install of the 64 bit Raspberry Pi OS (as I’d previously installed an outdated version and had some random issues not related to OP25) and went to follow the guide again, but am having an issue out that gate that would seem simple…yet I’m struggling with. In fairness, I don’t know python…and am not great with Linux.
When I run rx.py for the first time (as below) I get an error: ‘gnuradio.op25’ has no attribute ‘fsk4_demod_ff’
./rx.py –args ‘rtl’ -N ‘LNA:47’ -S 2500000 -x 2 -f 857.2625e6 -o 17e3 -X
I opened up rx.py and see references to things fsk4_demod, but not with the _ff. Perhaps this is coming from something else being referenced in the script that’s loading packages? I see that op25 is actually gr-op25, and when I go to ~/op25/op25/gr-op25 I find ~/op25/op25/gr-op25/include/gnuradio/op25/fsk4_demod_ff.h. In there I see class OP25_API fsk4_demod_ff, so to me, this has the same name, but why is it not being found or invoked properly?