
Building A Linux Computer For Offline Use
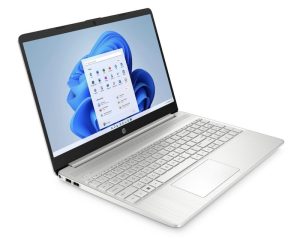
HP 15.6″ FHD 15-ef2030tg for a Linux Computer
I talk a lot about having a computer set up for off grid situations. But let’s build our own Linux computer that we can use both online and especially offline. I’ll try to teach you some valuable tips along the way.
Yeah, yeah, yeah, the picture next to this shows Windows. That’s a stock photo of the laptop I’m using for this project. The HP 15.6″ FHD 15-ef2030tg.
I picked this up for a song and it was so cheap, I believe, because this is a model from 2021 that is probably the last of its stock. It has decent specs though and this thing is IDEAL for a Linux computer.
Quick Specs
- AMD Ryzen™ 5 5500U (up to 4.0 GHz max boost clock, 8 MB L3 cache, 6 cores, 12 threads)
- AMD Radeon Graphics (integrated)
- 8GB RAM (we’ll add more)
- 512 GB PCIe® NVMe™ M.2 SSD (we’ll add more)
- 1 USB Type-C® 5Gbps signaling rate (supports data transfer only and does not support charging or external monitors); 2 USB Type-A 5Gbps signaling rate; 1 AC smart pin; 1 HDMI 1.4b; 1 headphone/microphone combo
- SD card slot
Sadly it is missing a built in ethernet connector but I’ll really only need that during installation just to make the file downloading and updating faster. I have a 2.5GB USB-C adapter here at the house.
NOTE: The only reason I am upgrading RAM is because I have some laying around already. 8GB is enough for this already.
NOTE 2: The only reason I am upgrading the SSD is also because I have an unused one laying around here. Also, I’ll hang on to the original SSD for a year until the warranty expires. That way if the machine dies or something I can slap the original SSD in it and they won’t give me any grief if I return it or send it in for repair.
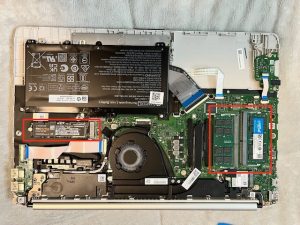
Laptop Upgrades
I now have 32GB of RAM and a 2TB SSD!
Make no mistake though. You DO NOT NEED to upgrade anything here. These specs are solid for a Linux computer.
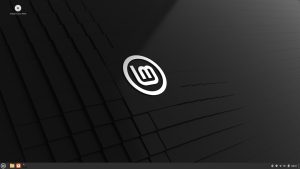
Linux Computer OS Selection
There are hundreds of Linux distros out there. I recommend the website DistroWatch that showcases most of them. If you have a specialty such as ham radio, or science, or intrusion testing or whatever you can find and install distros that are specific to your needs. Over the years I have gravitated to Ubuntu Linux. In this demonstration I’m going to install Linux Mint. It is essentially Ubuntu Linux with some spit and polish applied. Cinnamon desktop is the recommended version and that’s what I’ll use here. I’ve used Ubuntu and Linux Mint for years and find them to be excellent OS’s.
Download your version of choice and then download Balena Etcher. Select your downloaded file in Etcher, point it to your USB stick and click “FLASH”. Once it is done you can remove your USB stick and proceed to installing it on the laptop.

Prep Work Prior To Linux Install
Check for a BIOS Update before you do this. Sure enough mine has an update dated NOV 2023. Guarantee my BIOS isn’t up to date. That means I need to boot into Windows (yuck) to run the .exe file to update the BIOS. Might as well do this. It is the smart play to ensure the latest and greatest compatibility.
I didn’t want to boot into Windows and go through the whole stupid setup routine but again, this is the smart play. There are actually other ways to do this, but this is the easiest. Just suffer through it 🙂
On this particular laptop it is in Windows S mode. That means I had to turn off S mode before the OS can download and install programs from anywhere but the Microsoft Store. Ridiculous. I’m trying to be professional and nice, but Microsoft is a turd and S Mode is the King of those turds.
Live ISO Boot
The great thing about Linux Mint is you can run it from your USB stick before you actually install it. Albeit it takes a bit to load and it runs slowly, but the important thing to note is that you can make sure all your hardware is recognized and the programs you want to install can be tested.
Downside: Whatever changes you make in the Live ISO Boot go POOF if you reboot or do a subsequent install.
But I highly recommend you take the time to do a Live Boot, especially if you aren’t using this exact computer. If you trash Windows and then find out you have some unsupported hardware or software you just created a giant mess. This is another good reason to yank the original NVME SSD drive and set it to the side.
Installation Time
From the Live Boot screen there is an icon in the upper left hand corner to do a proper installation. Double click it to get started.
Live Boot Install
I recommend hooking up to fast ethernet if you can during the install. It isn’t mandatory but it will speed up your install a bit.
Gotchas
This probably falls under the category of “ONLY ME”. I set my laptop to login automatically. Then I installed ProtonMail Bridge (for encrypted emails). ProtonMail Bridge won’t start unless it sees a login keyring and the only way to have that login keyring is to login at every boot.
Gotcha. But not a biggie.
Another gotcha was that the sound worked during the Live Boot but when I actually installed the OS, the sound device never showed up. After much pain and agony I discovered that the module wasn’t loaded into the kernel. I fixed it with:
sudo modprobe snd_hda_intel
This darn computer is turning out to be not as much fun as I thought 🙂
Offline Stuff
Kaffeine
First up I have installed kaffeine which is a TV viewing program for a USB TV tuner. Depicted below is Hauppauge HVR-950Q. You can buy them online for about $60-$70 but you can pick them up used on eBay most of the time for less than $20. I just got one for $16 which is a steal.
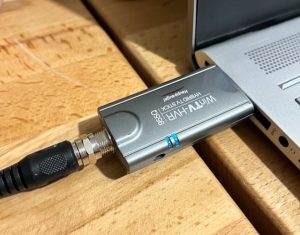
TV Tuner
The tuner needs no drivers under Linux Mint. It just works. You just have to configure the tuner in Kaffeine and have it scan for channels.

Local News Via USB TV Tuner
Nice!
RTL-SDR
An RTL-SDR is a USB Software defined radio. RTL is Realtek which is a chip maker. An RTL-SDR is a radio that can basically listen to ANYTHING. AM, FM, Shortwave, Police, Fire, EMS, Weather, Air Band, Satellites, yes satellites, etc.
You may have never heard of one but you need one in your bug out bag. I recommend the RTL-SDR Blog Version 4. There is a caveat here as you have to manually compile the driver. If you don’t want to do that then get an RTL-SDR Blog Version 3. Regarding both of them, beware where you buy them from because counterfeits are everywhere. My link is good to go.
Version 4 Installation
It’s not as bad as it sounds. Cut and paste each one of these commands one at a time:
sudo apt-get install libusb-1.0-0-dev git cmake pkg-config build-essential
git clone https://github.com/rtlsdrblog/rtl-sdr-blog
cd rtl-sdr-blog
mkdir build
cd build
cmake ../ -DINSTALL_UDEV_RULES=ON
make
sudo make install
sudo cp ../rtl-sdr.rules /etc/udev/rules.d/
sudo ldconfig
echo 'blacklist dvb_usb_rtl28xxu' | sudo tee --append /etc/modprobe.d/blacklist-dvb_usb_rtl28xxu.conf
sudo reboot
Version 3 Instructions
This is easier.
sudo apt-get install rtl-sdr
Software for RTL-SDR
After installing the drivers, download some free software called SDR++ and you can tune into anything (antenna permitting). Since I am running the latest Linux Mint I am using the one named Ubuntu_Jammy. Just double click on the downloaded file and it will open a package manager. Then just click “Install”. Now you can tune in to basically any radio station. Depicted in the pic below is 106.5 FM, a local classic rock station.
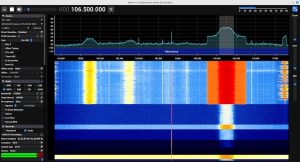
SDR++
RTL-SDR Additional Features
In addition to listening to radio you can quite actually download satellite data from these things. It’s a little more complicated and I won’t go into it here but imagine that the SHTF for real. Nothing down here is working. But the satellites probably are still up there doing their thing. You can actually download audio that creates a weather photo map. I’m no meteorologist, but I can see what a hurricane looks like.
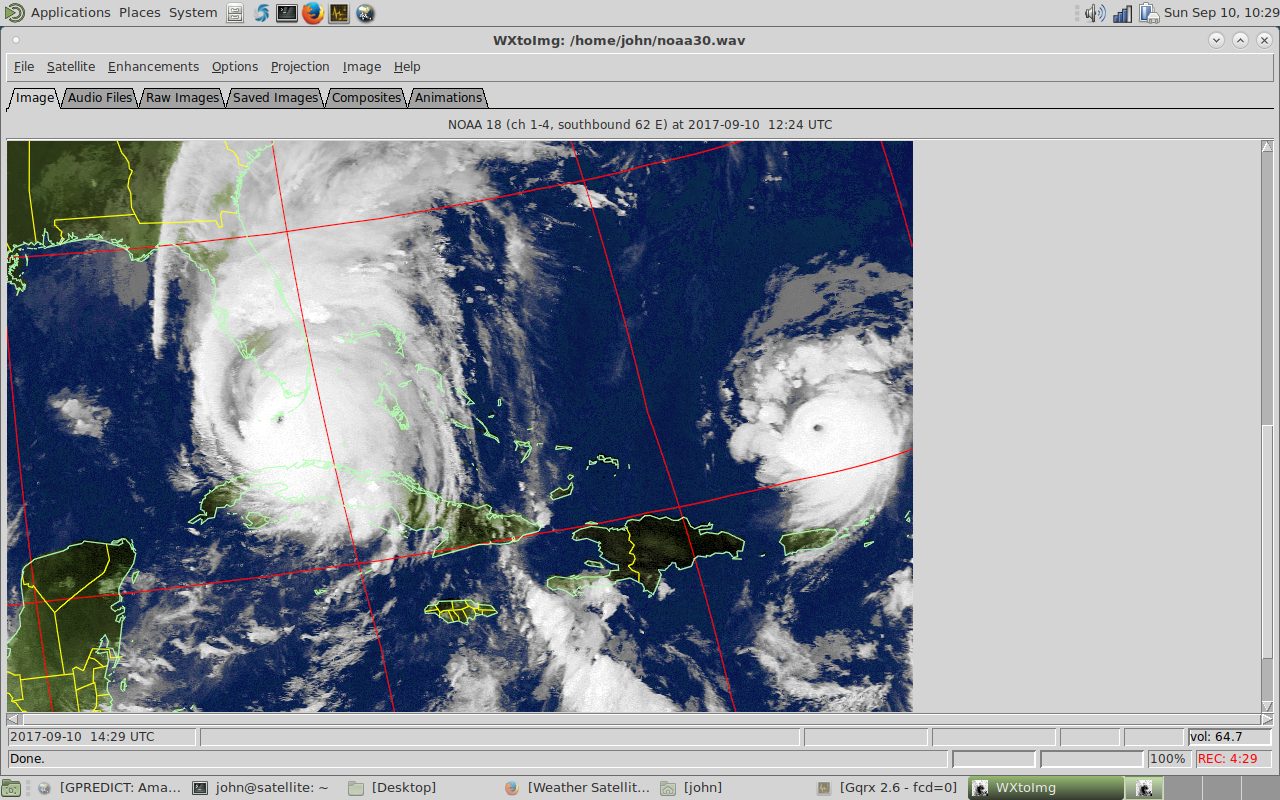
NOAA Image
How cool is that? Pretty valuable information. I created that image by following the satellite signal with a handheld antenna. Takes about 10 minutes and a little patience to keep the signal strong. But file this under “if I can do it, anyone can”. And here is a recent pass of NOAA 19. If I were in a situation that required some outdoor planning I can see that POSSIBLY some precipitation is sneaking up on me from the west starting in northern Mississippi. Hey, it’s just a guess but it is better than no intel at all.

NOAA 19 southbound 64E at 15 Jan 2024 14:15:13 GMT on 137.10MHz, HVCT-precip enhancement, Normal projection, Channel A: 2 (near infrared), Channel B: 4 (thermal infrared)
Additional information about RTL-SDR’s can be found here. It is INSANE and completely not normal what you can do with a $30 USB stick.
GPS or GNSS On Your Linux Computer
Obviously if the grid is down due to a storm or other emergency you might find yourself in a situation where it pays to know EXACTLY where you are. Or where someone else you love is. Also I think people who hike or head into the woods with just their cell phone are nuts. I’m so old school I know how to use a compass. Some manner of GPS device is going to possibly be very valuable to us on our offline Linux computer.
Anyway, as before, if it is bad down here on terra firma, the satellites are probably still working. GPS is the system the United States uses. The EU uses Galileo, and China uses Beidou. Russians have GLONASS. A combination of these systems is called GNSS.
My point here is that it is best to have a GNSS receiver as opposed to just a GPS receiver. I recommend the GNSS USB device, GNSS200L.

GNSS200L
These have authentic U-blox 8030 chipsets in them and have an IP67 waterproof rating. Better than your computer!
It is also a 72 channel GNSS receiver but does not do the Chinese Beidou system. Just GPS, Galileo, and GLONASS.
It also supports WAAS, EGNOS, MSAS. It is also very easy to install under Linux. Just run the command below.
sudo apt-get install gpsd gpsd-clients foxtrotgps
Now let’s check the device name after you plug it in.
ls /dev/tty*
Mine returned a device name of /dev/ttyACM0
If you run this command you will see scrolling NMEA output and if you catch it early enough you’ll see the $GNTXT headers that show that this is indeed an authentic U-blox M8030 chipset.
sudo cat /dev/ttyACM0
$GNTXT,01,01,02,ANTSTATUS=INIT*3B
$GNTXT,01,01,02,u-blox AG - www.u-blox.com*4E
$GNTXT,01,01,02,HW UBX-M8030 00080000*60
$GNTXT,01,01,02,ROM CORE 3.01 (107888)*2B
$GNTXT,01,01,02,FWVER=SPG 3.01*46
$GNTXT,01,01,02,PROTVER=18.00*11
$GNTXT,01,01,02,GPS;GLO;GAL;BDS*77
$GNTXT,01,01,02,SBAS;IMES;QZSS*49
$GNTXT,01,01,02,GNSS OTP=GPS;GLO*37
$GNTXT,01,01,02,LLC=FFFFFFFF-FFFFFFFF-FFFFFFFF-FFFFFFFF-FFFFFFFD*2F
$GNTXT,01,01,02,ANTSUPERV=AC SD PDoS SR*3E
$GNTXT,01,01,02,ANTSTATUS=INIT*3B
$GNTXT,01,01,02,PF=3FF*4B
Real deal. There are a ton of counterfeit U-blox chips out there. This is NOT one of them. It got a 3D lock indoors on a cloudy day in about 30 seconds. Now let’s set up the gpsd file.
sudo nano /etc/default/gpsd
This is a good minimal configuration that works.
  GNU nano 6.2 /etc/default/gpsd
# Devices gpsd should collect to at boot time.
# They need to be read/writeable, either by user gpsd or the group dialout.
DEVICES="/dev/ttyACM0"

# Other options you want to pass to gpsd
GPSD_OPTIONS=""

# Automatically hot add/remove USB GPS devices via gpsdctl
USBAUTO="true"
START_DAEMON="true"
That’s it. You can type “foxtrotgps” and it should grab your location. It does pull mapping via the internet, at least the first time for your general area.

FotTrotGPS
CHIRP For Programming Hand Held Radios
Chirp is some really useful software for programming amateur radios. A lot of local ham repeaters not only have to have the frequency set, they also need a tone, and an offset frequency set. Depending on the repeater there can be more settings. Applying them via the menu on a walkie talkie is a disturbing task at best. Essentially, you download the published frequencies in your local area and simply “Upload To Radio”. I do it every time I go camping somewhere. Takes a minute or two tops to program everything.
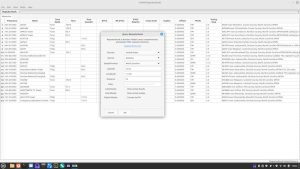
CHIRP Radio Programming Software
Once you have that data you just hit upload after connecting the radio. Man I love CHIRP. If you aren’t an amateur radio operator this probably doesn’t apply.
Final Thoughts On Offline Linux Computer
I only had one real challenge here, notably with Linux and the sound not working. That is typically not the norm. Other than that things went pretty smooth. Now when the internet goes down you have a device where you can:
- Watch local, over the air TV
- Listen to the radio
- Have a weather radio
- Get your GPS position with mapping
- Program amateur radios for local communications and emergency communications
- Store files, manuals, books, movies, music, etc.
One thing I didn’t cover much was satellite communications. Using a program called GPredict I can follow satellites passes overhead. Then using an RTL-SDR and an antenna tuned to 138 MHz roughly I can download the audio from the signal the satellite is transmitting. Once you resample that audio it makes a picture (think Fax machine). A picture from space of the earth. If things are down for a while think about how valuable it would be to take a picture of weather conditions daily or even every few hours. You’d know whether to take shelter or not. Potential life saving information.
And that’s what I’m trying to demonstrate here. Your computer CAN be used offline and your computer can help save your life. Or at least keep you informed of what is going on around you.