
ACMER P1 10 Watt Laser Review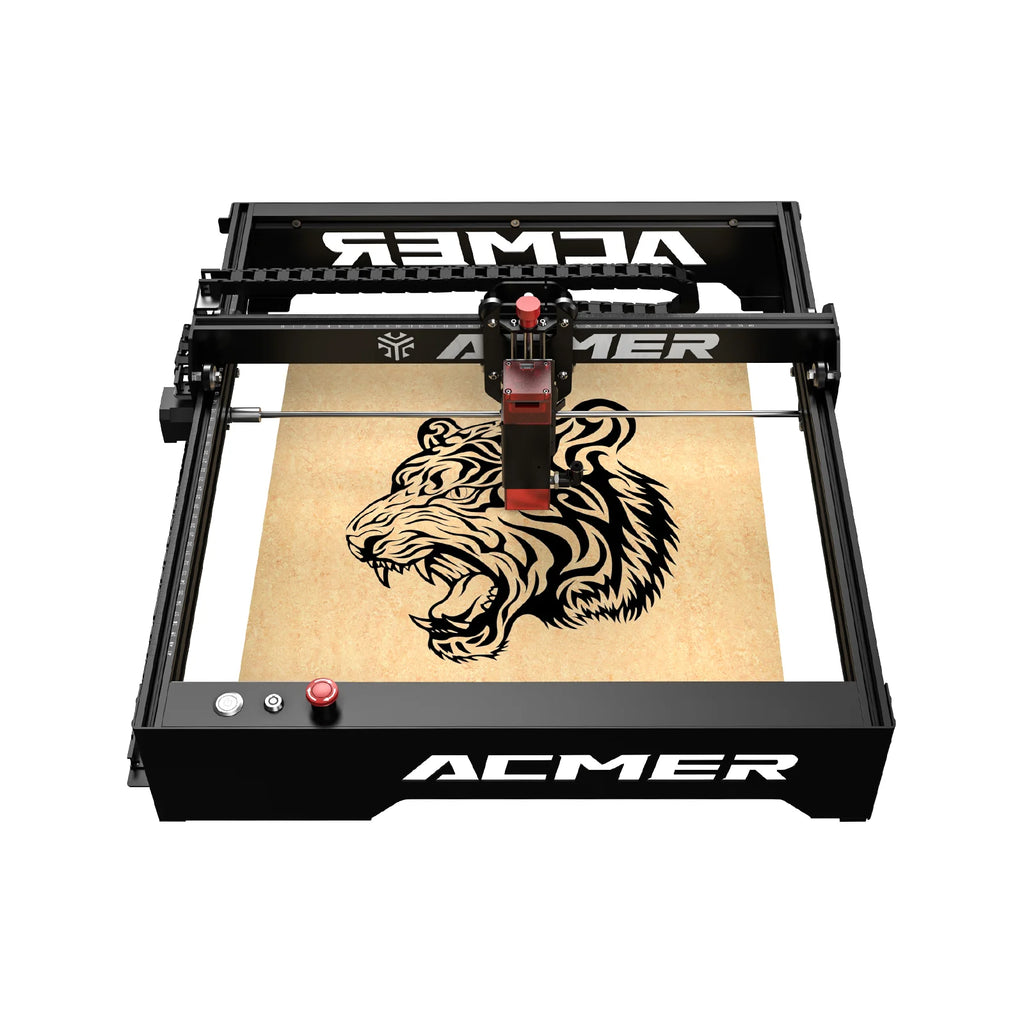
My new friends at ACMER recently sent me their P1 S Pro to review and they promptly followed that up by sending me an ACMER P1 10 watt laser engraver, an M2 Rotary Roller, and an R10 Enclosure.
I’ll just be featuring the ACMER P110 watt laser in this blog though and will cover the other items in a subsequent entry.
The P1 laser checks in at $339 on their website with the 10 watt laser head.
First Impressions
It is a full 10 watt output laser at a budget price, and it has a DRAG CHAIN. I love good cable management, and this does not disappoint. The working area is fairly large at 400 mm x 410 mm. The ACMER P1 10 watt also has end stops. It is a tiny bit unusual in that it homes in the rear left position.
Side to side pass through of larger materials is massive but the drag chain is in the way on the left hand side. Elevating the machine a bit would resolve that issue. Front to back passthrough is obscured a bit due to the shape and cut outs of the front and rear panels. Again, elevating the machine somehow will resolve this as well.
The laser head mounts on an adjustable lead screw which is another nice feature for a laser at this price point.
Laser Head
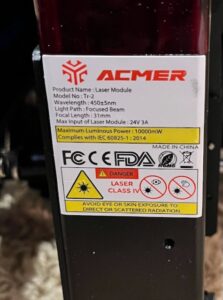
ACMER P1 10 Watt Laser Head
This is a pretty typical blue diode laser
It is a Class IV laser.
The Wavelength of the laser is about 450 nanometers and the output wattage is 10000 mW (10 watts).
This is usually achieved by combining two 5.5 watt laser diodes into one beam. The more diodes you combine, the higher the power, however, that tends to increase the size of the laser spot.
Lower wattage lasers typically provide greater engraving detail, especially as it relates to small items with lots and lots of fine details.
Lightburn Setup
This threw me for a loop for just a bit. When I connected the ACMER P1 to my laptop and Lightburn the Y movements were backwards. I followed the directions in the manual and in the P1 Lightburn downloadable manual.
I knew the GRBL Y settings need changed and emailed ACMER and mentioned it was running backwards. They told me to import an lbset (LightBurn settings) file. That file can be found here. Download the folder that says “Software and Drivers”. It is also on the included TF card.

Software and Drivers
In Lightburn open Edit > Machine Settings and Import the P1_Lightburn.lbset file. All it does is to change GRBL $3 (Direction port invert, mask), and $23 (Homing Cycle Direction) settings.
I want to point out again that this is NOT in the manual but is mentioned in their Lightubrn Settings video. That part begins at 2:20 in the video below.
[kad_youtube url=”https://youtu.be/oTtVWlbofJA?si=h1wfd2Sw0NMaq00J&t=141″ ]
Here is the output difference (GRBL is only depicted from $0 to $23). All other settings are identical after importing the lbset file. Again, only $3 and $23 are changed by the lbset file.
GRBL Differences – lbset
| BEFORE | AFTER |
| $0=10
$1=25 $2=0 $3=5 $4=0 $5=1 $6=0 $10=1 $11=0.010 $12=0.002 $13=0 $20=0 $21=1 $22=1 $23=5 |
$0=10
$1=25 $2=0 $3=7 $4=0 $5=1 $6=0 $10=1 $11=0.010 $12=0.002 $13=0 $20=0 $21=1 $22=1 $23=7 |
Now it will work correctly. Conversely, instead of importing machine settings, you could just open a console, and enter the following two commands:
$3=7
$23=7
Restart the laser and you should be good to go.
First Burn Test
I always video the first burn, good or bad. The video is raw and unedited (except for a fancy title box).
[kad_youtube url=”https://youtu.be/wm3TKk9cVj8″ ]
First test went well. I accidentally made a 3rd pass after shooting the video and the 3rd pass was perfectly accurate again. Repositional accuracy is exceptional.
Cutting Test
When I recently reviewed the ACMER P1 S Pro I didn’t record any of my cutting tests because, hey, it is a 6 watt laser and 6 watt lasers are not known for their cutting ability.
10 watt lasers are a bit of a different story though. Here’s my first attempted cut on 10mm pine. Really did a nice job.
[kad_youtube url=”https://youtu.be/nPqBtlAQs2Q” ]
Very nice. Especially considering I wasn’t using an air assist.
Lens Cleaning
Diode lasers produce lots of smoke very near the lens. Also, build up of soot and contaminants is the enemy of desktop lasers. The more difficult it is to clean the lens, the less likely it is that you will do it. The laser is connected to the main board via a JST connector which is slightly recessed. Consequently, it isn’t very optimal to remove the connector every time you need to inspect or clean the laser lens due to the fragility of the design. Couple this with the fact that the laser head is held in place with 4 screws on the mount makes it even more difficult to clean.
ACMER provides a lens cleaning video for users although my air assist nozzle is different than in the video.
[kad_youtube url=”https://youtu.be/yhDwpXK9Ka0?si=ssxtbgrosj4OFT9E” ]
I recommend leaning the laser on its side, and then unscrewing the air assist nozzle. Once that is removed, to access the lens protective cap you have to loosen several set screws to remove the glass from the air assist nozzle housing.
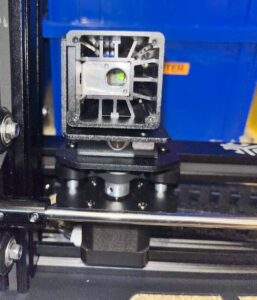
Lens Assembly and Air Nozzle Removed
Once removed you can break down the air nozzle and clean both sides of the lens assembly. I use a Q-tip with 91% isopropyl alcohol.
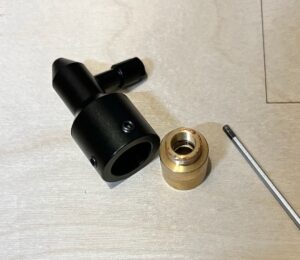
Nozzle Assembly
If you are not using the air assist I recommend not installing the air nozzle. This allows you free and unrestricted access to cleaning. However, if you do use air assist you are just going to have to take the time to disassemble and properly clean your glass. I do it almost after every big job.
There are people who will laugh at this however, you are looking at the guy who has never cracked a diode laser lens in all the years I’ve been doing this. KEEP YOUR LENS CLEAN.
Final Thoughts
At just over $300 the ACMER P1 10 watt laser has lots of bells and whistles that other lasers at this price point don’t have. The included drag chain, end stops, and metal air assist nozzle are great features.
On the flip side, lens cleaning is more involved than on other lasers. Also, the unit homes in the left rear which is slightly non standard. Having to import a LightBurn settings file is no big deal, however, that step should be included in the manual. If it is in there, I couldn’t find it.
The ACMER P1 is a solid desktop laser at the right price point. John’s Tech Blog recommends the ACMER P1 10 watt laser.
Pingback: 2024 Best Laser Engraver - John's Tech Blog
Great review! One of the best I’ve seen! I would absolutely trust any of your reviews.