
Coospo CS600 Maps – Building A Custom Map
Boy this is one blog that I hope becomes irrelevant quickly. I’ve recently purchased a Coospo CS600 Bicycle Computer which I believe is breaking new ground in cycling computers. And by that, I mostly mean it is high quality hardware at a super affordable price. That being said, the Coospo CS600 Maps leave something to be desired.
Making a custom map for a Coospo CS600 really leaves something to be desired.
I should add that the steps I use here may or may not even work for you. I did this on a Mac M1 Laptop with 16GB of RAM.
Map crunching takes a lot of horsepower and if the horsepower isn’t there then you have to finesse the commands to get it to crunch.
MOSTLY I AM DOCUMENTING THIS FOR MYSELF, BUT IF IT HELPS YOU, AWESOME.
Software
Java
It stinks but you have to have Java installed. Chatgpt told me to use Java 17 for this. Your mileage may vary.
Osmosis
To make your map you need a hunk of software called Osmosis. There haven’t been any updates in a while, so there’s that. It still seems to work. On Mac you can install with brew.
brew install osmosisMapForge Map-Writer
MapForge Map-Writer is essentially a plug in for Osmosis. Create a directory (I did mine in my home directory) as so.
In your home directory create a directory:
/.openstretmap/osmosis/plugins
And drop the plugin from here into the plugins directory you just created.

We are ready to make a map.
Map Type
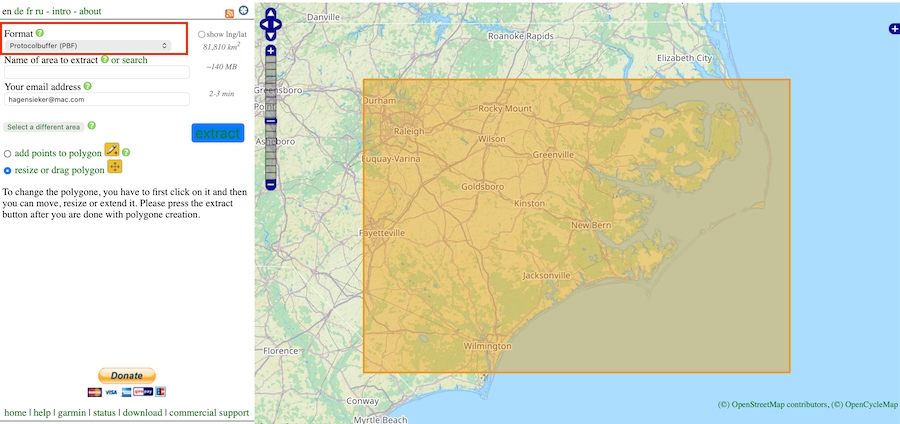
To create a custom map you need to download an .osm.pbf file. They can be obtained from Geofabrik, however the smallest map you can grab there is an entire state. Yep, you can do that but it really is much easier and faster to grab a smaller region. I don’t know about you but I don’t EVER ride away from my home.
Go to BBBike Extract and zoom in on a smaller region and download. They make the map and you’ll get an email in a few minutes where you can download that map.
It is IMPORTANT to take note of the drop down box at the top left of the page. Make sure it is set to ProtocolBuffer (PBF)
Map Time
Fun Time. Go to the Coospo Map Generation Github page. Grab this code and save it in a file named:
highway_type.transform.xml
<?xml version="1.0"?>
<translations>
  <translation>
    <name>Convert Secondary to Primary</name>
    <description>Remap highway:secondary to highway:primary</description>
    <match type="way">
      <tag k="highway" v="secondary"/>
    </match>
    <output>
      <copy-unmatched/>
      <tag k="highway" v="primary"/>
    </output>
  </translation>
  <translation>
    <name>Convert Residential, Service, Unclassified to Tertiary</name>
    <description>Remap highway:residential, service, unclassified to highway:tertiary</description>
    <match type="way">
      <tag k="highway" v="residential|service|unclassified"/>
    </match>
    <output>
      <copy-unmatched/>
      <tag k="highway" v="tertiary"/>
    </output>
  </translation>
  <translation>
    <name>Convert Bike Paths to Unclassified</name>
    <description>Remap highway:path, track cycleway, footway, and bridleway to highway:unclassified</description>
    <match type="way">
      <tag k="highway" v="path|track|cycleway|footway|bridleway"/>
    </match>
    <output>
      <copy-unmatched/>
      <tag k="highway" v="unclassified"/>
    </output>
  </translation>
</translations>
This Is Where It May Or May Not Work For You
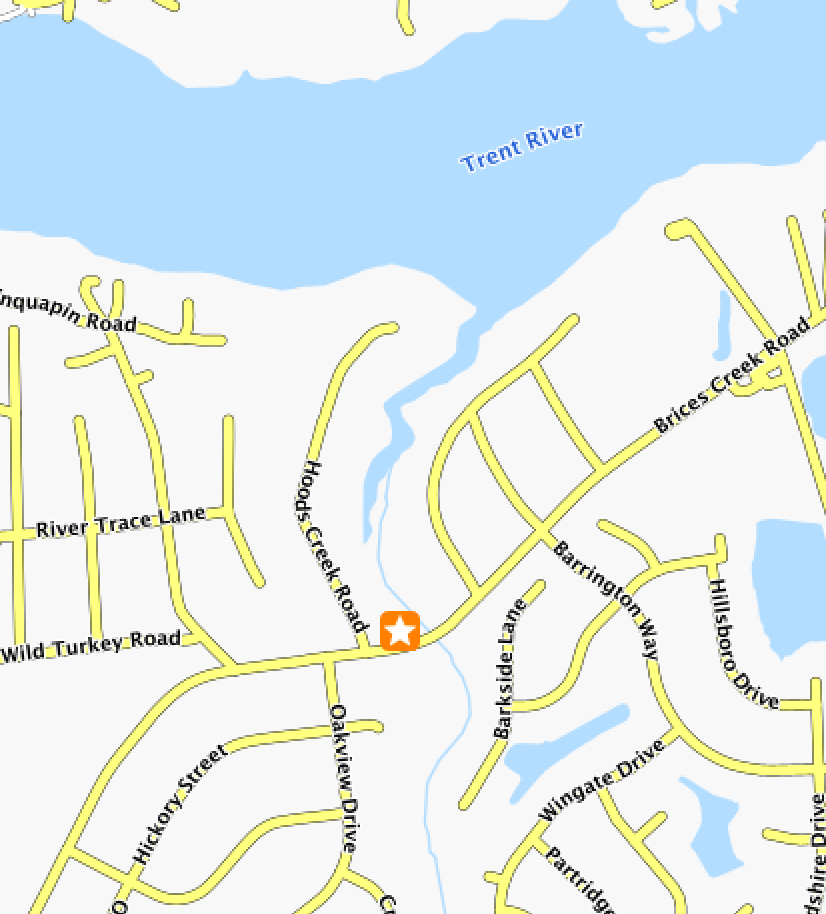
This is custom like a mo-fo. I ride in the middle of nowhere and I want residential and side roads to show the road names. If you live in downtown Tokyo this may create WAY TOO MUCH information on your small bike screen.
Also, you can’t swing a dead cat around where I live and not hit a river or a stream, or a creek. And as I ride out into the Croatan National Forest there are trails. I want the trails marked.
Remember this is the file that gives you all the personalization. The author of the Github page has a sample tag-mapping.xml file. Start there. If you don’t like what you see, call upon Mr. ChatGPT to help.
Anyway, the xml code below is what I am using.
Now create a file named:
cs600-tag-mapping.xml
<tag-mapping default-zoom-appear="15">

  <ways>

    <osm-tag key="highway" value="motorway" zoom-appear="6"/>
    <osm-tag key="highway" value="trunk" zoom-appear="6"/>
    <osm-tag key="highway" value="primary" zoom-appear="8"/>
    <osm-tag key="highway" value="secondary" zoom-appear="9"/>
    <osm-tag key="highway" value="tertiary" zoom-appear="12"/>

    <osm-tag key="highway" value="residential" zoom-appear="13"/>
    <osm-tag key="highway" value="unclassified" zoom-appear="13"/>
    <osm-tag key="highway" value="service" zoom-appear="14"/>

    <osm-tag key="highway" value="track" zoom-appear="13"/>
    <osm-tag key="highway" value="path" zoom-appear="15"/>
    <osm-tag key="highway" value="footway" zoom-appear="15"/>

    <!-- =========================
     TRAILS (Garmin-style rural visibility)
    ========================= -->

    <!-- TRAILS (Garmin-style hierarchy) -->

    <osm-tag key="highway" value="track" zoom-appear="12"/>

    <osm-tag key="highway" value="cycleway" zoom-appear="14"/>
    <osm-tag key="highway" value="path" zoom-appear="14"/>

    <osm-tag key="highway" value="footway" zoom-appear="15"/>
    <osm-tag key="highway" value="bridleway" zoom-appear="15"/>

    <osm-tag key="highway" value="pedestrian" zoom-appear="15"/>
    <osm-tag key="highway" value="steps" zoom-appear="17"/>


    <!-- =========================
    WATER (CS600 / Garmin-style stable model)
    ========================= -->

    <!-- Linear waterways -->
    <osm-tag key="waterway" value="river" zoom-appear="8"/>
    <osm-tag key="waterway" value="stream" zoom-appear="8"/>
    <osm-tag key="waterway" value="intermittent" zoom-appear="8"/>
    <osm-tag key="waterway" value="canal" zoom-appear="10"/>
    <osm-tag key="waterway" value="riverbank" zoom-appear="8"/>

    <!-- Drainage / minor water -->
    <osm-tag key="waterway" value="ditch" zoom-appear="10"/>
    <osm-tag key="waterway" value="drain" zoom-appear="11"/>

    <!-- Area water features -->
    <osm-tag key="natural" value="water" zoom-appear="8"/>
    <osm-tag key="landuse" value="reservoir" zoom-appear="8"/>
    <osm-tag key="water" value="lake" zoom-appear="8"/>
    <osm-tag key="water" value="pond" zoom-appear="10"/>
    <osm-tag key="water" value="basin" zoom-appear="10"/>

  </ways>

</tag-mapping>
Are We Done Yet?
Nope. Now we have to crunch this data. I use this command to make my map. Bear in mind that your file locations must be called out correctly in this command. I just did all this in my Downloads Directory. And I renamed the file I downloaded from BBBike Extract. Mine is named “easternnc.osm.pbf“. The command below outputs a file named “output.map“
NOTE: If you are smart you’ll take the “output.map” and change it to the actual naming convention that the Coospo CS600 looks for (i.e. US060020250528.map). That US number is their designation for North Carolina. Your state will be different.
 osmosis \
  --read-pbf-fast easternnc.osm.pbf \
  --tag-transform file=highway_type.transform.xml \
  --mw file=output.map tag-conf-file=cs600-tag-mapping.xml \
  threads=4
Depending on how big a bounding box you created on BBBike Extract this can take anywhere from a minute to a few minutes to a lot longer if you downloaded the whole state. Remember that my example above needs to display every tiny street name across the state. That could take a bit.
Install Your Coospo CS600 Maps On Your Device
Plug in your CS600 to your computer, ensure you have a USB connection enabled. The CS600 will appear as a removable drive in Finder, and then drop that file you made into the Maps folder.
Make sure your Coospo Map for your state is renamed or removed. I left mine in the Maps folder but renamed it to US060020250528.map.bak
That way if I ever want it then all I have to do is remove the .bak extension.
Wrap Up
You may hate my map. That’s okay. You may think I did something stupid or set some zoom level stupid. Also okay. Just adjust your map to fit your needs. This one works for me.
And finally, as I stated in the beginning, I hope these instructions become irrelevant very, very soon. If you own a Garmin you can go to a whole bunch of OpenStreetMap sites and just plain old download a map and transfer it to your device. That is what I hope will happen for the Coospo CS600. And I hope it happens soon. This is not really a procedure for the uninitiated computer users. In fact it is a little bit nuts.
Having said that though you’ll get just a tiny taste of cartography. That’s the science of making maps!
Good Luck!
It’s great to see someone exploring custom maps with the CS600. I’ve been looking at options for my next bike adventure – this seems like a really interesting path.
Muito obrigado por compartilhar os eu progrsso na paersonalização dos mapas apra o CS 600, vou fazer a minha personalização e usarei os eu guia. Estou na divisa dos Estados de Minas Gerais e São Paulo, no Brasil.
Translation:
Thank you very much for sharing your progress on customizing maps for the CS 600; I’m going to customize mine and will use your guide. I am located on the border between the states of Minas Gerais and São Paulo, in Brazil.