Category Archives: laser

History of the Desktop, Consumer Level Laser

This is uniquely frustrating and equally interesting, and also a cry for help.  I’m researching laser history and while there is considerable reference material out there, none of it has anything to do with the timeline of hobby lasers or the timeline of consumer laser products beyond laserdisc players or laser printers, or barcode scanners.

There simply isn’t much documentation of the development of consumer grade desktop lasers. Forum discussions from the early 2000’s now point to a bunch of dead links.  It would take considerable effort to rebuild that knowledge.

Best I can tell the consumer market started at least down this path:

The Chinese developed a CO2 laser that was cheaply made solely for purpose of making rubber stamps for your signature for official documents. But I have no idea when they first began making them. The CO2 laser was invented in 1963 and the oldest reference on the internet I can find for someone in the US buying one of these units is from 2008 off of eBay.

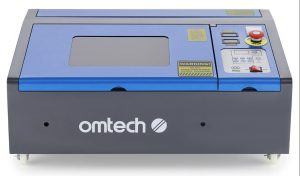
Current K40 laser

These things have been around at least since then, and maybe a couple of years before. Pre Pandemic you could get one for about $300. Now they are about $450 and currently are affectionately called the K40 as they are 40 watt CO2 lasers.

They originally came with a control board that only worked with software called Moshidraw and I can find no real timeline for that software development either.  I believe that board was referred to as a Moshi board.  The DIY folks began developing boards for these lasers and that continues to this day.  Until recently I owned my own K40 and while they looked pretty polished the purchaser had to upgrade and mod these things to make them sing.  You almost certainly had to add a control board that was compatible with laser software such as Lightburn.

Continue reading

So You Want To Have A Laser Business?

I’ve written this article before, but it bears repeating, I think.  I just got a new laser, which means  I joined a new Facebook group and I’ve seen this happen so many times from every manufacturers Facebook or Webpage Forum.   A group member will write:

“HELP!  My machine stopped working and I have orders that I have to fulfill.  I am frantic, HELP!”

Please know that I’m not knocking anyone here and I don’t think I’m smarter than anyone else by a long shot.  I just want to point out some observations I have made over the last few years of operating a laser.

If you have bought a laser to run a small business and:

  • Don’t know how to troubleshoot your machine.
  • Don’t have lots of experience with the machine.
  • Don’t have spare parts.
  • Don’t have a backup machine
  • Don’t have a fellow hobbyist who can help with your orders during your downtime.

Then all I can say, is that you didn’t plan out your business very well.   Lasers are electronic, mechanical, and optical devices.  There is a lot going on there.  They break.  Sometimes WE break them.  If you have a laser and you are just a hobbyist making stuff for yourself and your family then you can afford the luxury of waiting a week or two on parts.

If you are in business you can ruin your reputation in a hot minute by not delivering what you’ve promised.
Continue reading

xTool RA2 Rotary Pro

xTool RA2 Rotary Pro Review

FULL DISCLOSURE – I was provided an xTool D1 Pro with an RA2 Rotary Pro at no cost to review.  xTool has in no way attempted to influence my review. 

I’ve been given the great opportunity to review the xTool D1 Pro and included in the kit was an RA2 Rotary Pro.

There are a lot of videos online that show the RA2 but most of the ones I have seen are familiarization, and unboxing videos.

I appreciate all these reviews and learned a lot from all of them but when I get my mitts on a piece of gear I want to fill in the gaps that others may not touch on and I will discuss Lightburn settings quite a bit in this blog.

Regarding unboxing though……….my kit was missing the small bubble level.  Obviously that doesn’t affect assembly or use of the machine so it won’t affect anything discussed here.  Actually I have a couple of those mini bubble levels around here somewhere so no harm, no foul.
Continue reading

xTool D1 Pro Review

xTool D1 Pro Review

Full Disclosure – xTool provided me an xTool D1 Pro at no cost to review.  They in no way whatsoever influenced this review.  

NOTE:  Almost all my testing is done with Lightburn using the configuration file xTool provides here.

It doesn’t take me long to tell whether something is great, good, or problematic.  In the case of the xTool D1 Pro my conclusion is landing somewhere in GreatLand™.

I’d be remiss in not mentioning that I have considerable desktop and CO2 laser usage and I know just what to do to reveal problems right away.

While waiting for my D1 Pro to show up I began asking people questions and joining forums and groups.  The first thing that hopped off the page for me were people asking “How do you keep things straight?”

STRAIGHTNESS

I’m going to refer to this as an “issue”, and not a problem because almost every laser made, maybe with the exception of industrial lasers, don’t have any immediate method of straightening.   Someone I know owns a D1 Pro and has the honeycomb kit . I asked him to provide me any input before I received my machine and wrote my review.  One of his bullet items was:

The honeycomb panel set isn’t currently able to be fixed to the machine itself in anyway, which makes it very difficult to maintain square between the panel and the machine itself. “

There are a couple methods for overcoming this issue of keeping things straight.
Continue reading

XTool D1 Pro Build And First Impressions

xTool D1 Pro

FULL DISCLOSURE – I was contacted by xTool and provided this xTool D1 Pro Kit to review.   This is just an initial impression following my build out,  with a further, more in-depth review to follow soon.

XTool D1 Pro

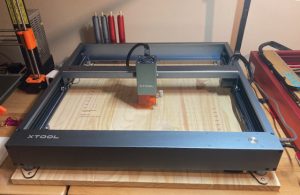
My laser is the 20 watt version with the RA2 Rotary.  It has an impressive working area size of 430 x 390 mm (16.93 x 15.35 inches).  The published Z height is 50 mm (2 inches).  I suppose they had to put some number there but the reality is you can laser an item of just about any height if you raise the laser with the included riser legs or 3D print legs or stack soup cans under the legs. The Z height can be just about anything.

As usual I won’t spend time with videos showing the unboxing or reposting things you can find on their product information page.  If you are looking at this blog and have an interest in getting an xTool D1 Pro you’ve already looked at their page and me re-hashing a picture of the box and listing the specifications (other than the ones I listed just above)  is simply redundant and a waste of your time.   Here on my blog I get something, use it, sometimes in ways it wasn’t meant to be used, and then tell you what I think.

The first thing I want to say about ANY LASER is that you probably think you’ll buy one and start whipping out crafty things and soon become a millionaire, or at least be the talk of the town.  Some of you might.  But most people that buy them have no laser experience, no experience with other items that travel along an X, Y, and Z axis.  They also have limited graphic arts abilities, and minimal abilities to repair malfunctioning electronics.  I basically just described myself at one time, so don’t take that personally.

But I will say this before I start my review.  If you buy ONE machine to run a business, that is a business model designed for failure.  If you are in business you need to plan for downtimes.  That may include owning TWO machines, or having a kit of repair parts.  It might even involve having two computers in case one fails.   Lasers are electrical, mechanical, and optical devices that can break.  Diode lasers degrade over time.  All I am saying is don’t buy one machine, and then run that machine to failure and then declare it to be junk when you have orders you can’t fulfill.  Rant complete.

On with the build and review!
Continue reading

Lasers. Know What You Are Getting In To.

I have written about this before but it seems there is an explosion of laser owners who spend big money on a gigantic CO2 laser machine and then are never able to produce anything with it.  The frustration level is generally pretty high and then after declaring the machine to be garbage they then want 95% of retail price to sell it.

It is both fun, and sad to watch.  After playing with lasers for a couple of years, here are my updated thoughts on the dilemma that plagues many new users.

There are some incredible artists out there with exceptional abilities to produce imaginative products.  Products that they assume will make them rich.  So they invest thousands in a CO2 laser.  Here are some of the things they quickly find out:

  • The lasers are made in China, with all the quality tech support you have come to expect from China.
  • A laser is a SYSTEM which consists of Power Supplies, Electronic Controllers, safety switches, fans, motors, water cooling systems, a HIGH POWERED laser with a precision alignment series of mirrors in which the beam must be aligned horizontally AND vertically.  Throw in a laser dot pointer, and a water chiller, and an air assist system, and you have a device that requires several vocational skills to maintain.  Oh, and they can be networked as well.  You might need some minor computing skills.
  • Machines like this WILL BREAK.  It is not “if”.  It is “when”.  CO2 laser tubes have a finite life span and will have to be replaced and re-aligned.  There is no getting around that.
  • If the machine is vital to your production and any down time will affect your BUSINESS AND CUSTOMERS you absolutely, positively MUST MAINTAIN SPARE PARTS and possess the ability, or know someone with the ability to repair the machine.  Or own a back up machine.

Continue reading

Lightburn USB Issues on Mac OS X

Lightburn is the best software for laser editing, design and control, bar none.  But it always seems to have an issue on Mac OS X when you upgrade.  More times than not, when you upgrade Lightburn it simply will not output your design when you are connected via USB.

There seems to be an issue with the FTDI drivers on Mac OS itself which doesn’t like our Ruida controllers.  There are a couple of workarounds.  First is to take your file you want to engrave or cut and transfer it to a USB stick and upload it directly to the laser.  The other way is to connect your laser via its ethernet port instead of its USB port.  This works flawlessly ………. well almost.  I noticed that once I followed the directions provided by Lightburn that the laser was only recognized when WiFi was turned off.  I dunno about you, but I’d kind of like to use my computer on the internet while I’m sitting there watching my output and making sure nothing catches on fire.

The directions provided by Lightburn instruct you to get the IP address of your computer and then add that to the same subnet.  For example if your computer is 192.168.1.10, they advise you to add 50 or 100 to the last octet. (192.168.1.60, or 192.168.1.110).   This will give you wifi problems.  Let’s tackle this, shall we?

Continue reading

Wiring a 24 volt Air Assist Solenoid to KT332N Laser Controller

Adding an external, more powerful air assist is a MUST DO upgrade for your CO2 laser.  There are many guides on how to do this however none of them are specific to a laser which has a Ryxon KT332N Controller.  Larger lasers use different controllers and the controller connections have a different name on them on the KT332N which may confuse some users.

I’m not doing an inclusive build of materials here. This will just cover wiring the solenoid to the controller.

First of all you need a 24volt Solenoid which is Normally Closed.  That means air only spews out when the solenoid is energized electrically from the controller.  So you need:

  • Solenoid
  • Wire – you can use any wire as long as it will handle 24 volts and about 250 degrees F.  I chose this wire simply because it is jacketed and it is easier and cleaner to route 1 cable, than 2 separate wires.

Also note that the solenoid is non-polarity specific so that means you don’t have to observe polarity at either end however where the wires are connected to the controller you SHOULD follow standard color coding in case you sell the machine or if it catches on fire the fireman will blame your backwards home brew wiring for the cause of the fire 😃

Continue reading

Why You MUST Add A Water Flow Sensor Switch To A K40 Laser

My K40 (and various other CO2 lasers) does not have a water flow sensor switch on it.   There are folks who put a water flow meter on the outside of their lasers which gives you a visual representation that the water is indeed flowing.  That’s great.  Until you turn your back and the pump fails causing water to stop flowing and your laser tube and power supply go “POOF”.

You would have to watch that flow meter 100% of the time to be safe.

With a water flow sensor switch it kills power to the laser firing circuit if no water flow is detected thus saving your precious CO2 laser tube and power supply.

The switch in the flow sensor is in the normally open position.  That means the circuit is BROKEN until water flows through the sensor and then the switch closes which ENERGIZES the laser firing circuit.

In fact laser power supplies have a protection circuit ready to roll.

BUT LOOK AT HOW THEY BYPASS THIS CIRCUIT IF THERE IS NO WATER FLOW SENSOR SWITCH INSTALLED!

Bypassing the Water Protection Circuit On A CO2 Laser

Yikes.  The jumper, if it could talk would say……”there is a protection circuit here, and it is working just fine”.  But if your pump fails it would also say…….”there is a protection circuit here, and it is working just fine”.  NO PROTECTION.  THIS IS UNSAFE!

Continue reading

More Laser Discussion For New Users

Beating a dead Horse by PotatoeHuman on DeviantArtI hate to beat the proverbial dead horse but I digress.

First I have got to say that anyone ABSOLUTELY HAS THE RIGHT TO BUY A CO2 Laser for their business or hobby or whatever.  I am not opposed to that at all.  More power to ya.  Seems since this COVID pandemic the “work from home” DIY business model has exploded and CO2 lasers are at the forefront of this.  Heck, it is hard to buy a laser right now.

Also let me throw in that while this blog is largely about a lack of technical prowess just know that I am jealous AF of the artistic and creative ability of a lot of you.  I can fix some stuff……but art……..I failed art and I didn’t even take it, and still failed it.  I can’t draw a circle with a compass and a can of beans.

What bothers me when I peruse the forums Facebook groups for CO2 lasers there are a rash of new users with no experience whatsoever on the technical aspects of a CO2 laser.  And let me add…….THAT INCLUDED ME AT ONE TIME.   Again, if you want a laser and can afford one………get one.

Here’s what worries me.  I will frequently see discussions where the new user buys a giant laser and says “What do I do now?”

I’m not knocking you if you are asking that question or any other.  That’s what forums are for.  You are most assuredly doing the right thing.   Just know that I’m scared for you.

The answer I can best provide is “Don’t Kill Yourself”.  First and foremost, know that your CO2 laser uses a High Voltage Flyback transformer that pulses anywhere from 1000 volts DC to about 20,000 volts DC.   Allow me to translate:  That will stop your heart in an ……errrr…….heartbeat.   We’ve all been shocked by household current.  You get tingled, a moment of OUCH and then a giggle.   If you take a 1000vdc shot to your body you will likely die and you better hope you are standing next to someone who knows CPR.  I wish I was joking.  I’m not joking.

Continue reading