Smart Plug
Bought some of these plugs a few years back and never used them much because I put z-wave smart switches all over my house.
Well, I have a “new” house now which was built in the 80’s and it doesn’t have a dedicated neutral line which limits my smart switch choices a bit which leads me back to the smart outlets.
First of all, when you get switches like this that say “Compatible with Alexa or Google” just know that that means they are made in China and the controlling software and app are made in China and that your smart device is sending info to China. You can’t be sure because the software is proprietary,
Enter “Tasmota” which is a custom firmware with Open Source code which means you can see the code which makes you feel more comfortable when you say “Alexa, turn on Safe House, Safe Room lights”. That of course is an exaggerated joke.
So, this post is mostly for me. In order to flash these devices it is rather complicated and requires a program called tuya-convert. I won’t go into that here and I have blogged about it in the past. The reason I’m writing this is that there were some minor Home Assistant issues with the code and I’m pasting it here later FOR ME. Basically you need:
- Linux computer (I use a Raspberry Pi)
- Wifi card or Dongle to create an Access Point Hotspot
- Another computer or cell phone to connect to that hotspot
- And to place the device in firmware receive mode (holding down the button on it)
- Then the plug creates a wifi hotspot which you connect to and then input your home wifi credentials so it can connect to your network.
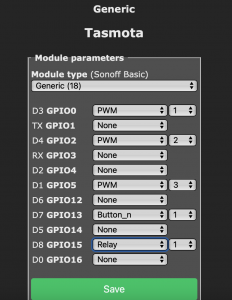
- Then you have to configure the switches, buttons, and relays.
It’s a pain in the ass. And that is done in the device configuration.

device configuration
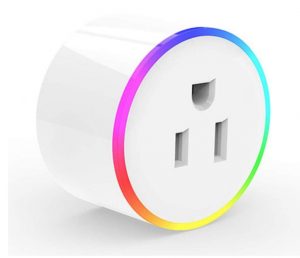
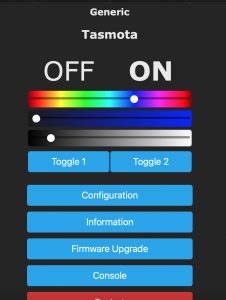
Once installed and configured, it looks like this when you put the device IP address into a browser. Toggle 1 powers the outlet on and off, and Toggle 2 turns on and off the LED lighted ring.

Tasmota Wifi Interface
Once you configure an MQTT broker you can incorporate the device(s) into home automation. I use Home Assistant. Here’s the code. Again I am posting this updated code for the file configuration.yaml in Home Assistant.
There are two parts to this
NOTE: I changed the command topic to “tuyaplug”. Default is “Tasmotaxxxxx (Tasmota with random numbers behind it.)
switch:
  - platform: mqtt
    name: "Lamp Outlet"
    state_topic: "stat/tuyaplug/POWER1"
    command_topic: "cmnd/tuyaplug/POWER1"
    qos: 0
    payload_on: "ON"
    payload_off: "OFF"
    payload_available: "Online"
    payload_not_available: "Offline"
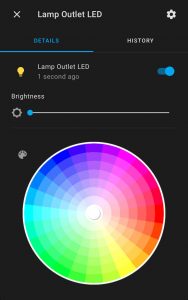
That was easy. That just turns it on and off. Now to get a color wheel so we can manually control the color of the ring.

RGB Color Palette
And here’s that code:
light:
  - platform: mqtt
    name: "Lamp Outlet LED"
    retain: true
    state_topic: "stat/tuyaplug/POWER2"
    command_topic: "cmnd/tuyaplug/POWER2"
    availability_topic: "tele/tuyaplug/LWT"
    qos: 1
    payload_on: "ON"
    payload_off: "OFF"
    payload_available: "Online"
    payload_not_available: "Offline"
    optimistic: false
    brightness_state_topic: "stat/tuyaplug/Dimmer"
    brightness_command_topic: "cmnd/tuyaplug/Dimmer"
    brightness_value_template: "{{ value_json.Dimmer }}"
    brightness_scale: 100
    rgb_state_topic: "stat/tuyaplug/Color"
    rgb_command_topic: "cmnd/tuyaplug/Color2"
    rgb_command_template: "{{ '%02x%02x%02x' | format(red, green, blue)}}"
Whew! Now you can tell Alexa to “Discover Devices” and she’ll pull it in from Home Assistant so you can say “Alexa, Turn on Lamp Outlet” (or Lamp Outlet LED). You can even say “Alexa, set Lamp Outlet LED color to blue” (or whatever). Super freaking cool.
The LED rings, while cool, aren’t really practical however they do make pretty nifty nightlights for dark bathrooms. With Home Assistant you could easily set up an automation to tell the LED light to come on after dark so it isn’t on all the time.
