
Venus Firmware
Problem: My Victron Solar Charge Controller and Victron Battery Monitor are bluetooth only. This makes it very difficult to observe the status of my solar power system while I am away from home.
How I deal with this is to take a laptop and run VictronConnect software on it and then I can VPN into my network and then VNC into the laptop and observe VictronConnect. It works well 90% of the time with the 10% downtime as being the most important times I actually need to observe it. And it ties up an entire laptop which must be kept powered on and within bluetooth range of the Solar board.
Solution: Victron has software or more accurately firmware that emulates their Color Control GX / Venus GX monitoring devices and it runs on a Raspberry Pi. A Venus GX costs nearly $300 and a Raspberry Pi costs about $30. It even runs on older Raspberry Pi’s which are even cheaper. I’ll be using a Raspberry Pi 3 for this.
The directions are here and they are pretty great but there is always a thing or two that get left out. Also the directions kind of assume you work with Windows and I use a Mac or Ubuntu.
First you download the latest image from this page. Make sure to get the one with the rpi-sdimg extension. Actually it is a zip file. I downloaded it on a Mac and the instructions say to burn the image onto an SD card with Balena Etcher. I could NOT get Etcher to work with this extension.
So I went old school. First figure out what disk you are using. DD is a dangerous command. Here we go:
diskutil list
This will return something like /dev/disk4 (in my case for the SD card, 16GB) MAKE SURE YOU USE THE RIGHT DISK. DO NOT JUST COPY MY COMMAND. I’ve bolded the things you may have to change to get the right path and again, make sure you get the right disk.
sudo dd if=/Users/john/Downloads/venus-image-raspberrypi2-20200316162949-v2.52.rootfs.rpi-sdimg of=/dev/rdisk4 bs=4m
Once the SD card is written (it will take several minutes) put it in the Pi and connect it to a wired ethernet connection.
I then used a program called LanScan to find the local IP address. The mDNS name will be “Venus”.

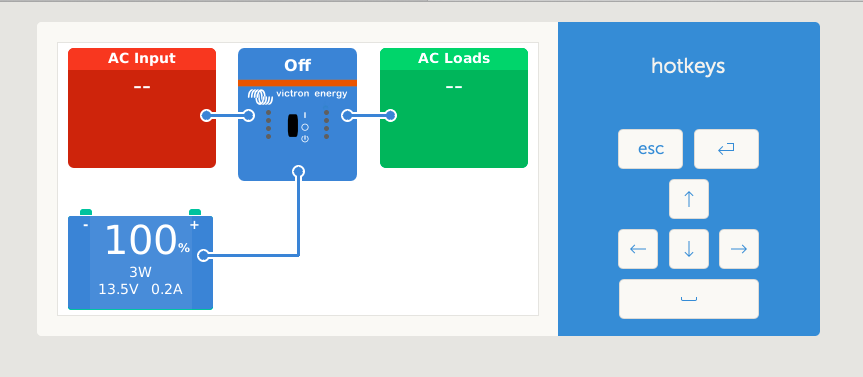
Then go to a browser and paste the IP address in and you’ll see the console:
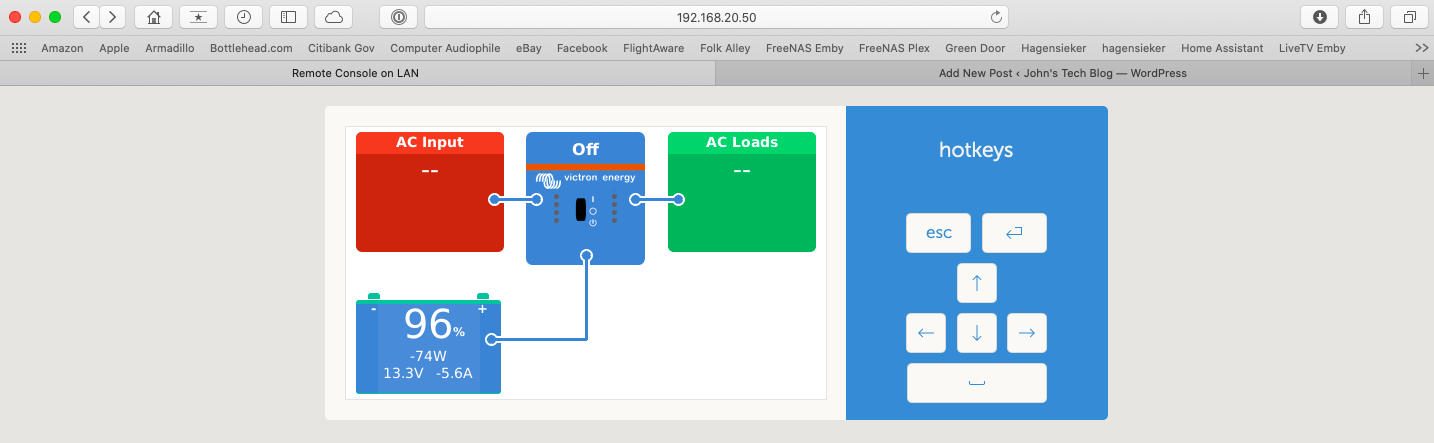
Venus Firmware Console
Now float over the picture and click and a menu will pop up.
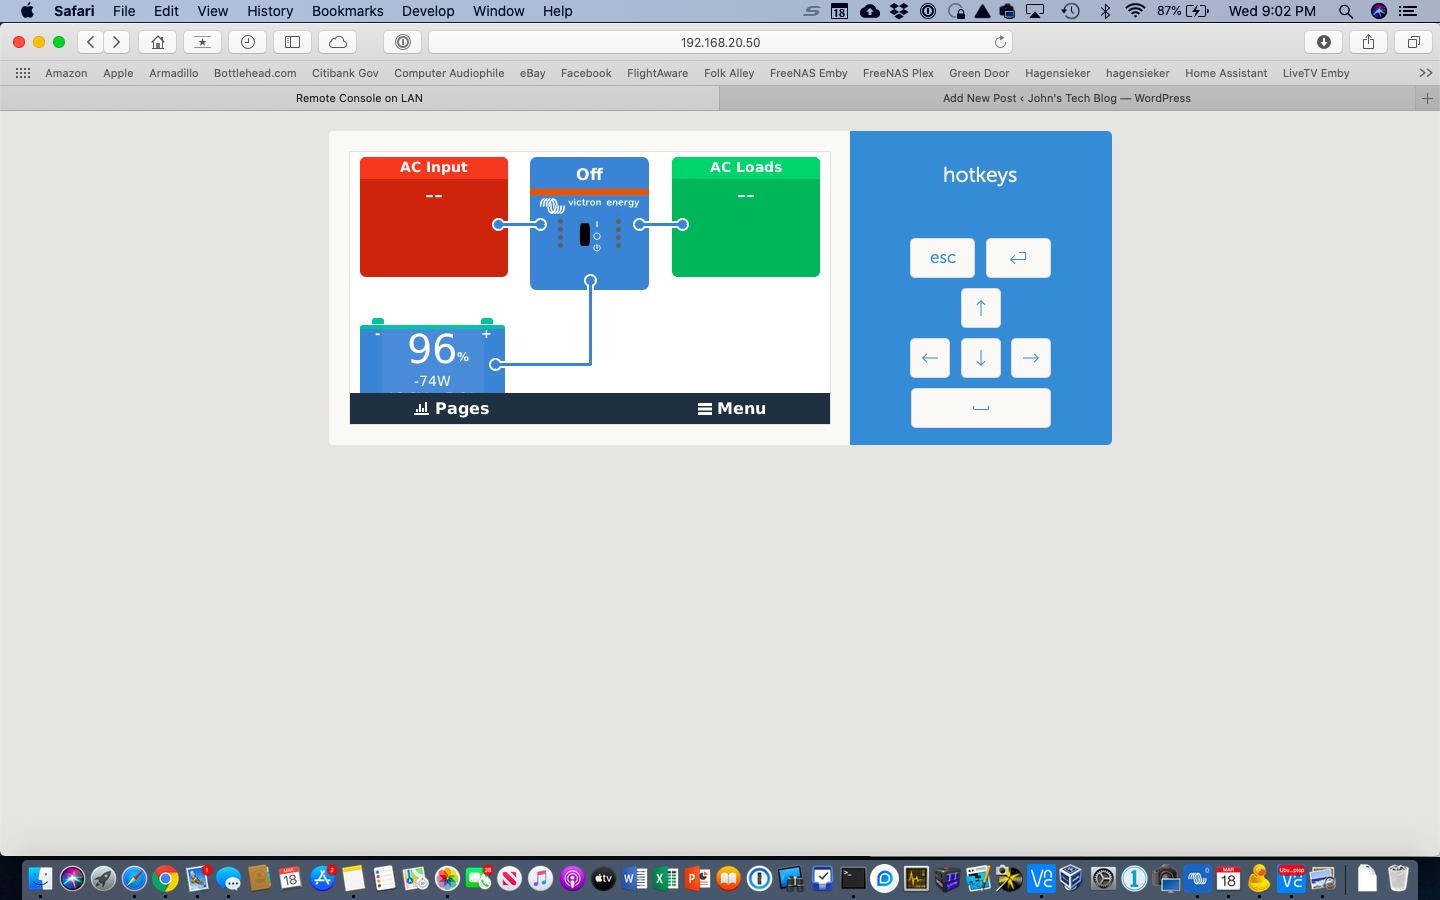
Click on “Menu”. What we want to do is become Superuser and then set a password and possibly set up WiFi.
Get the directions to set yourself up as Superuser here Scroll down to the Number 1 and 2 and follow the directions. Make sure it looks like this when you are done:
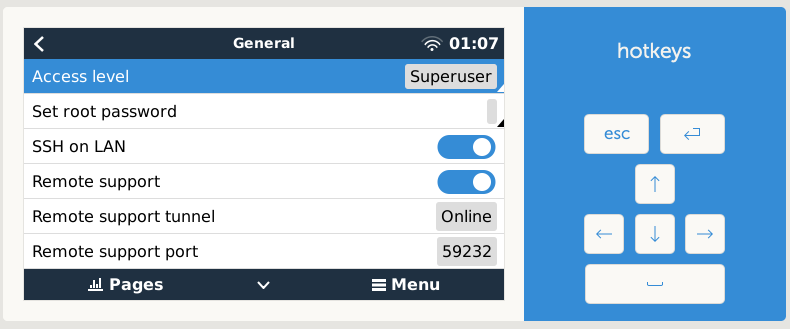
Now go back to the Settings screen and scroll down to the WiFi Section by using the down key on the hot keys on the right.
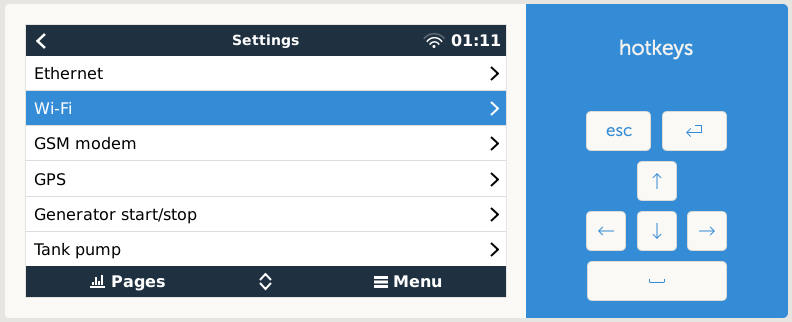
Click on WiFi and set your credentials.
Now you can move the Pi over to your solar board and hook it up with a Victron VE.Direct to USB cable before booting.
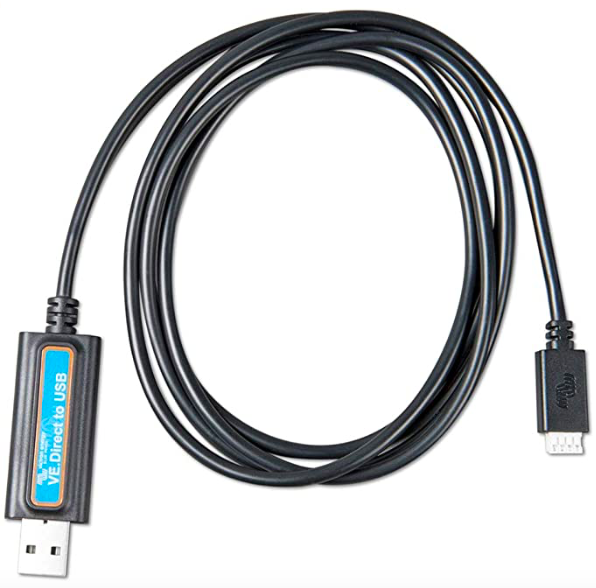
Victron VE.Direct to USB cable
That is basically it. I’ll add more when I customize it some more. Also I’m ordering another cable since I have both a BMV-712 and an MPPT Solar Charge Controller and I want to get data from both devices.
If you look at your VictronConnect software it even recognizes it as a Device
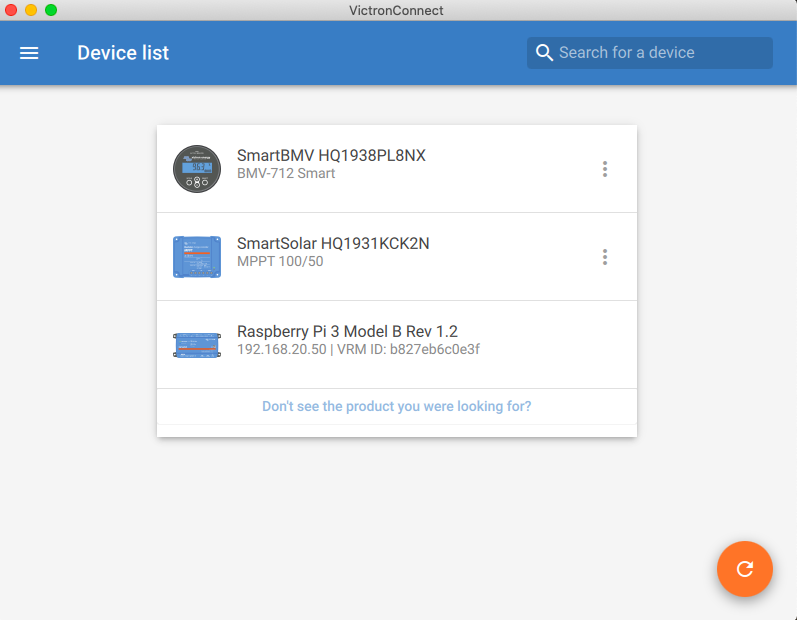
VictronConnect
Clicking on the Raspberry Pi 3 take you to this:
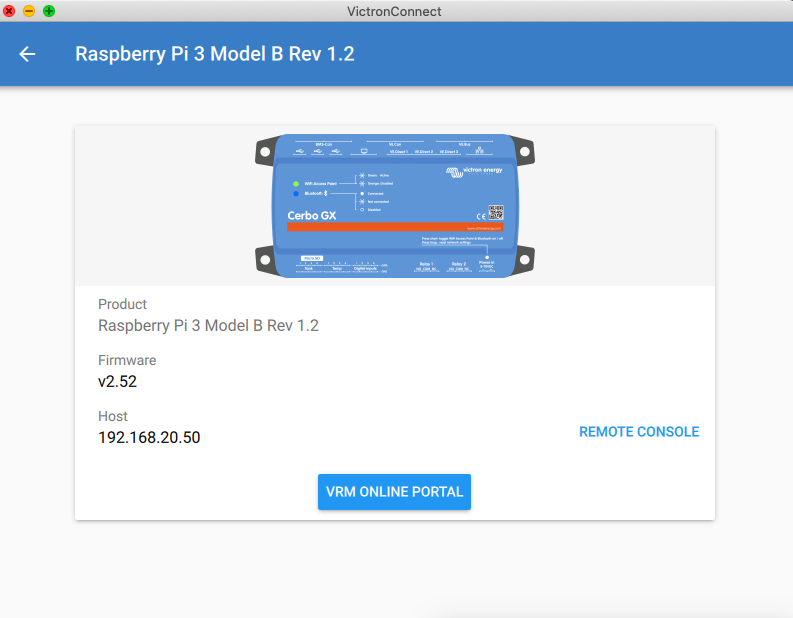
VictronConnect Pi Screen
Clicking on the blue button at the bottom that says “VRM ONLINE PORTAL” allows you to set your station up on Victron’s VRM site which I think is pretty cool. You can set an advanced page up to display the info the way that you would like it displayed. I love this.
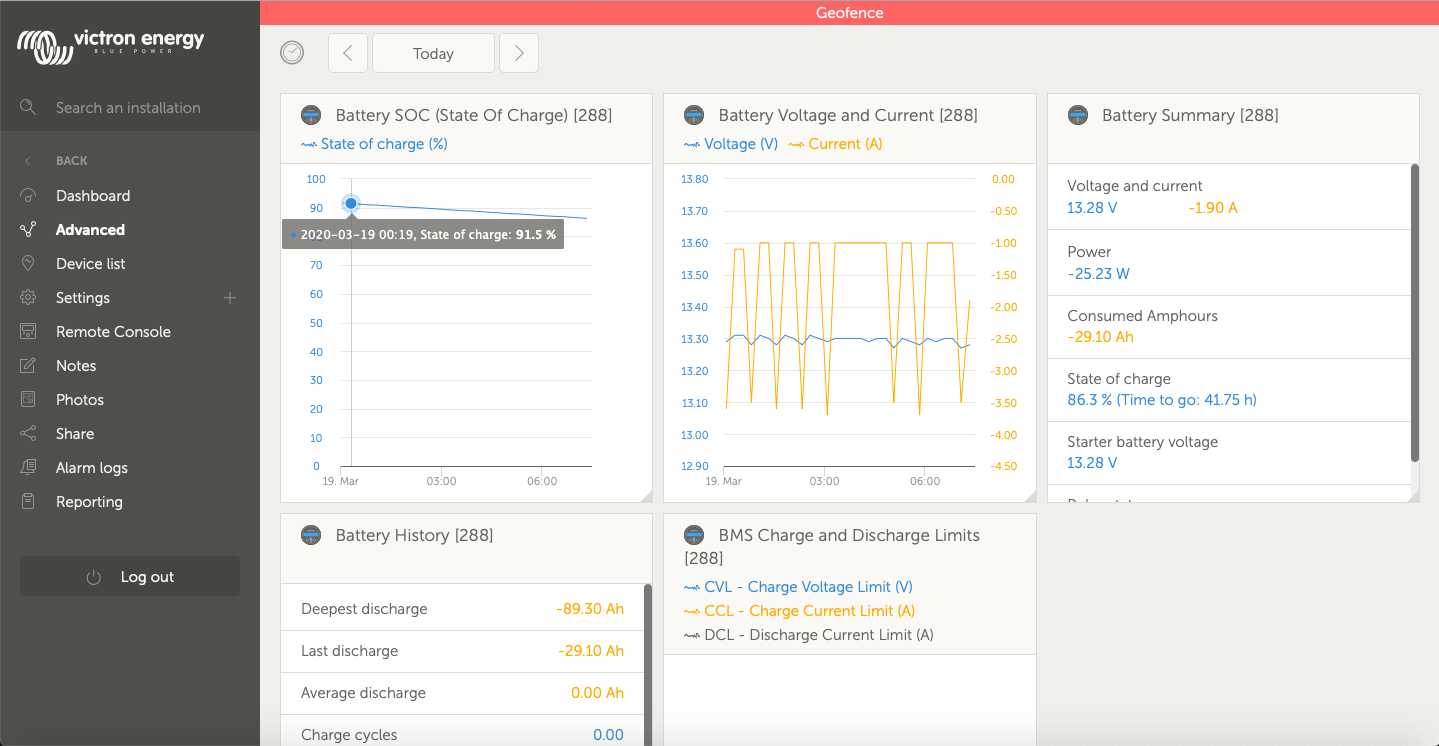
Victron VRM
Now I can check my solar system from anywhere on the internet WITHOUT A VPN OR REMOTE-ING INTO A COMPUTER. Just log in your Victron account. I’d love to find a way to display this data in my Home Assistant. It is doable and I see where a couple of people have done it but it doesn’t look that simple or pretty. Not sure I’ll go down this rabbit hole or not.
To hook it up it is best to get a 12 volt to 5 volt converter and tie it to your fuse block on your solar board. I don’t have it mounted cleanly yet but you’ll get the idea.
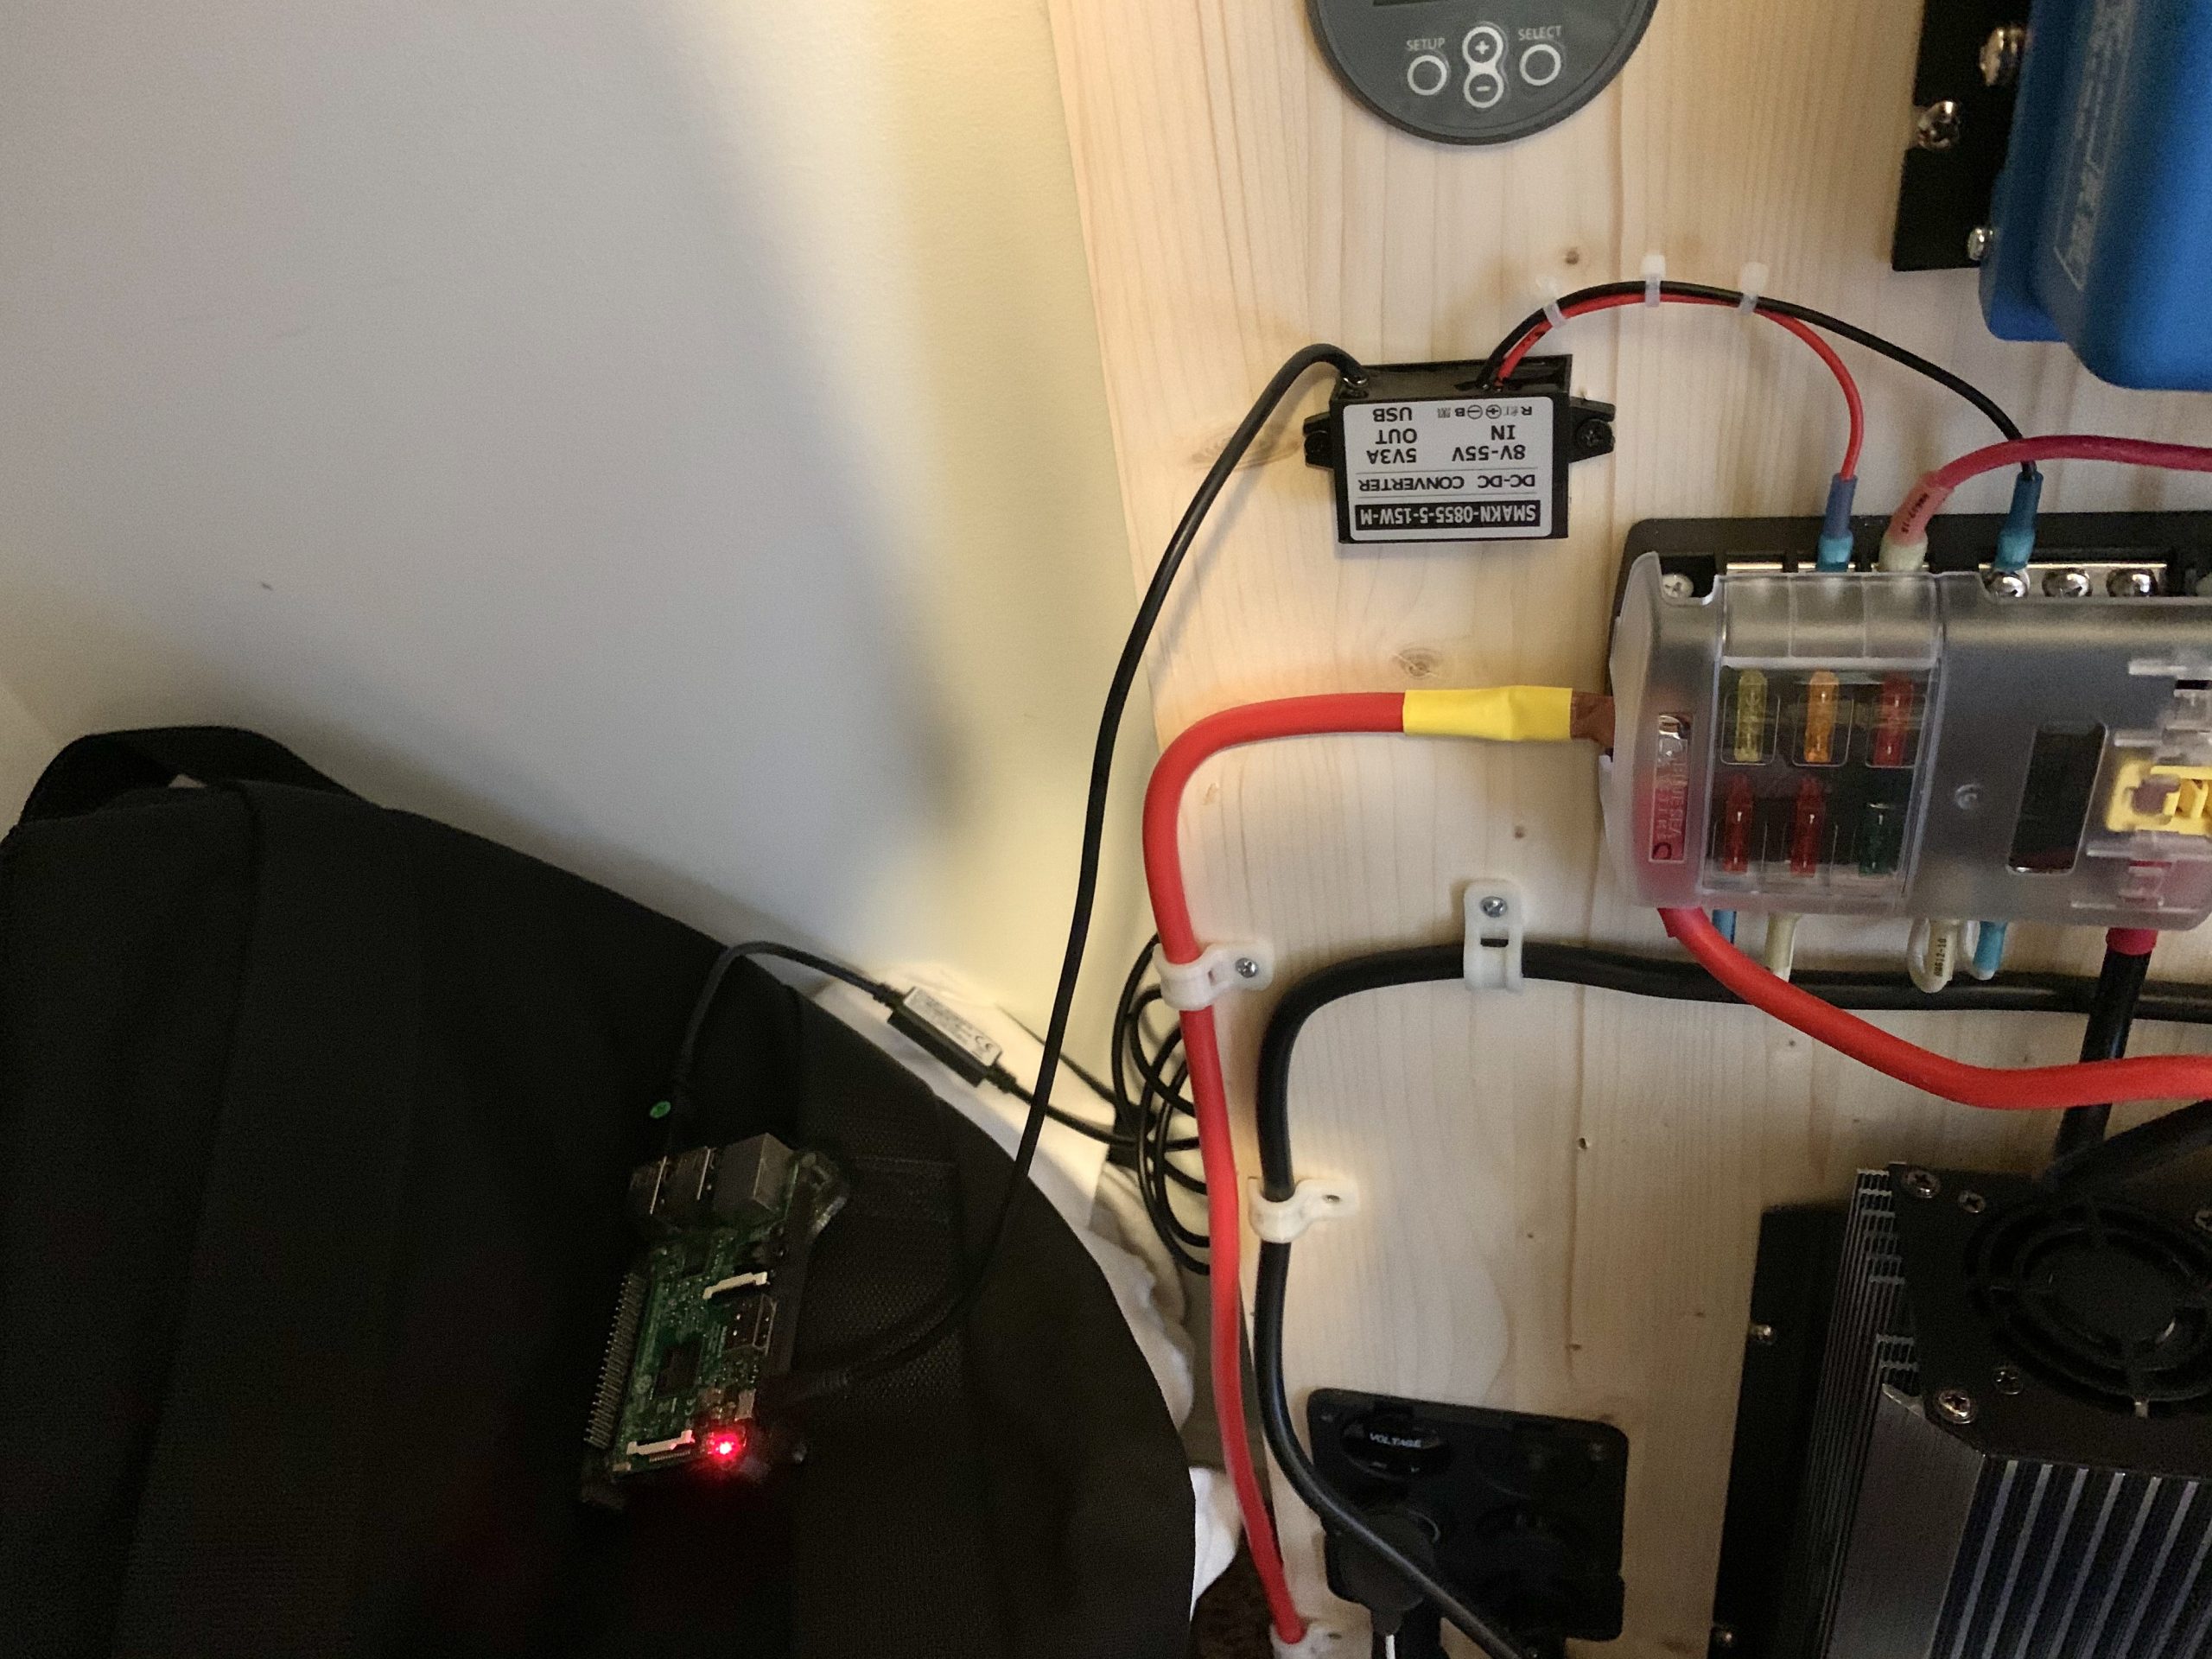
Pi with Venus Firmware hooked to 12v to 5v converter
This frees me up from using a USB port because I always have the USB ports maxed charging tablets and phones and radios and such.
Got a 2nd cable for the MPPT Solar Charge Controller. Now I need a Victron Inverter I guess 😀
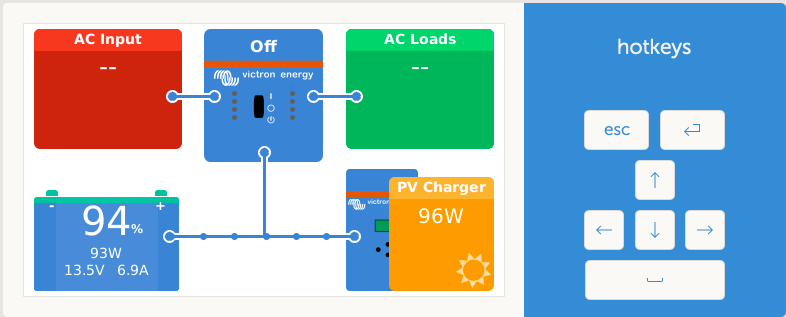
Victron Remote Console
Here is the Remote Console in action.
[kad_youtube url=”https://youtu.be/7H3w1mQMTlQ” ]
Thank you for posting this!
Do you know if the ALARM functions in Venus use the standard audio out?
Hi John,
Great write up! I’m trying to copy it as closely as possible, however I have the Pi 3A+
How did you get the VRM portal ID? I have used the MAC address which I have read is what you use in other forums, but this won’t work for me.
Cheers,
Kieren
From the menu go into settings, scroll down to VRM online portal second line down is your VRM Portal ID
flash forward to 2025 Is anyone still doing this or can someone help me find the login and Password for the first time the Victron software comes up on the screen. I have connected to the Victron Connect on multiple devices and even got through to the GUI when I boot the Pi with the victron sd card in, and have set everything in the app with supper user selected after getting into via internet with the IP adress in the URL. I put everything in like the password and then reboot from the app and nothing stays in the password category and there is no way to find the login or what login or why sorry.
I have used “sodu config raspberrypi “command and saved that as well. Also did the same thing in the GUI under the Raspberry configure tab, Each time it says changed password successfully, but I think that is just for the Pi.
So there must be a special login and Password for when the Victron SD card is in but I have no idea how to reset that or figure out where it is.
Do I have to have it in a different mode from Supper User? I set the password and set the password for the net work and then it says password changed then I reboot then it goes right back again. The Pi restarts so I know it is communication and registering, but No password comes up or works on the Pi even after I have changed everthing in the app,
I have done that many times. So I figured there has to be a new default password with a Pi4b with newest firmware updates and as far as I can tell everything works except the login into the which shows this
“Victron Energy v3.64 raspberrypi4.ttyl”
raspberrypi4 login:
So I have no idea what it wants it does not say any ware in any manual I have seen or forum for that matter, as to what this is referring too, except the old raspberry pi did have as the login and password default. raspberry and pi but is also not zzz for both or 000000 these are default for bluetooth i think but . nothing? these are all I have tried.
I am not sure what this is or why it is asking again for login and password (if I boot on the pi os with that sd card in it goes to the operating system but I cant see the Victron connect or use the IP in the URL when I dont boot with the Victron SD card in the first slot, But since it is still stuck on the first time I have open this and not gotten away from it, I figure it has to be a default or a mistake on my part which is highly possible,
to be clear even when I reboot remotely from the Victron connect app. it does not stick.
Ironically it is also happening with the Pi itself if I set all the screen settings to make it so I can read the tiny text and then reboot it just goes back to its previous state? this is by far the stupidest place to get stuck with no one to ask I cant even read the screen, so any time I find someone who has done this I try to get help with figuring it out. everything works except I cant get into the GUI from the screen when I boot to the Victron SD card. No pi card in it . Is that it. I am such a Newb so be gentle. Mikael