
Tasmota Light Bulb Kauf A21
Kauf A21
There are a ton of smart Internet of Things (IoT) devices out there. Most of them are a security nightmare to introduce into your home network. But I’ve found one that ISN’T a security nightmare. The Kauf A21 bulb with ESPHome Firmware is one such device. An ESPHome or Tasmota Light will ONLY communicate within your home network. A Tasmota Light is my personal preference for home automation.
These lights are designed to work with home automation software such as Home Assistant
If you buy a light bulb at Walmart you can control it with an app you put on your phone. And while that seems cool, it really isn’t. That app, and that bulb communicate off of your phone and contact servers outside of your home network.
IoT devices that are app controlled are a security risk. And in your quest to smarten up your home you may have several devices and several apps. Additionally, those apps want you to grant permission to use your camera (presumably to scan a QR code) and they also want location control enabled. Why does my Lifx bulb I bought at Walmart need to know where I and my phone are? Riddle me that, Batman.
Local Control
Local Control are the two most important words you’ll hear in home automation. That means the devices will not seek to communicate on an external network. The security risk is essentially removed.
Installation
Setting the bulb up is fairly easy. Plug it in a lamp socket and turn it on. It will broadcast a WiFi hotspot called ESPHome and probably some numbers or characters. Connect to that WiFi network. In my case a pop up happened which asked me to input my home WiFi credentials so it can connect to my network.
ESPHome Config
If it doesn’t pop up, then navigate to
192.168.4.1
in your browser.
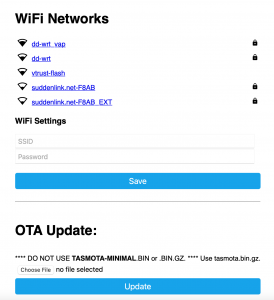
Once that is accomplished your home automation software, Home Assistant will auto-magically find it as an integration. I’d like to go into the setup but this is about Tasmota. If you look at the pic above it has a section called OTA update. From here you can flash Tasmota firmware onto the device. In theory that is. I had to navigate to the IP address of the Light bulb. And then I had to configure the bulb. You may have to check your router settings to find the light bulb IP or get a network scanner such as LanScan.
I want to make it clear that you don’t HAVE to flash Tasmota firmware, but that you CAN flash Tasmota. Tasmota has a lot of advanced features. With Tasmota you can add lights to Device Groups. You can hook wall switches up in various locations to control lights WITHOUT a physical traveler wire connected between the switches.
Did you ever have an LED light that doesn’t seem to illuminate until the intensity is fairly high? Tasmota has power settings to correct the range intensity. On my garage door I only need to initialize the relay to open the door. Leaving the relay in an open or closed state is problematic and makes crazy things happen. Tasmota lets you just tap the relay. I can go on and on and on.
If you just want to add a light to Home Assistant and control it from Home Assistant then you don’t need Tasmota
Tasmota Light Installation and Configuration
Once you navigate to that page you’ll see a place where you can do the OTA Update. Download the file named tasmota.bin.gz from this page
It’s very important that you use tasmota.bin.gz. There are a whole bunch of files on that page. Once you flash Tasmota the fun starts all over again. Look for a WiFi network called Tasmota something or other and you should get a pop up allowing you to connect to your home WiFi network. If it doesn’t pop up, then go to
192.168.4.1
in your browser again. Once connected find your device IP on your network (it is probably the same as it was when the bulb was ESPHome) and open that address in your browser. You’ll get a generic looking Tasmosta page. Go to “Configuration” and then “Configure Other”

Tasmota Configuration
Then paste in the following code in the section that says “Template”
{"NAME":"Kauf Bulb","GPIO":[0,0,0,0,416,419,0,0,417,420,418,0,0,0],"FLAG":0,"BASE":18}
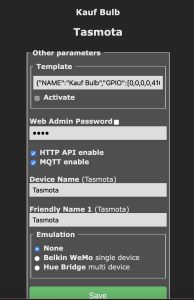
Template Config
Hit save and it will reboot. When it comes back online it will look like this:
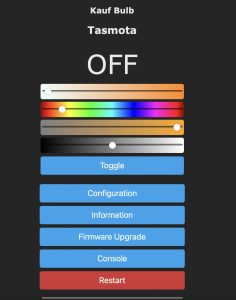
Configured
Now you have complete control over color, hues, whatever. You can easily incorporate your Tasmota device into home assistant using MQTT. It will then appear under the Tasmota integration in Home Assistant. Yes, I have 31 Tasmota devices on my network.
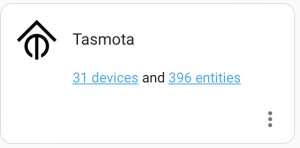
Integration
I’m serious about local control. I have weaned myself off of light bulbs, outlets, and LED strips that cannot be flashed with Tasmota, or other locally controlled firmwares.
Everything can be controlled by your Home Assistant web console (which is also local).
And if you have an Alexa you can integrate it with Home Assistant to discover all these Tasmota devices. Yeah, I know. I just incorporated the biggest spy device on the planet into my home network. But in my defense, all my IoT Tasmota devices, cameras, Alexa’s, and Smart TV’s are on a separate network in my home. My personal computers are on another network subnet and some firewall rules prevent my IoT stuff from even knowing my personal computers exist.
Anyway, once the device is installed in Home Assistant you can click on it and you’ll see this:
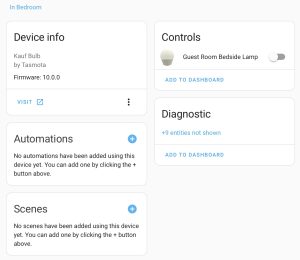
Home Assistant Config
From here you can rename the device and add it to your main dashboard just by clicking. Easy money. Once it is on the dashboard, clicking on it will get you a color palette. And as you can see I have 6 of these Kauf bulbs in my home………with more on the way!
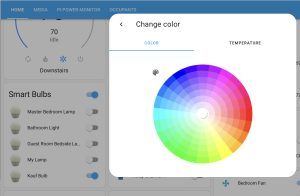
Color Wheel
Tasmota Light Wrap Up
If you are a Home Assistant user and a Home Assistant NEWBIE you probably want to stop at the ESPHome configuration as it comes out of the box. Plug it in, connect to your wifi and Home Assistant finds it, and it is essentially fully configured.
If you prefer MQTT, as I do, then flash to Tasmota. It takes a few extra steps but the MQTT control is pretty cool. There are some advanced techniques you can do with Tasmota and MQTT such as creating device groups. Issue one command, and turn on multiple lights. In fact Tasmota is so powerful it is impossible to do anything but scratch the surface here. Yeah, it’s geeky ………..but the POWER!
If you want a smart light for Home Automation, and specifically Home Assistant, this is your Huckleberry.
The Shelly DUO bulb can be OTA reflashed with Tasmota too. I got a couple on sale and so far they’re working.