Dymo Rhino 4200 Review
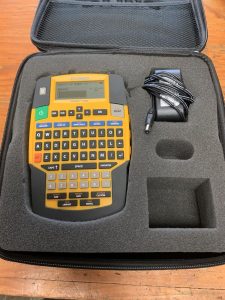
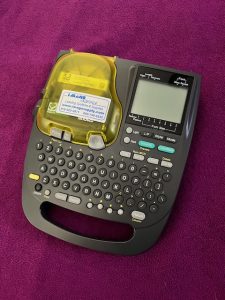
Dymo Rhino 4200
I am on a quest to find the perfect label maker. Recently, I got my hands on a Dymo Rhino 4200. I need to make this clear. My testing unit is a USED Rhino 4200.
I obtained it from eBay for an exceptional price. Mine included the case, rechargeable battery, power brick, and the machine had a Dymo original D1 cartridge installed (black lettering on white, 1/2″).
Even though this machine is used it seems to be in remarkable shape. I gave it a quick wipe down with isopropyl alcohol and it looks brand, spanking new.
However, on my first test after powering up the unit, the labels would not feed out correctly. The motor was pushing them but they were just bunching up in accordion fashion and not cleanly exiting the chute. A visual inspection didn’t really reveal any problems. It seems like maybe I now know why the unit was sold inexpensively.
I put another D1 cartridge in experienced no issues. Then I tried a heat shrink cartridge with no issues. Perfect printing was realized. After reinstalling the cartridge that came with the unit the problem returned. I pulled out about a foot of material and cut it off and tried again. At this point it began to behave. The problem seemed related to that cartridge. The material seemed to be curved or bending just enough to get stuck in the chute or just prior to the chute. Cutting the label or rather how you cut the label seemed to have an effect on that as well. More about that later.
It looks like I got a good label maker for a song.
Continue reading