Mikrotik SolidRack 10
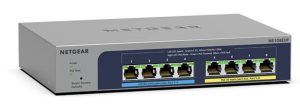
I recently went through a round of network upgrades and I had stuff and cables all over the place. There was a real need to get organized and to employ at least a LITTLE cable management. I also decided to run two separate networks and needed a simple way to keep everything straight. Enter the Mikrotik SolidRack 10.
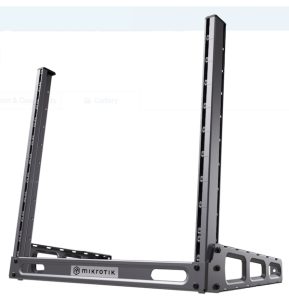
SolidRack 10
Most server racks are either big, or expensive, or both. I didn’t want anything big. Just a place to mount a couple of switches that didn’t occupy too much real estate.
That is where the Mikrotik SolidRack 10 really shines. It is small, and very affordable at about $43 at Multilink. Right this second they are out of stock.
I do want to point out the obvious with this rack. There are no back legs! That is NOT a complaint. All I’m saying is this is for light duty use and you aren’t going to cram some Dell PowerEdge servers in this thing.
Okay, I will concede that you probably could do it if you hacked something up or propped up the back end of the server with a ServerBrick™ or something. But natively, it’s not meant for that and you know what I meant.
Continue reading